

Happy weekend, my loves!
Happy weekend, my loves!
Hello 702 Park Project readers! I’m Laura from Simply Lowcountry, and am thrilled that Sarah asked me to do a guest post on her blog today.
My husband and I live in Charleston, South Carolina and we love it. The salt air breezes from the ocean, rows of palm trees, pastel Charleston colors and of course, the southern hospitality. One of the greatest things about living on the coast is the fun beach and coastal inspired decor that is incorporated into many of the homes in the Charleston area.
We moved into our place just over a year ago, and we are still decorating and making it home. I have been trying to tackle one room at a time to make sure it’s perfect and something we love instead of something we are going to want to change in a few months.
The coast has inspired my decor in a lot of different ways: color pallets, accessories, paint colors, lighting and furniture style. Today I thought I would share with you my inspiration board for the perfect coastal-inspired living room.
Our living room is still not a finished product, but it is getting so much closer. Here was my vision for the room:


Hello 702 Park Project readers! My name is Olivia, and I am the blogger over at Lacquered Life, where I share my thoughts on historic preservation, interior design, DIY projects, entertaining and life. I live in Charleston, South Carolina where I am a restoration and paint color consultant. A big thank you to Sarah for inviting me to do a guest post on 702 Park Project – I am such a fan.
I thought I would share some before and after photos of my own home renovation here in Charleston that was recently featured in Southern Living. I have an M.S. in Historic Preservation, so restoring a 1780s Charleston Single House was definitely a dream come true. I hope you enjoy the sneak peek of our house on Church Street. For more photos of my home restoration be sure to check out Lacquered Life and follow Lacquered Life on Instagram.

Facade Before

Facade After

No Piazza Before

Piazza After

Rear Facade Before

Rear Facade After

Kitchen Before

Kitchen After
Thank you Sarah for having us – hope you’re off having fun on vacation! We’re excited to share some fun before and after pictures with you guys! For those of you we’re just meeting, my sister, Heath, and I blog over at Southland Avenue. We’ve been working this summer on renovating our existing garage/shed in our (Mary Keller’s) backyard, and finally have after images to share. (Here’s a quick recap on where we started and progress we made along the way.)
When we first bought our home, the yard was SO tiny and the home’s original garage took over the entire backyard. We wanted to gain a little more yard and add a pretty fireplace too. Keep in mind when you see these pictures below, just the garage/shed renovation is complete. There’s always more work in the backyard to do – fence needs to go up, new gate, landscaping, you know, the list goes on… :)


We’re really so pleased with the end result. It is such a dramatic improvement. We seriously almost didn’t buy this house because of the yard, and now I feel like the yard is an extension of the home and will be a selling point. No, the yard still isn’t huge, but yards around our neighborhood are typically small anyway. We salvaged all of the old wood from the home’s original garage to use on the renovation. We wanted the newly renovated shed to still have an authentic, older feel. We bought two old doors at a local salvage yard and picked up two simple lanterns from Lowe’s.
Next up is a new gate to close off that gap between the shed and the fence in the back. (The gap used to be taken up by the existing garage. When we shaved 3′ off of the existing garage, we knew it would leave this gap.) We’re currently waiting on the patio cushions that we’ve ordered from Cushion Source. We plan to replace the chain link fence between our house an our neighbors, and then add landscaping and sod in the fall too. Last step will be to add pavers in front of the fireplace to create a patio look, similar to some of our inspiration pictures here. Slowly but surely we’re getting there!
Quick question on the fireplace – would you leave the brick as is or paint it white? Our original plan and our inspiration pics all have a white fireplaces. We love white brick, but now that the fireplace is up we can’t decide! Paint it or leave it? We’d love to hear!
Thanks again for having us Sarah. We loved sharing this with you guys and hope you’ll join us back over at Southland Avenue!
~Mary Keller
p.s. Our original ideas for furniture and pillows for the patio and our front porch here. We’ve decided on a look combining looks 2 & 3. When the cushions arrive in August we’ll share more pics then too.
Late Saturday night, Charles and I decided to finally throw some samples up on our dining room walls and pick a color. We narrowed the choices down to green, purple, cream, and orange.

The orange was Charles’ “wild card” pick, and it actually complemented the green tile in a very pretty way, but in a room this size with such high ceilings, it would have just been too much. The greens were both gorgeous, but we were worried we would lose the fireplace in all that green. So, surprisingly (especially to us), we chose purple!
I’m a neutral lover, so this was a big step for me. We chose Classic Violet by Valspar in a semi-gloss. It is a little grayed out, which flows nicely with the grays in the butler’s pantry and kitchen. Here’s a little sneak peek of the first coat (keep in mind that we still need at least one more coat, and maybe two).
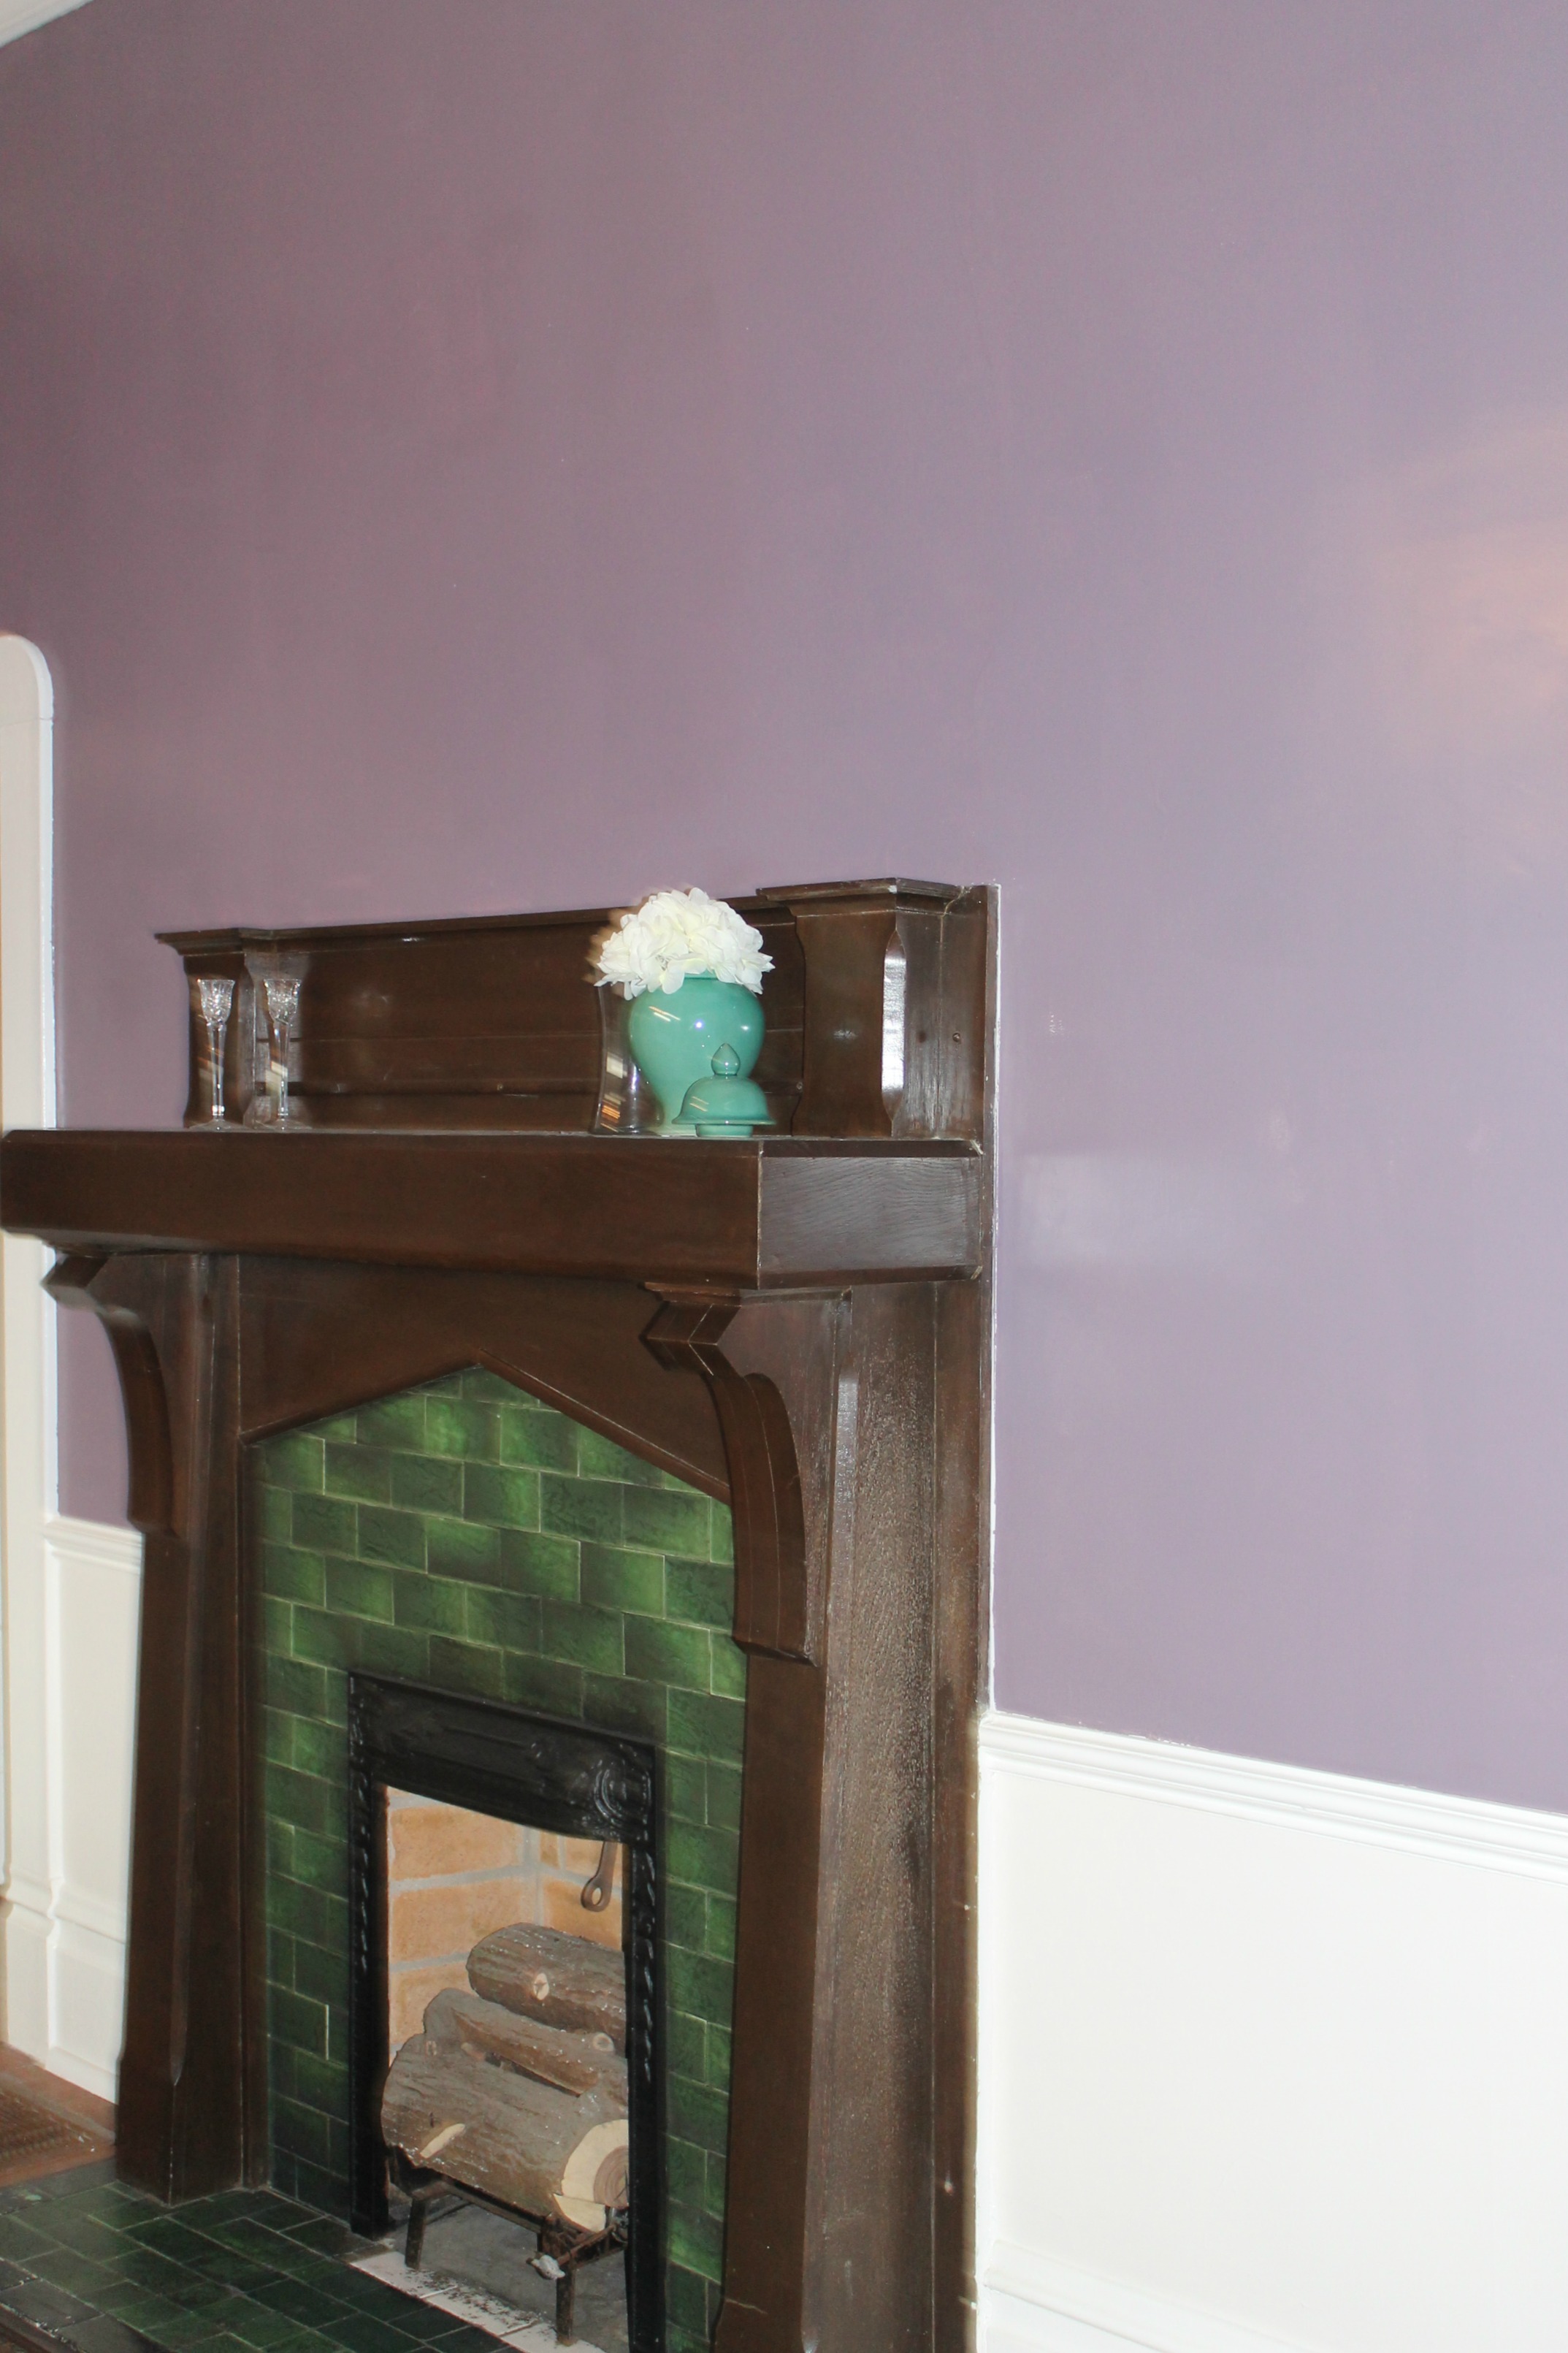
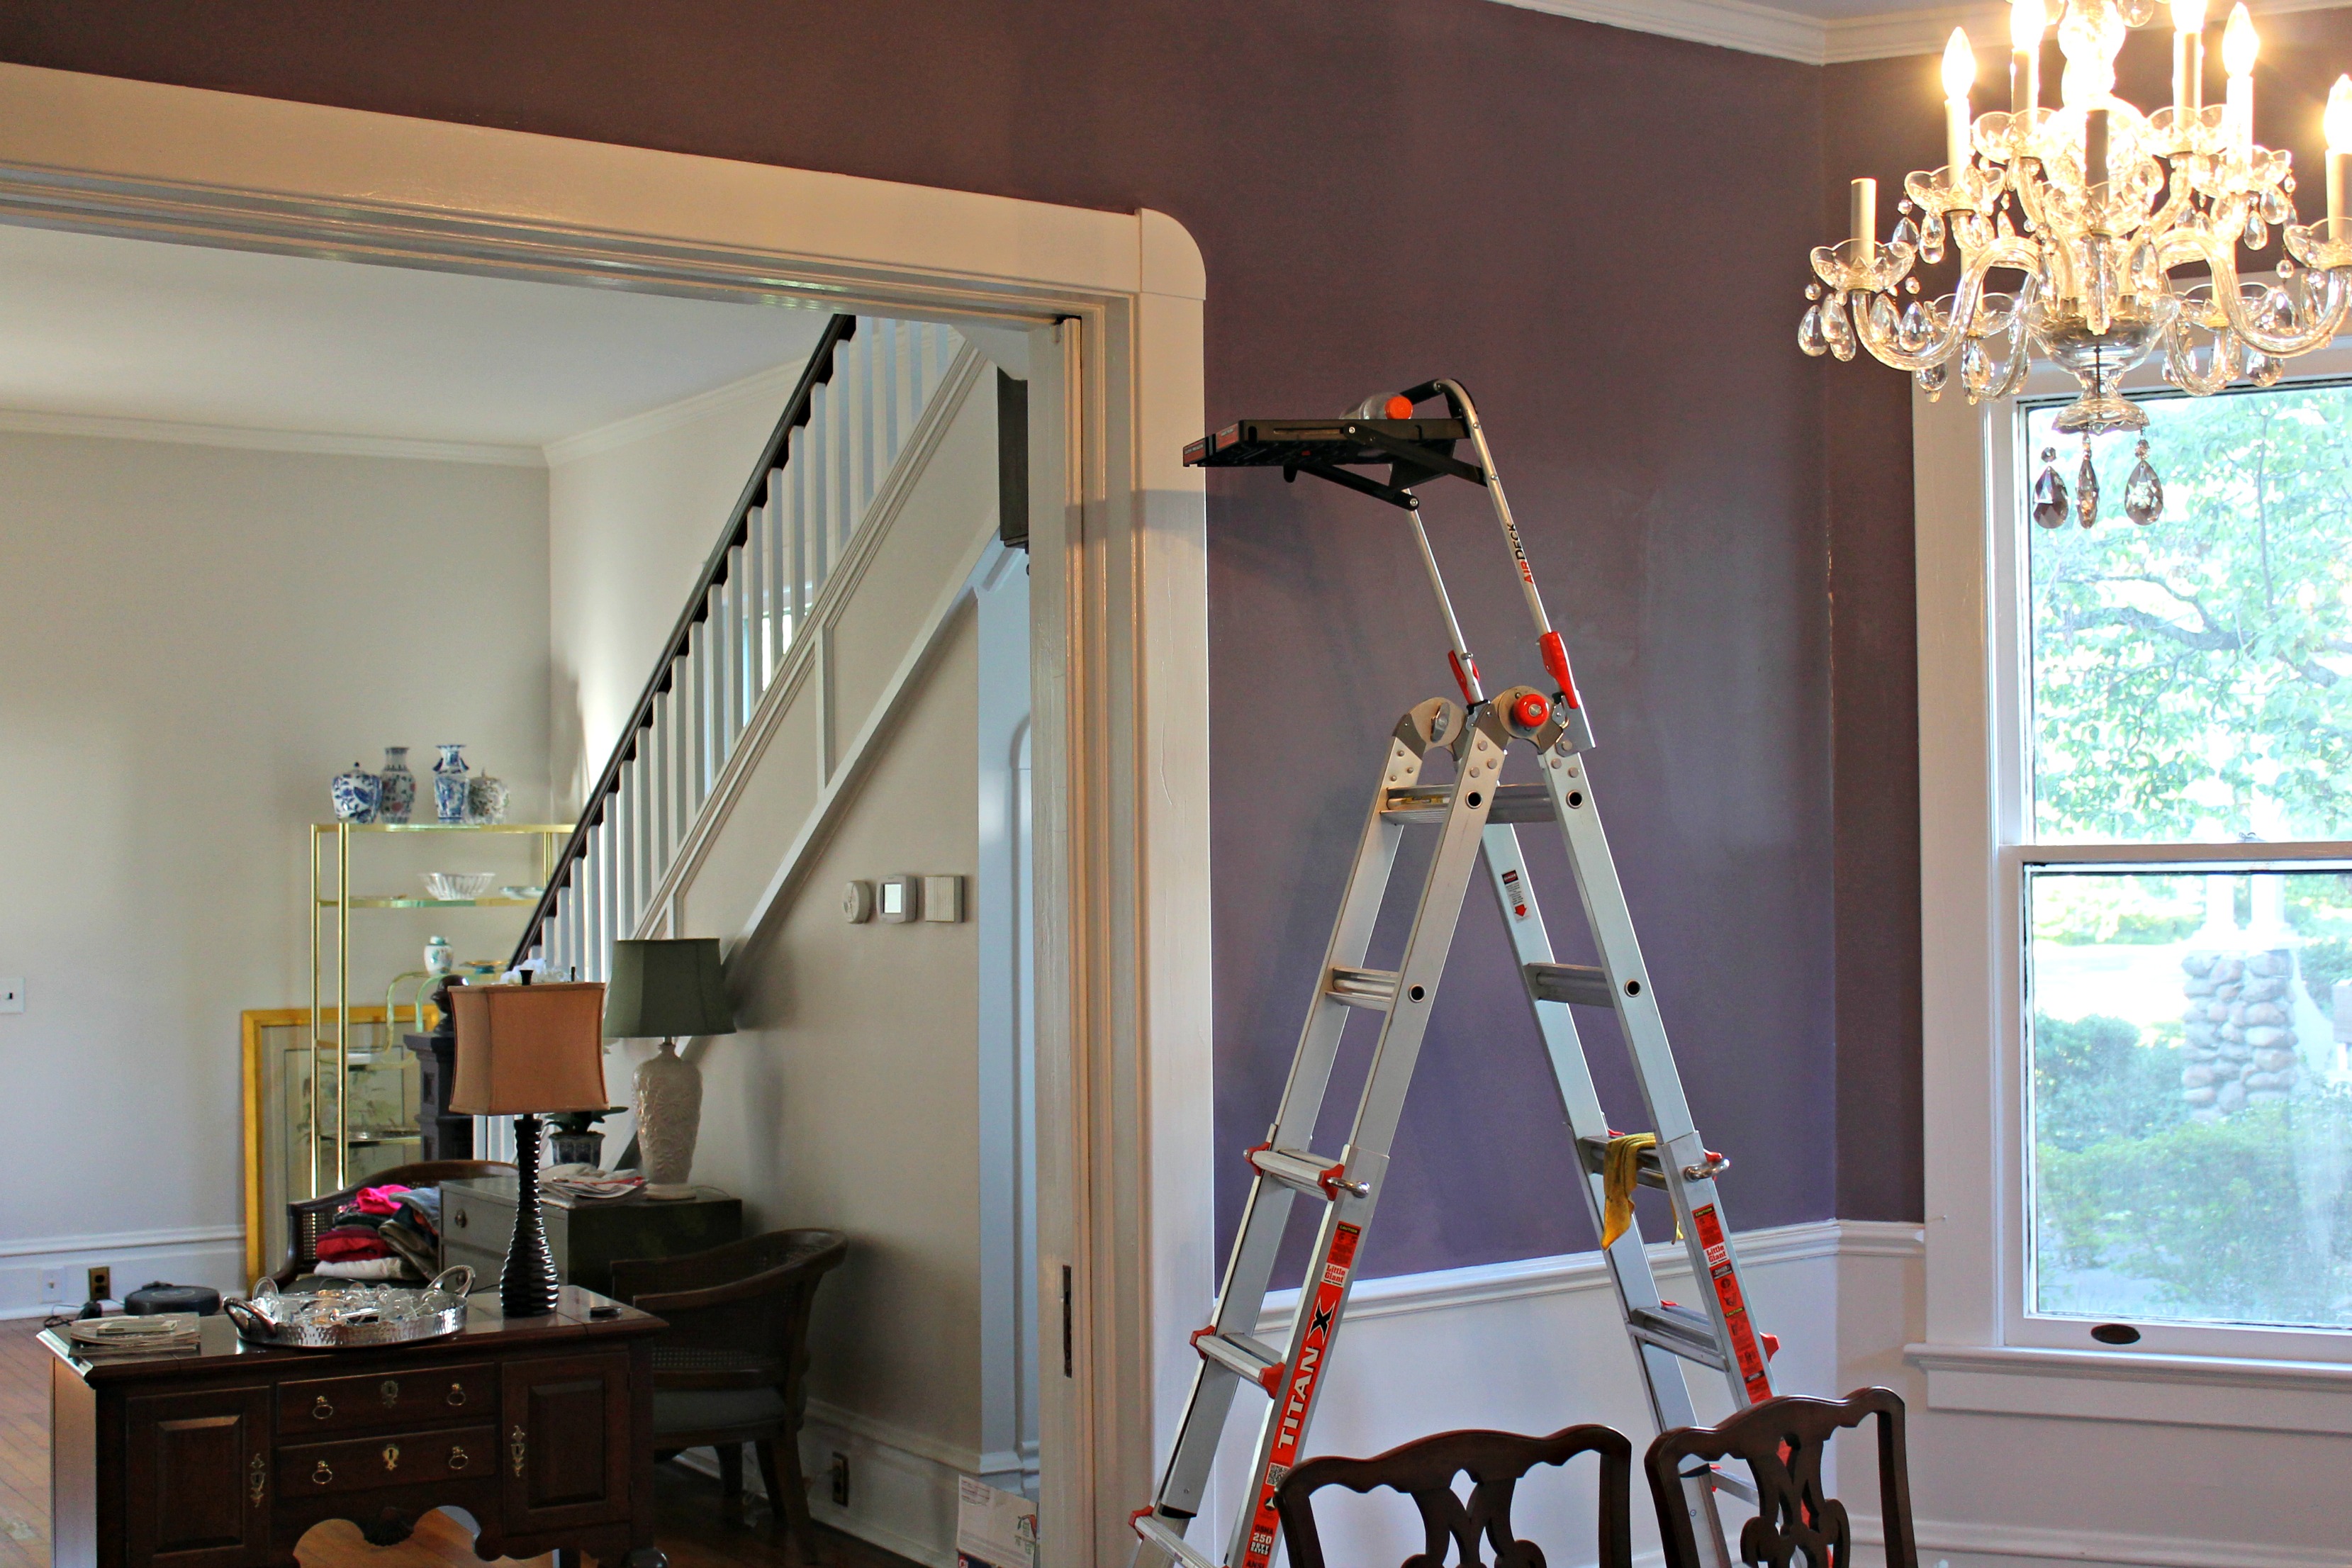
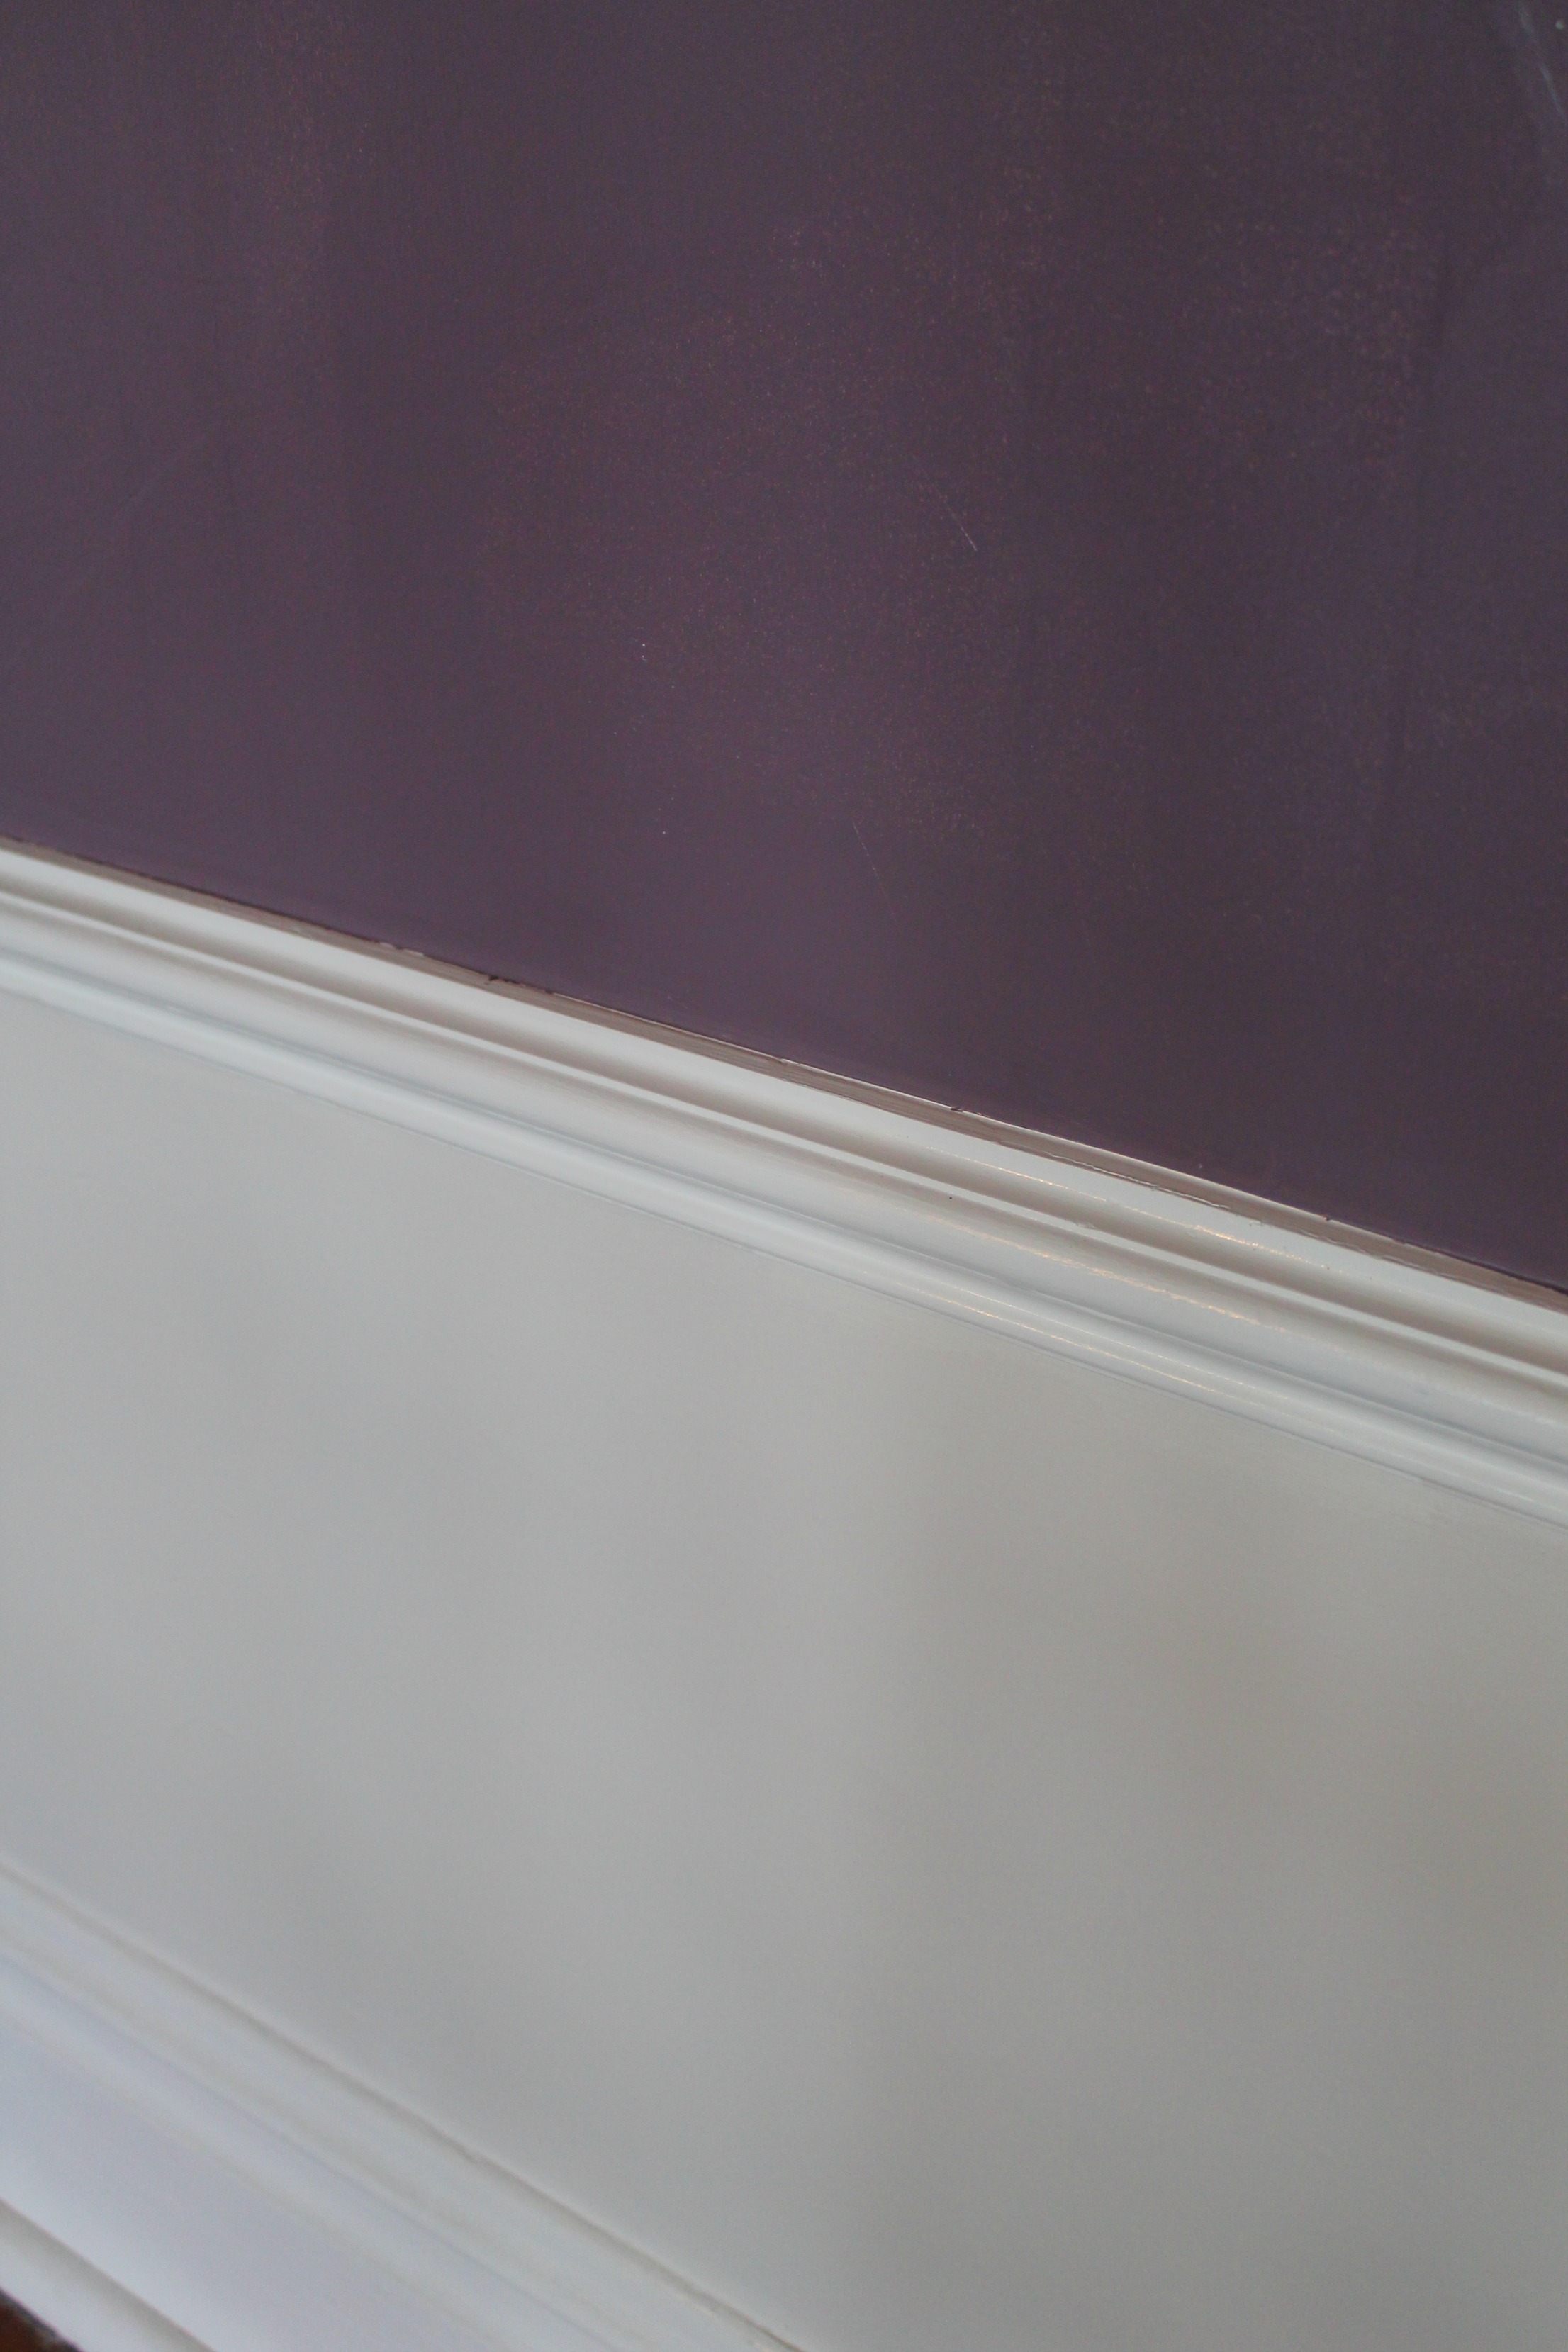
We painted below the chair rail Kitten White to match the foyer. I know that anytime you pick a bold color, it’s not everyone’s cup of tea, but Charles and I really love it and that’s what matters, right?!
On another note, I’m off for a little R&R, but I’m super excited about the fabulous guest bloggers I have coming up this week. They come from 3 of my favorite blogs, so you are in for a real treat! Here’s the line up:
Enjoy the rest of your week, lovelies! :)
PS- in case you’re wondering, the paint samples (minus the orange, which I can’t remember for the life of me!) from left to right, top to bottom are Simply Plum, Classic Violet, Blue Grass Mood, and Redstone Osgood Green. All are by Valspar.
It’s no secret that when you’re doing any renovation you have to pick and choose where to spend your money. If you’re like most of us, the budget is NOT endless and some things must be put on hold.

For us, one of those things was our master closet. We took our closet from a 2′ x 3′ reach in to a 7′ x 13′ walk in, and we absolutely love it! But when it came to installing an organization system, we chose to go the inexpensive route.
We started with two of the Seville Classics expandable closet organizers from casa.com (on sale now!). These expanded to about 7 feet long, and gave each of us two hanging racks and eight shelves. I love that these come with shelf liners so you don’t have to worry about anything falling through.
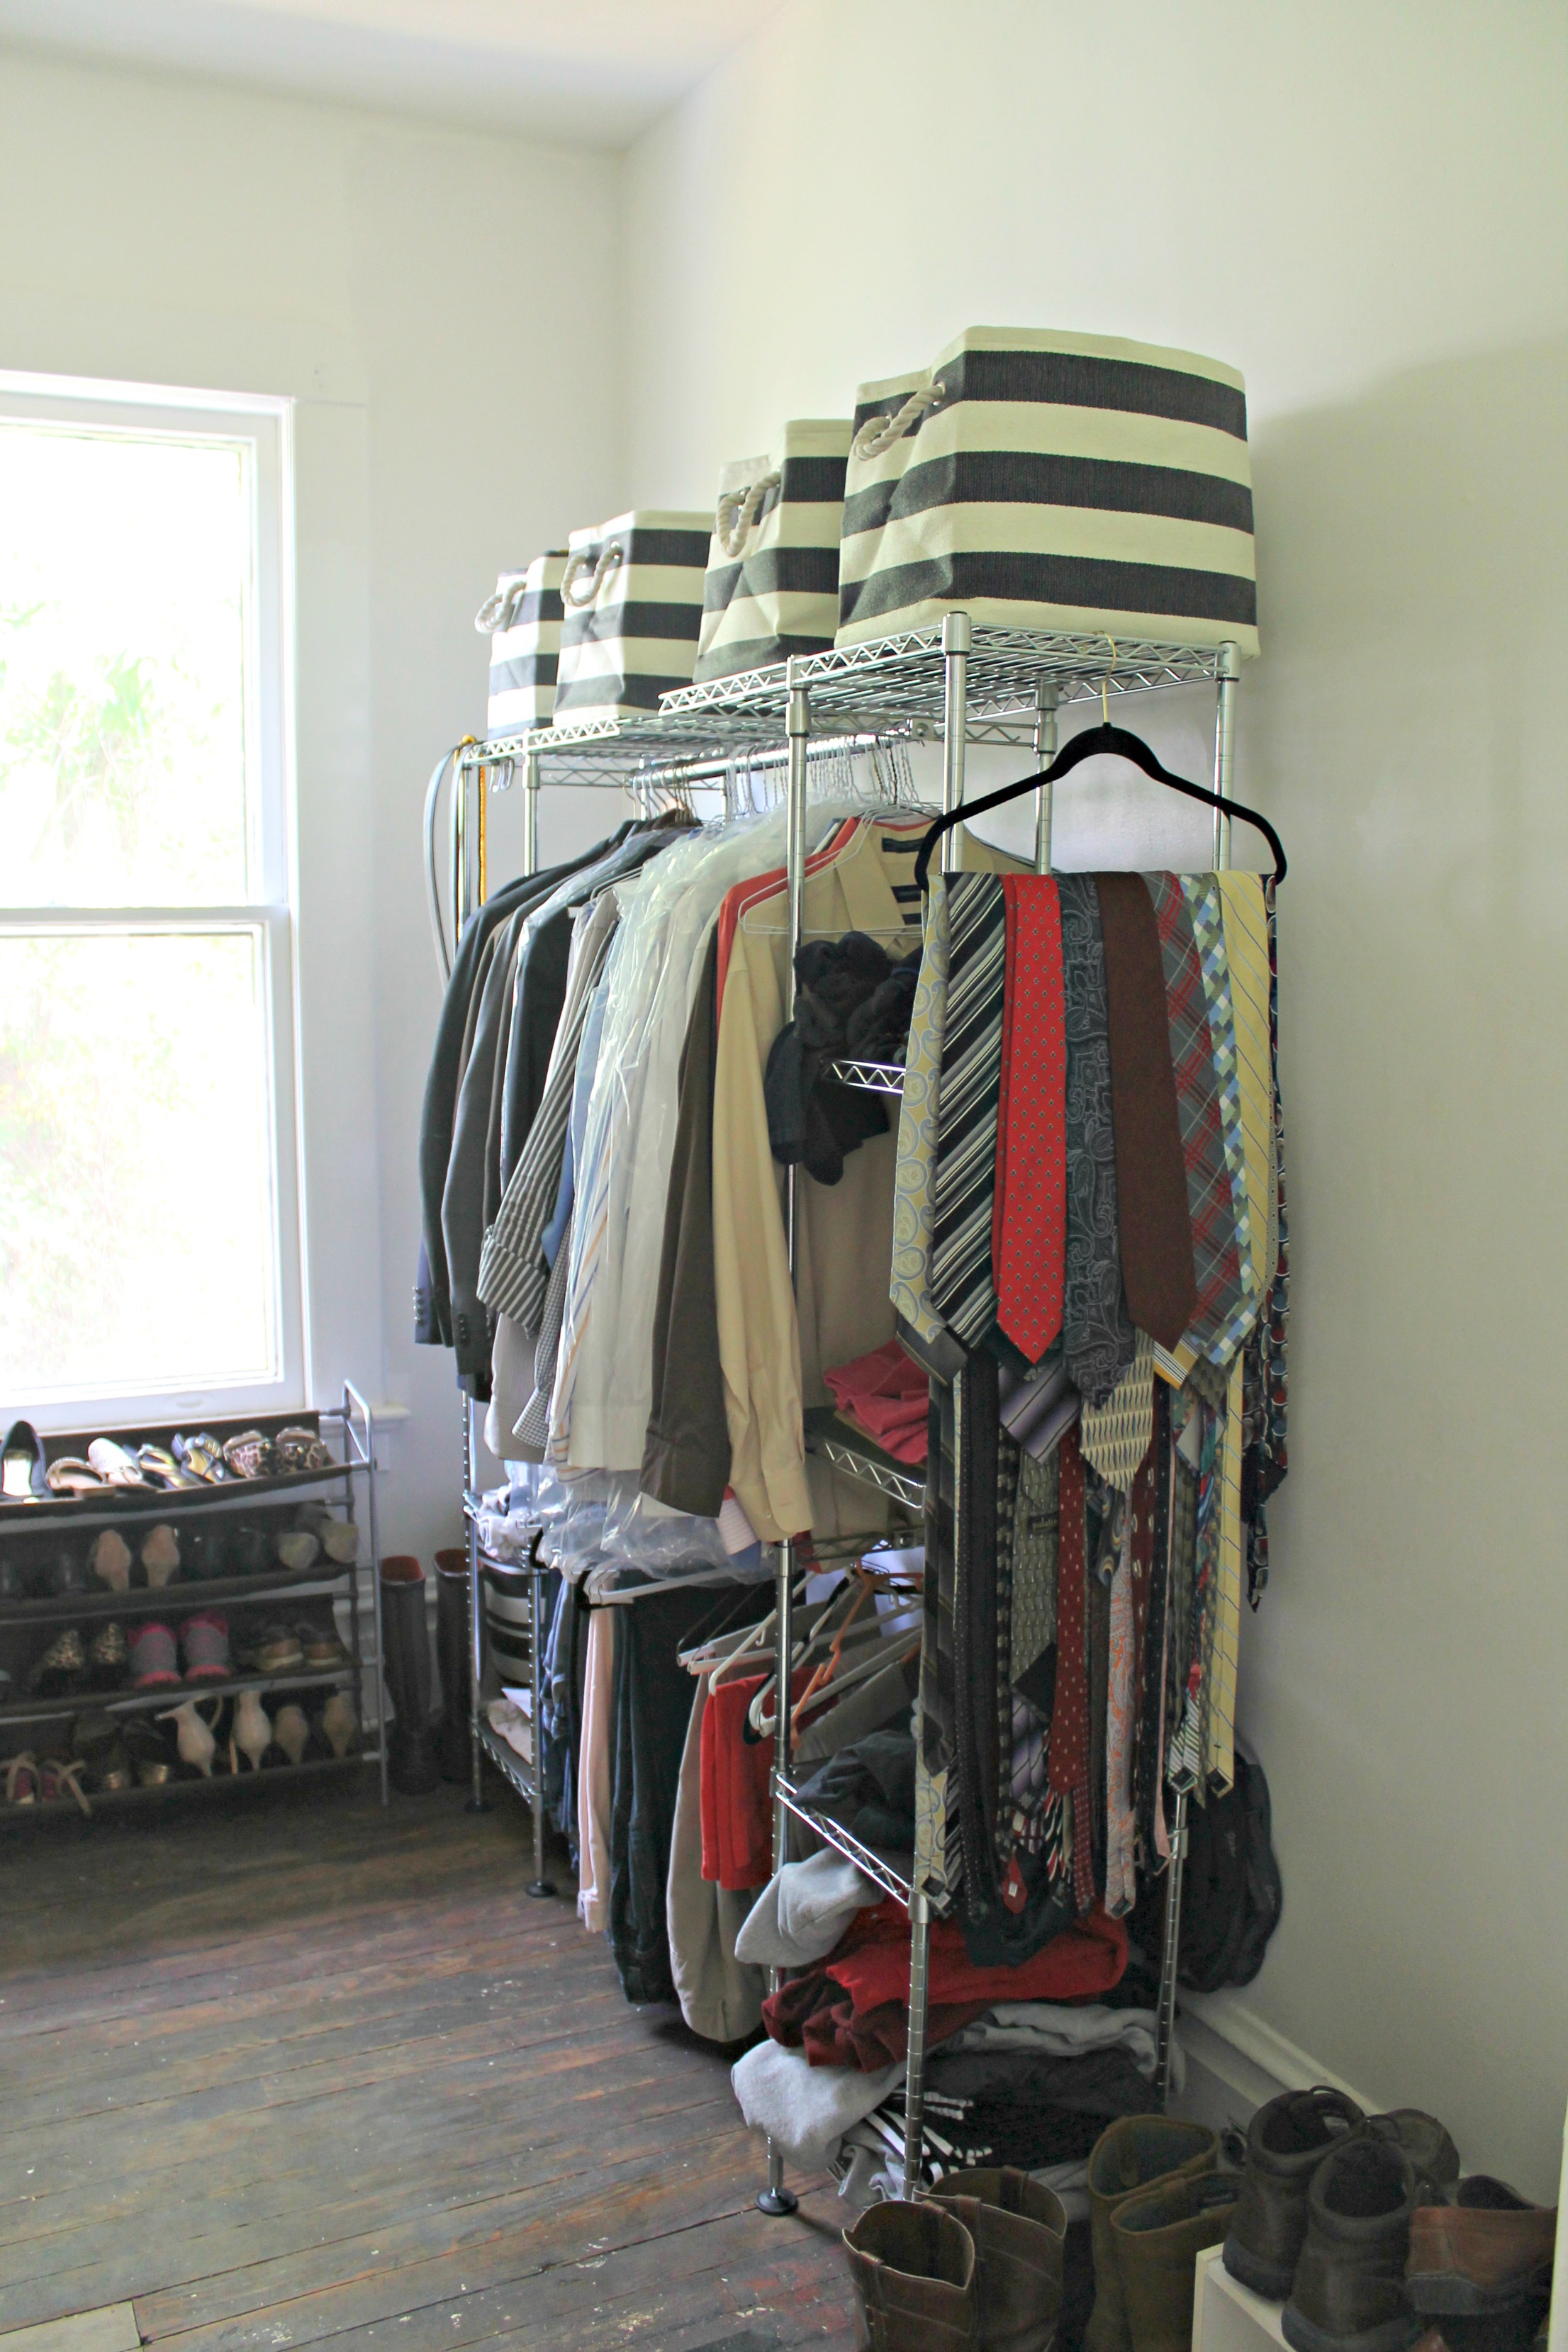
I had a couple of old canvas cubes from Target, but I decided to pick up 8 small rugby stripe bins from The Container Store. On my side, I’ve stored scarves, hats, swimwear, and sweats in mine. Charles’ hold his t-shirts. These bins are a nice way to keep everything looking uniform, even if what’s inside gets messy.
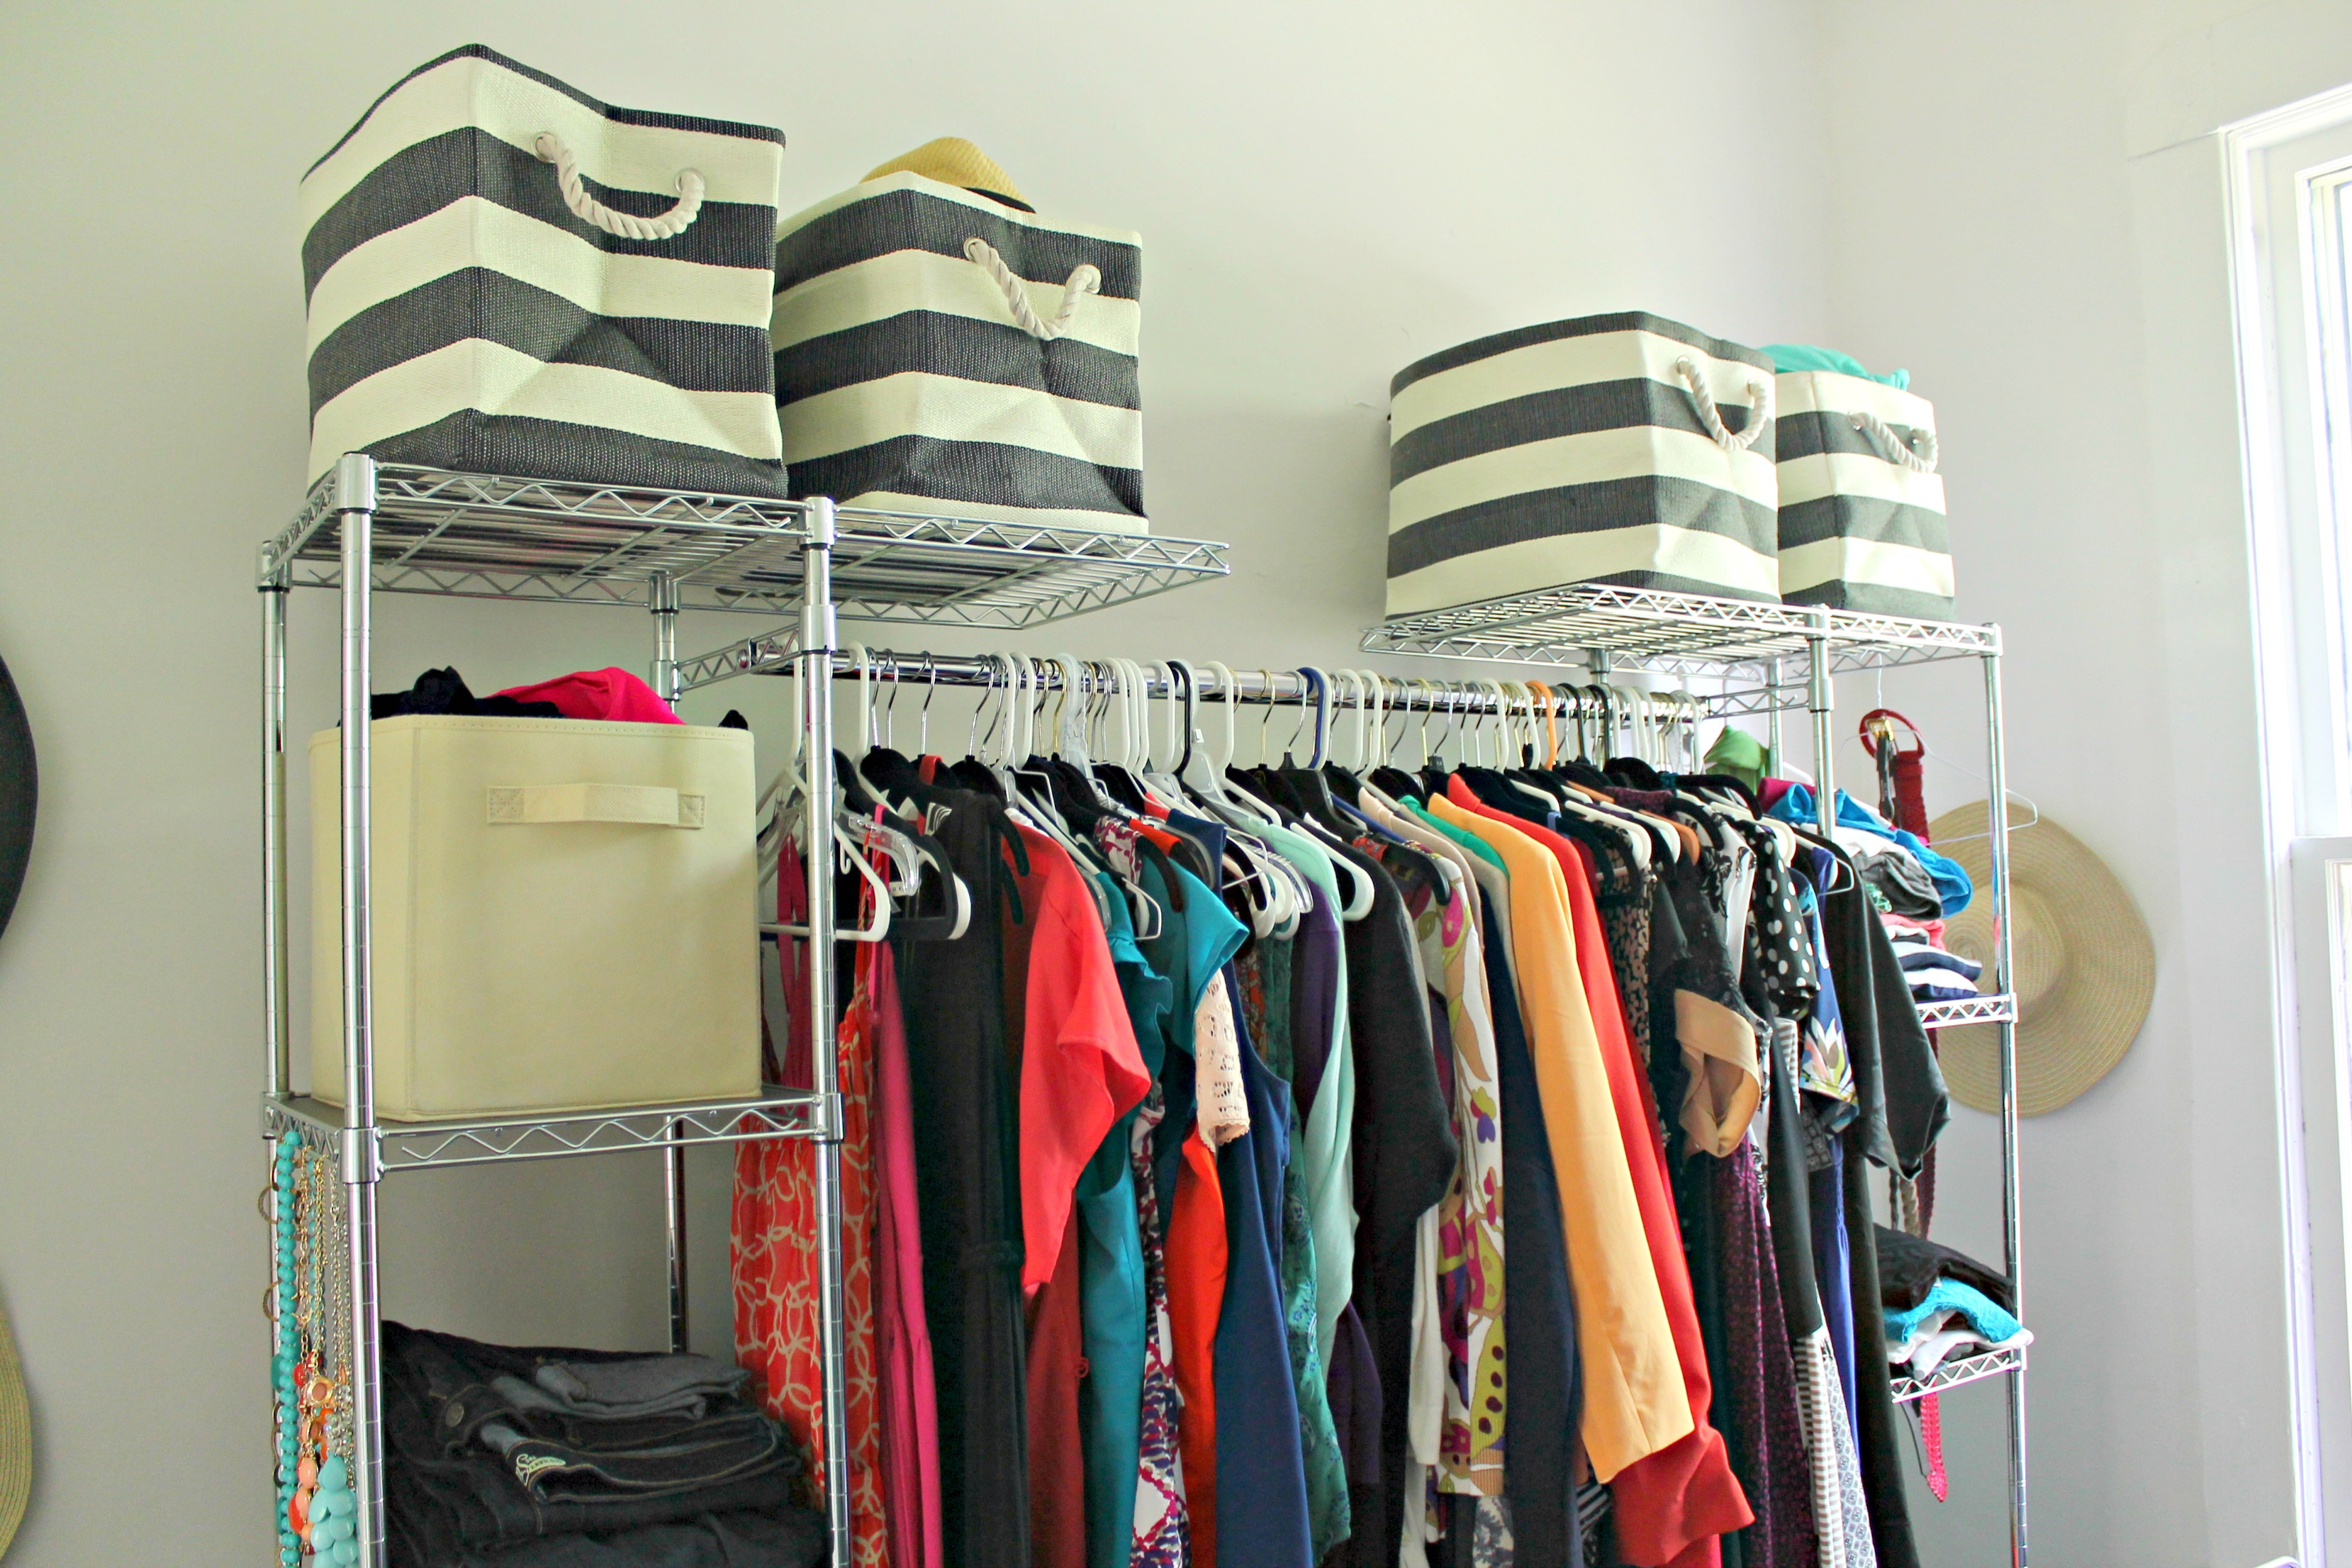
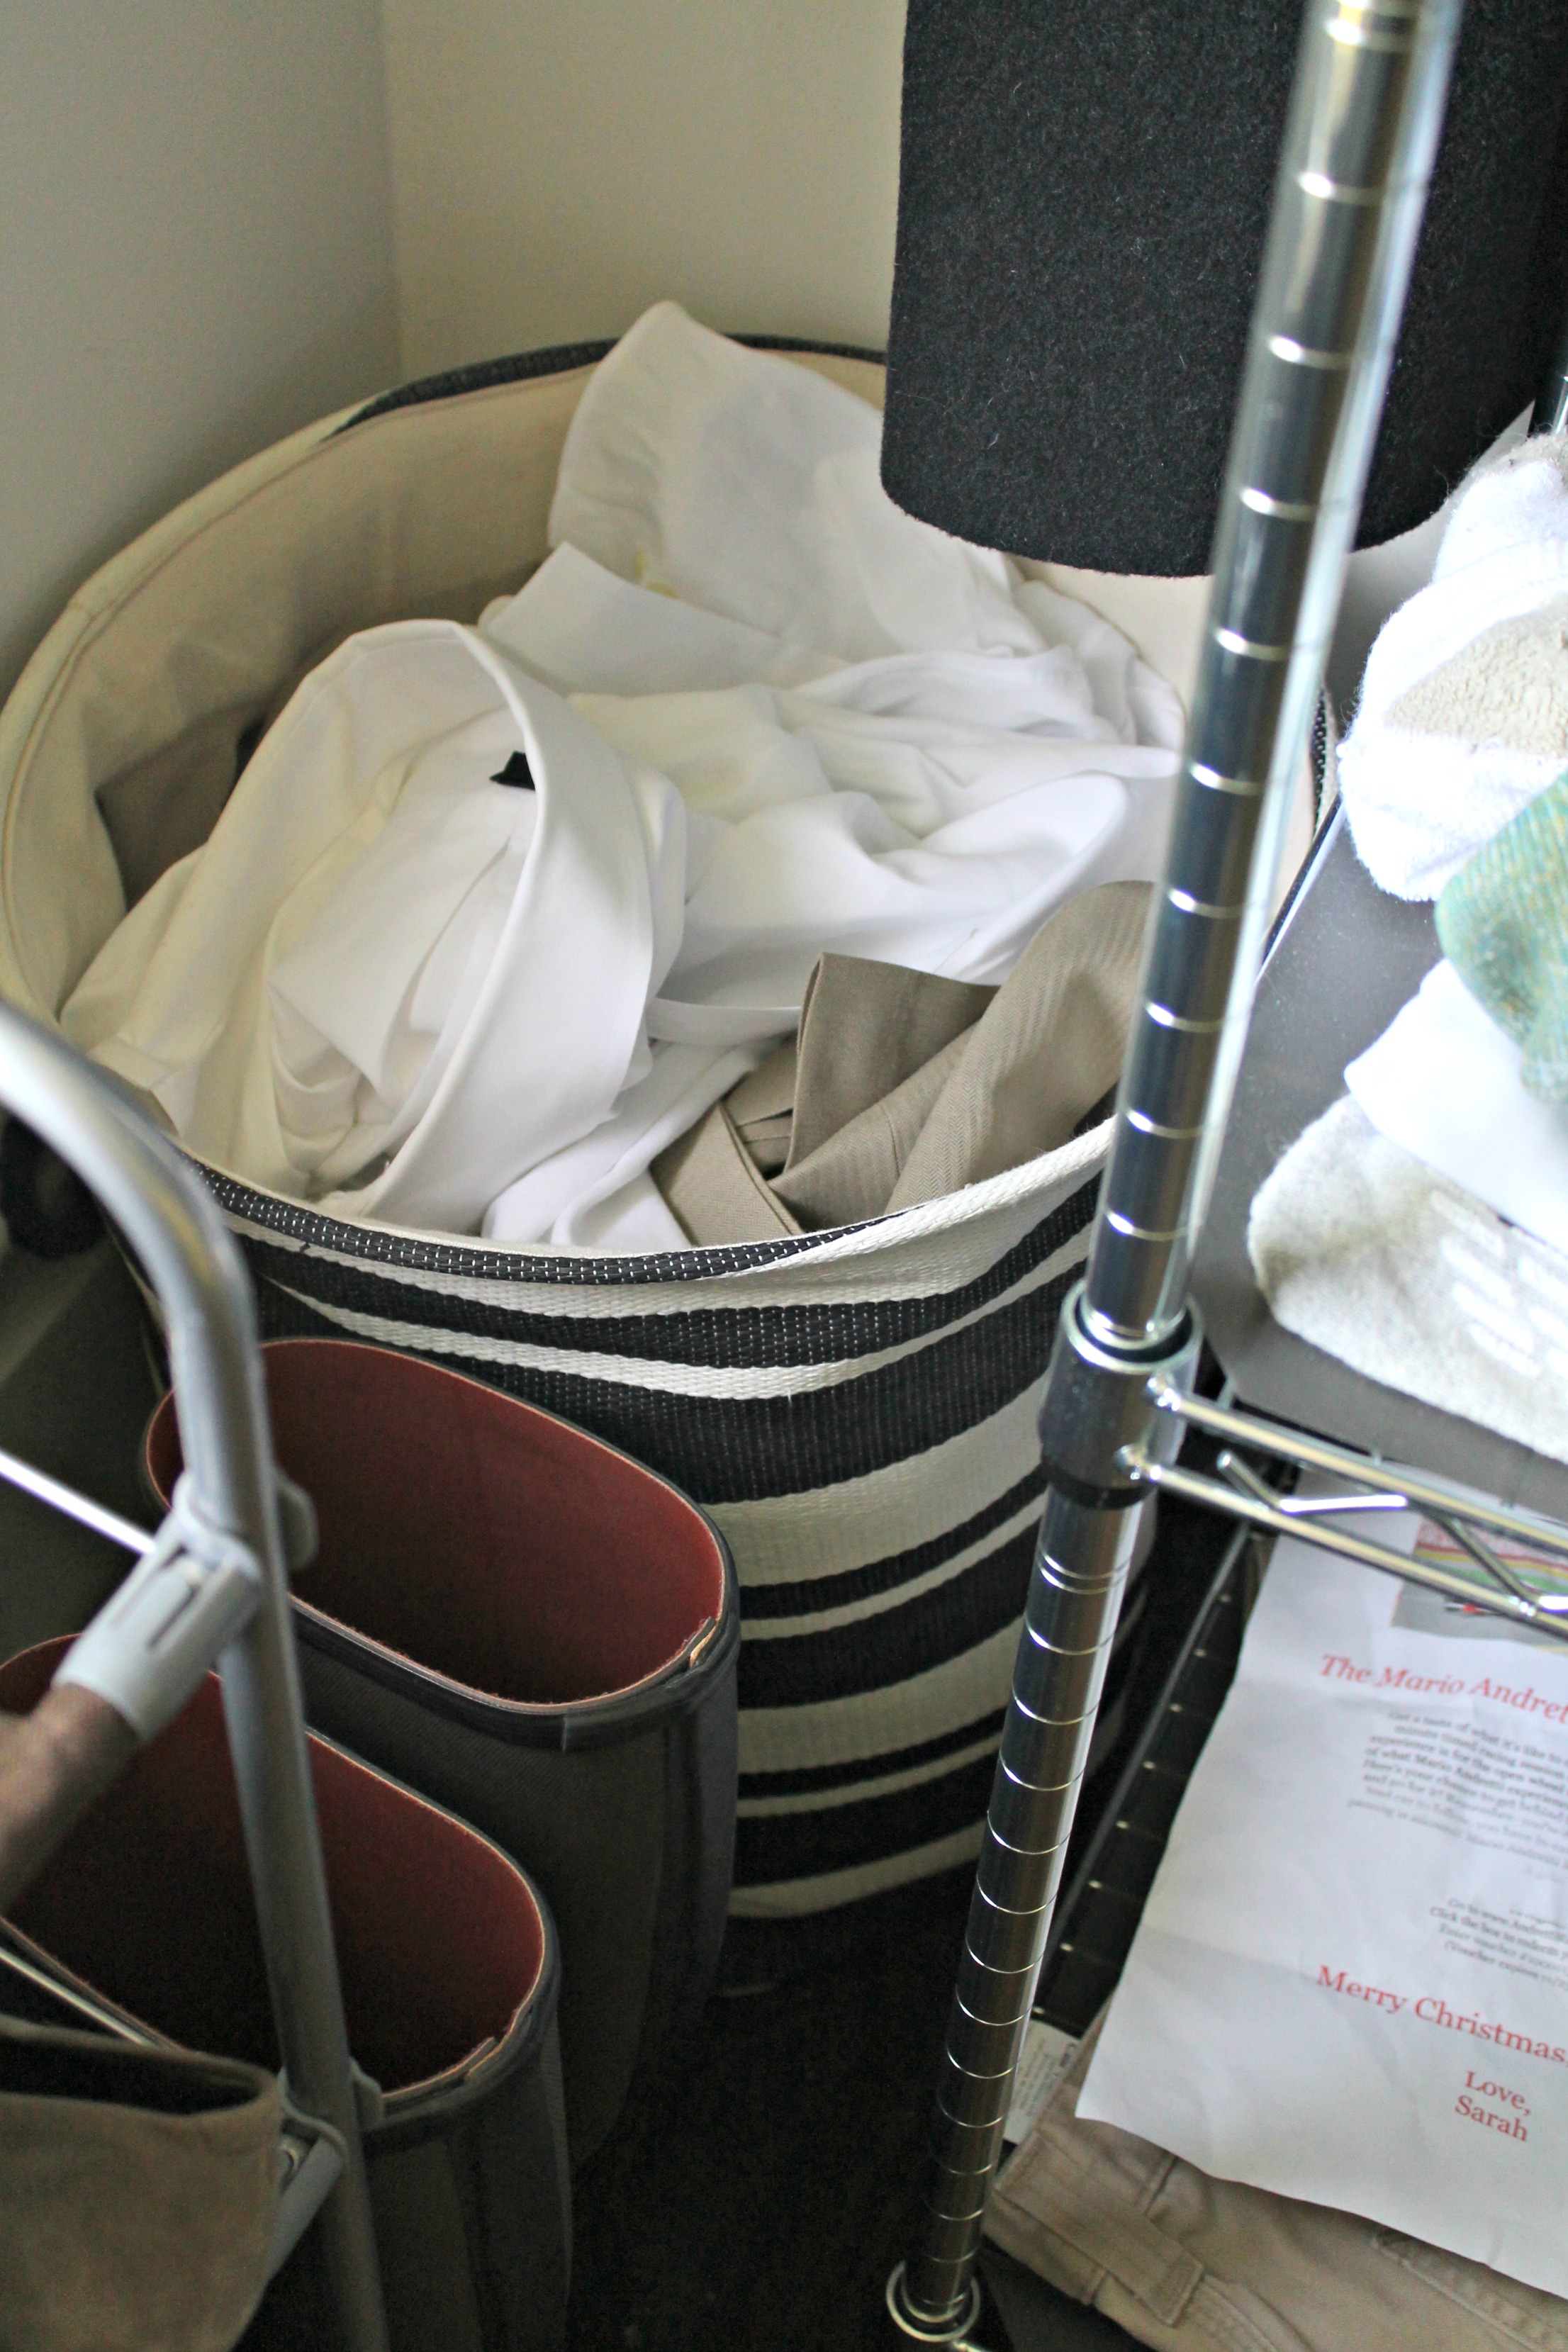
We each had old shoe racks that we decided to keep, and the laundry basket was a wedding gift. I also picked up this cute striped bin from TJ Maxx to nestle in the corner for our dry cleaning pile.
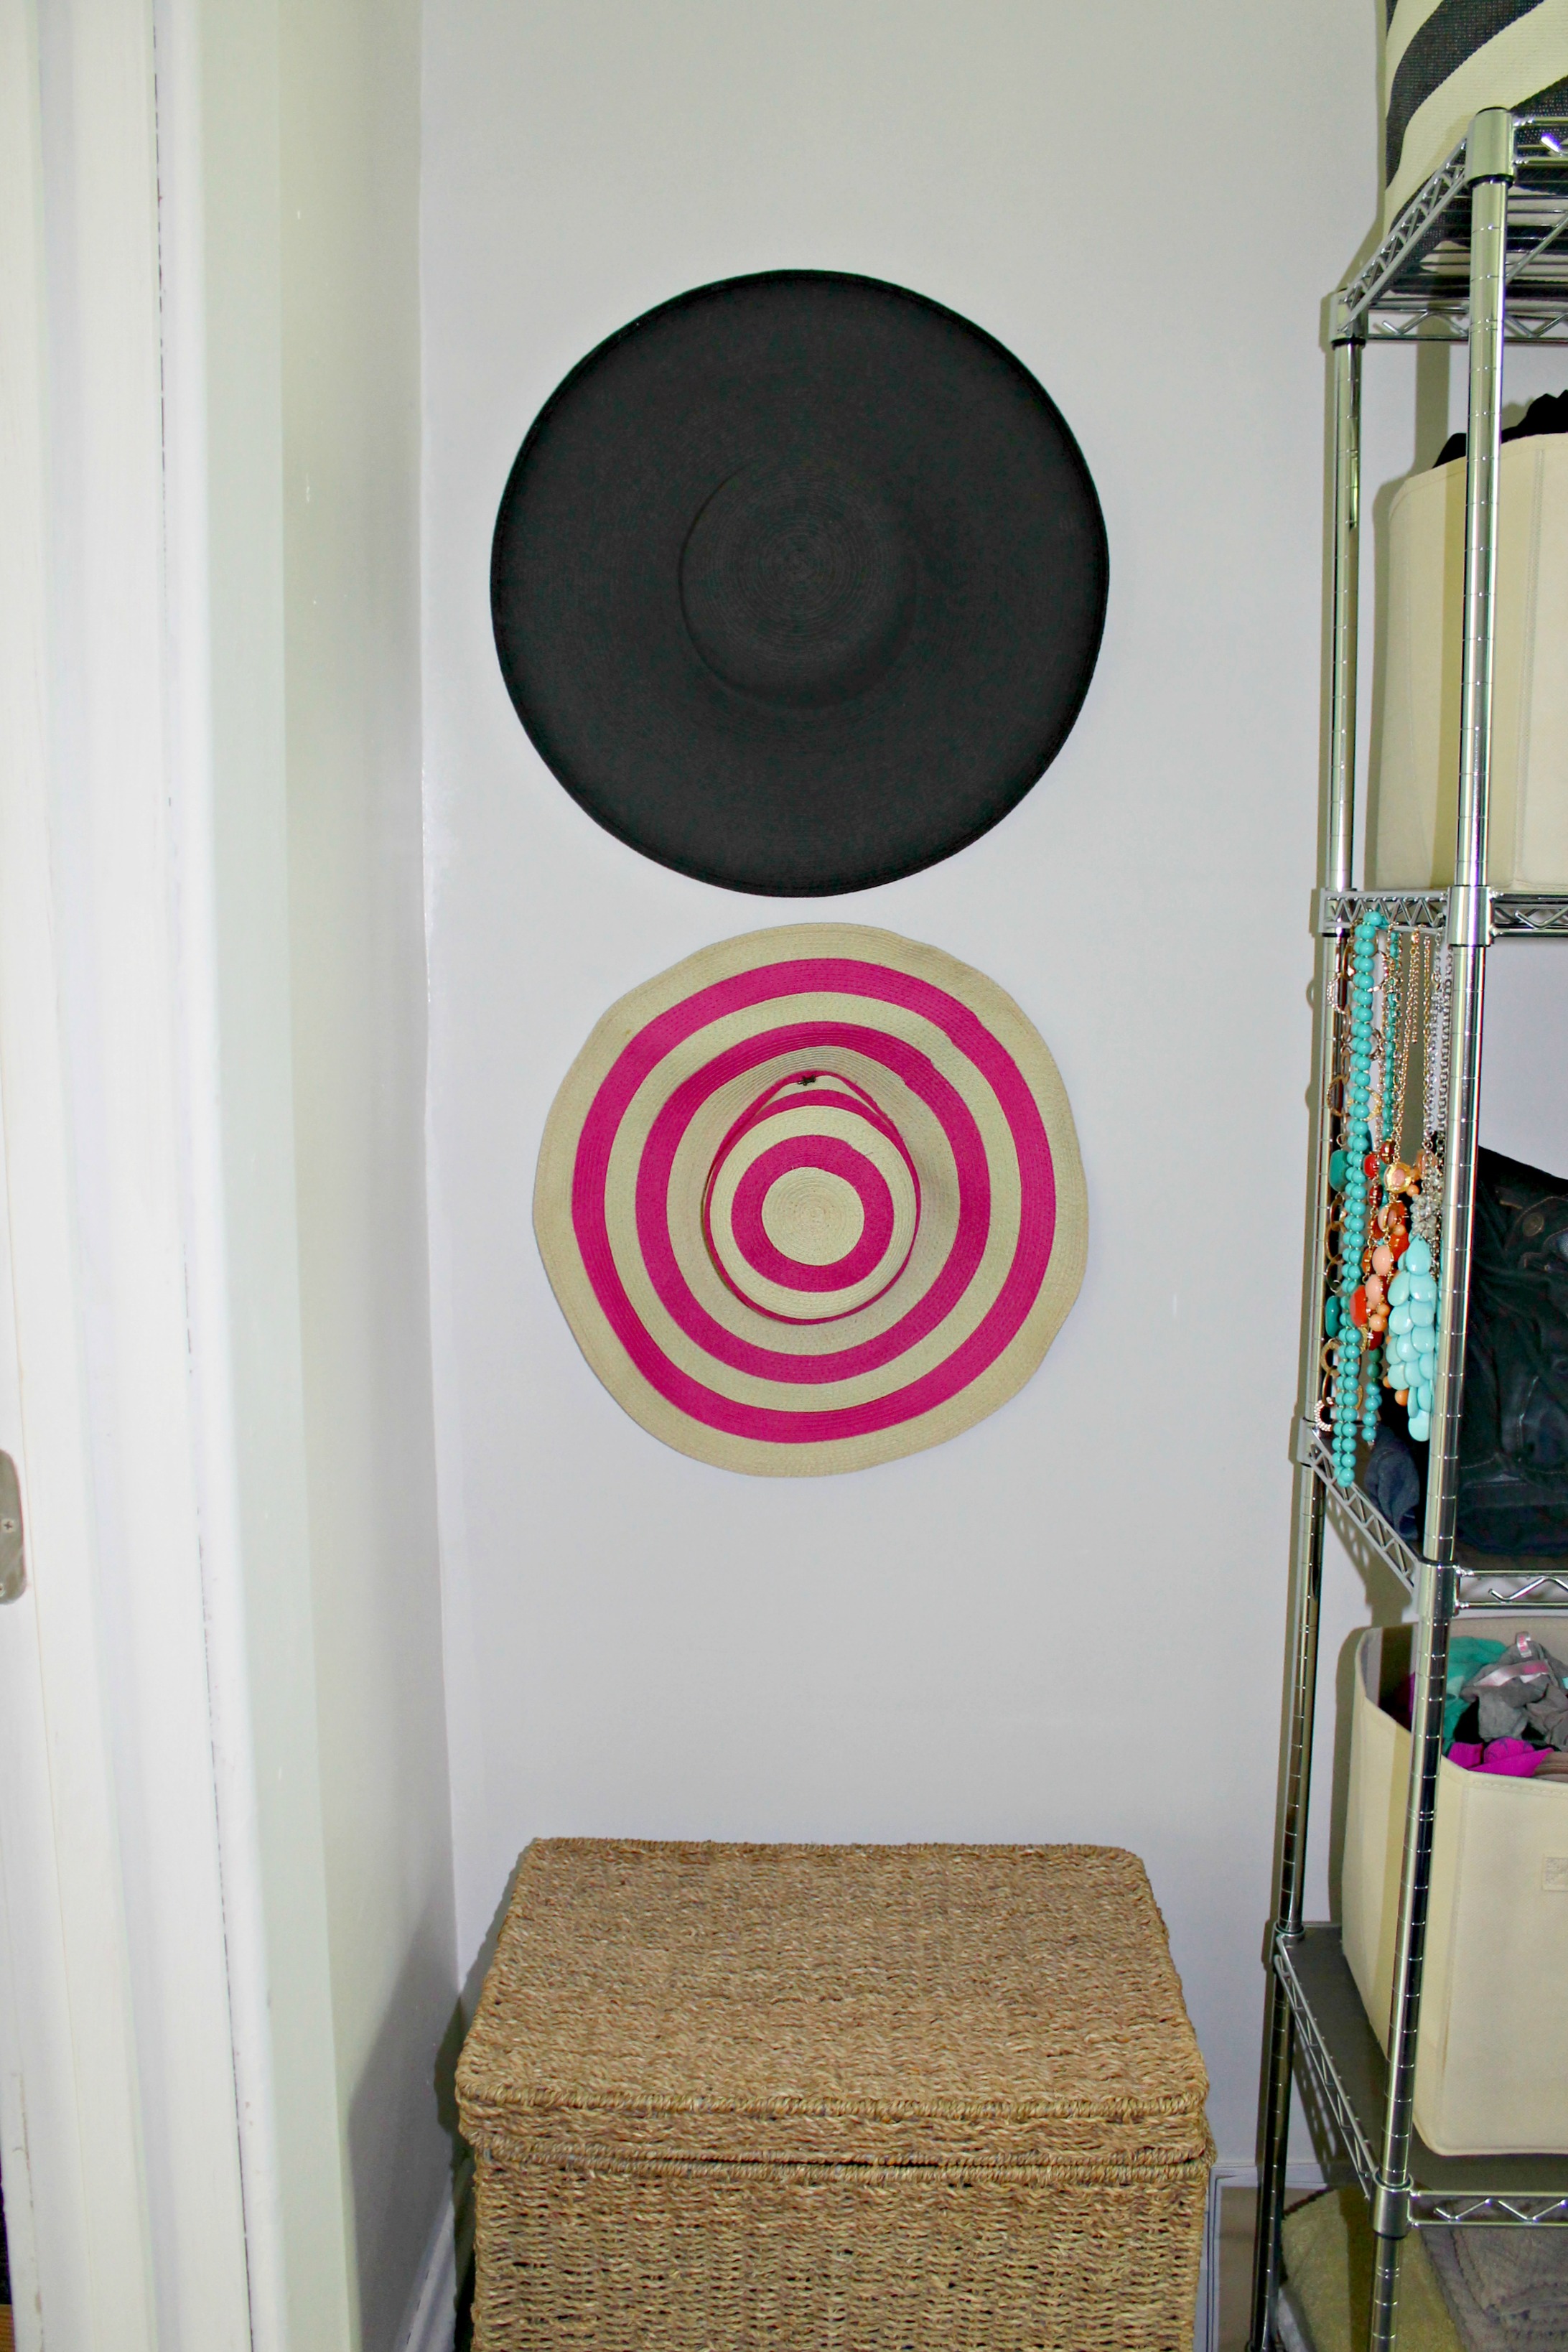
Lastly, we needed a little color in the closet, so I hung two of my sun hats on the wall. It’s a really cute, inexpensive way to add a little “art” to a small space. All you need are a couple of 3M hooks!
Eventually we’d love to have gorgeous built ins, but for now, we’re really happy with the way this closet came together…under budget!