Category Archives: Reno

Running the Option

We did it!  We made a big decision!

We met with our architect friend on Tuesday night to go over the plans he drew up for us.  He outlined 5 basic options, but really, he could have done 100.  The possibilities for this bathroom really are endless!

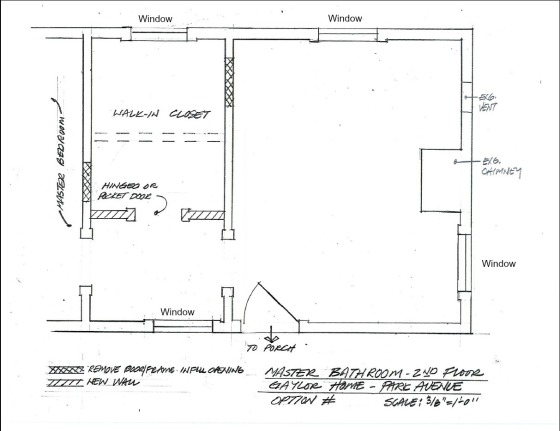
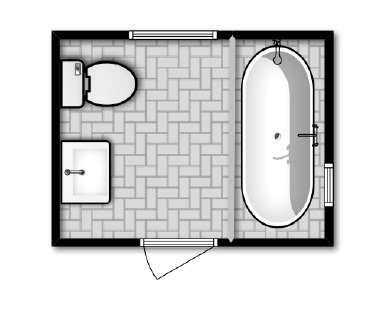
Here’s a look at the general space before adding any bathroom fixtures.

blank2

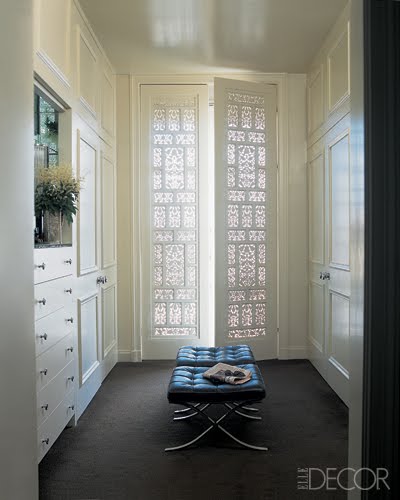
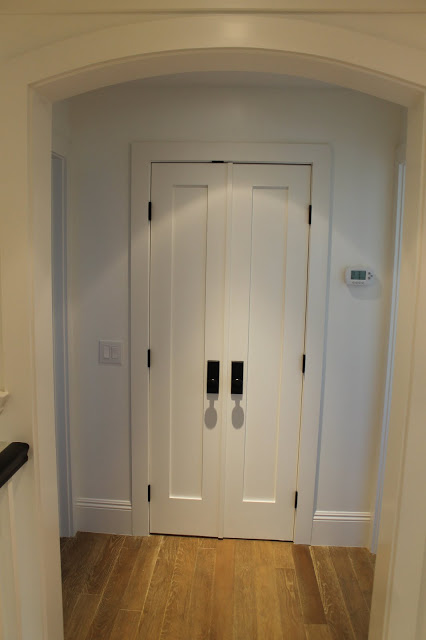
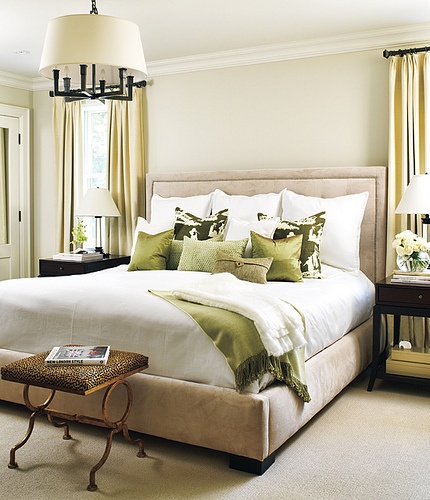
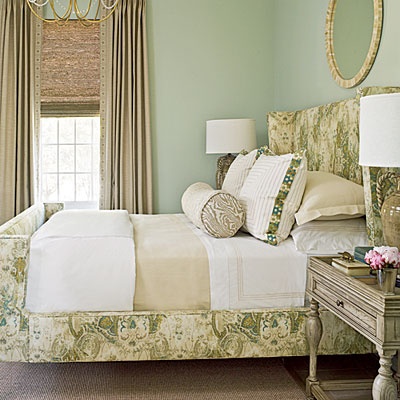
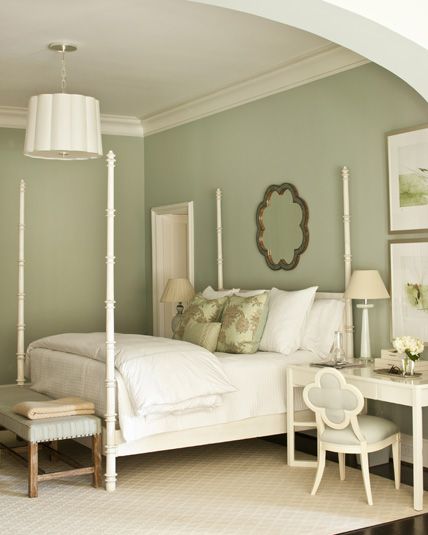
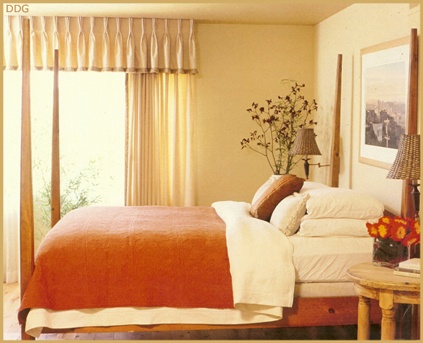
Check out this post for more on the closet.  The closet area is the same in all drawings.  The only decision we really have there is whether to do pocket doors or french doors.  As much as we love pocket doors, they can be a pain to install, so I think we have settled on skinny french doors that swing out. Maybe something similar to one of these?

ED - designed by Jeffry Weisman & Andrew Fisher {via}

IMG_2420 {via}

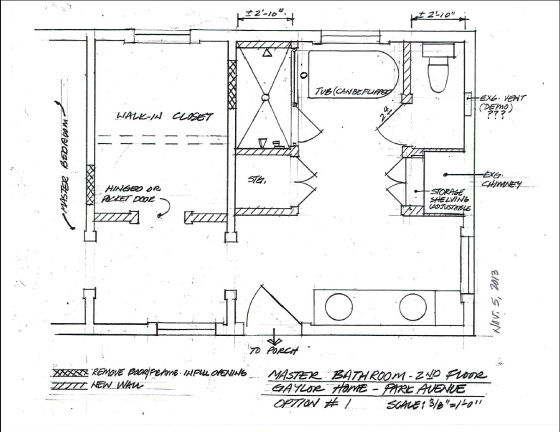
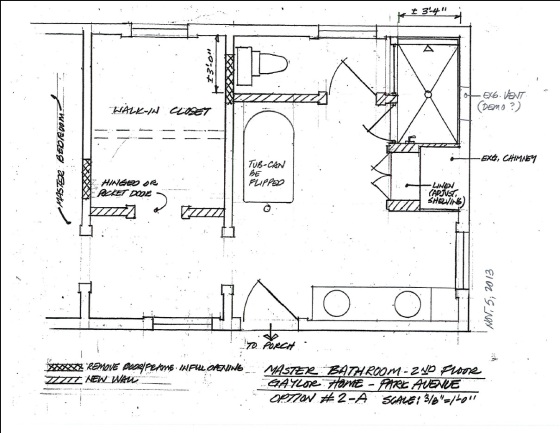
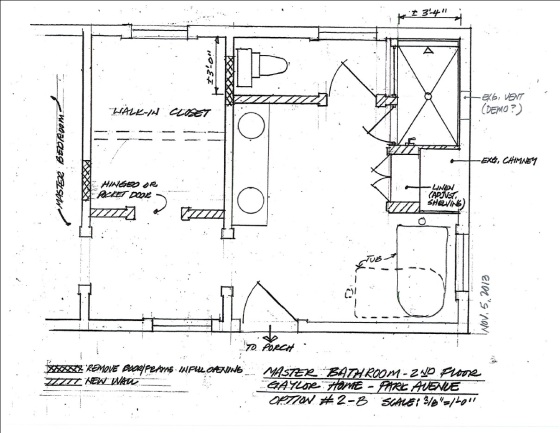
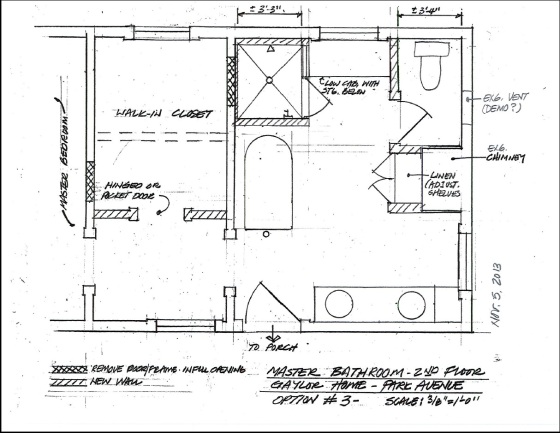
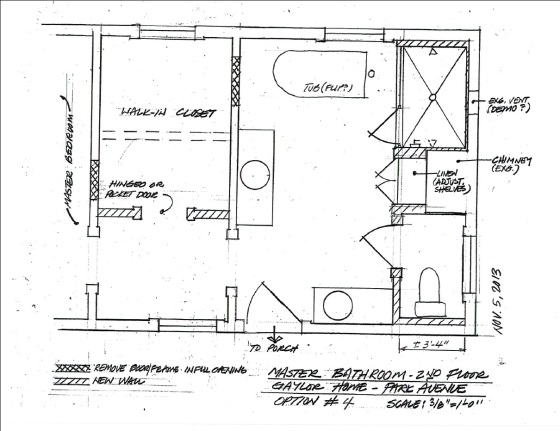
Alright, let’s get down to business.  Here are the options.  Keep in mind that the tub, toilet, etc. can be turned in different directions, and the placement of sink basins, faucets, etc. can be adjusted.  These just give you the jist.  Also important to note–while we do plan to build a separate “water closet” for the toilet, we plan to do some sort of opaque glass, either in the door or above the door, to allow natural sunlight to reach all parts of the room.

Option 1: A glass and tile shower would be installed on the left, and the water closet would be on the right.  The tub would go in between the two (a tight fit, but it fits), and two linen closets would be added.  Both the shower and water closet dimensions would be around 2’10” x 5’8″.

option 1

Option 2-A: The glass and tile shower would be installed in the back right corner, and a water closet would take up the rest of the back of the room.  The approximate dimensions of the shower would be 3’4″ x 5’8″, and the water closet would be around 8’8″ x 3′.

Option 2A

Option 2-B: This option is the same as 2-A, except the tub and vanities have been switched.

Option 2B

Option 3:  This option is similar to Option 1, but the tub has been moved to the left wall.  This decreases our shower to about 3’3″ x 4’6″.  The space between the shower and water closet would be used for storage…possibly a bench under the window.

Option 3

Option 4: This would place the shower in the back right corner, and the tub would be somewhere along the back wall.  It could be centered under the window, or centered on the remaining wall.  There are endless possibilities with the placement of the tub.  We could also add some sort of storage in the back left corner.  The vanities would be split into two separate units.

Option 4

Which one do you think we picked?  Which is your favorite?

Roughing It

I recently learned the term “rough in.”  Basically, it’s when you lay out the general components of whatever you’re roughing in, but you don’t connect anything.  In our case, we have been roughing in the guest bathrooms.

IMG_3599

The layout of the downstairs bathroom will remain the same, so that one’s pretty easy.  However, instead of the outdated vanity that was in there, we will be going with a pedestal sink and built in cabinets.  I’m hoping for something like this:

a977e13440e54af39cd689567e23e8c8 {via}

Although this bathroom is pretty simple, it has another bathroom above it that is getting completely rearranged.  So this bathroom ends up with lots of pipes running through it.

IMG_4264

IMG_4261

IMG_4259

Ok, let’s go upstairs.  Remember this post about the layout of the new bathroom?

guest bath jpeg1

Well now we’ve got the plumbing for it.  The pipes for the pedestal sink and toilet have been installed on the left side:

IMG_4269

IMG_4275

IMG_4276

And the drain and controls for the shower have been installed on the right side:

IMG_4271

IMG_4270

IMG_4280

IMG_4279

We are hoping to make some big strides this week towards getting these bathrooms finished.  On Sunday, Charles and I spent a few hours over at the house and made a very detailed list of things that are left to do before we can move in.  Yeah, it’s 7 pages!  BUT we started to get really excited when we realized that most things on the list would not take much time, and we could be moving into our forever home in just 2 short months (fingers crossed!!).

After our list-making, we headed over to Lowe’s to pick out some finishes for the upstairs bathroom.  Here’s what we decided on…

For the floor tile, we are going with a pretty simple octagonal pattern.  It’s a smaller bathroom, so we didn’t want anything to “busy.”

office bath floor

Then for the wall tile around the shower, we decided on plain old white subway tile.  I just don’t think you can go wrong with white subway! office bath wall

And last, we decided on a taupe-ish grout.  It’s called Bahama Beige.  We didn’t want to do black or gray since the adjoining office will be navy, and we thought this subtle color would look really chic.

mapei bahama beige grout

So there you have it.  The guest bathrooms are under way!

Also, how gorgeous is this dogwood in the fall?!  We’re thinking of planting another one on the left side of the house where the big pine used to be.  What do you think?

IMG_4220

Updated Pictures Posted!

New pictures are up on Shutterfly.  Go take a look!

IMG_4113

IMG_4213

A few things to note:

  1. The foundation around the back porch is complete, minus painting.
  2. New tongue and groove boards have been installed on both back porches.
  3. New stairs to the basement have been installed.
  4. We are making the foundation vents smaller so that we are able to fit more efficient open-and-close vents instead.
  5. In the upstairs guest rooms, we are keeping the green but changing the pink to yellow.

Honeywell vs. Nest

When we bought the house, we had a gas furnace in the basement that was coupled with a condensing unit to heat and cool the first floor.  Then we also had a heat pump to heat and cool the second floor. Here’s what that looked like:

IMG_34211

IMG_35071

When we were basically forced to replace these units, we decided to go a more energy-efficient route.  This plan also gets the gas furnace out of the basement, which was somewhat of a fire hazard.  So now, we will have a gas pack to heat and cool the first floor, and another heat pump to heat and cool the second floor.  Both are Goodman, if you’re interested.  If you’d like to know more about how a gas pack works, click here.  For more on the heat pump, click here.

Here’s our dilemma: we know that we want a “smart” thermostat that we can set and operate from almost anywhere using our smart phones, and we’ve narrowed our choices down to two.  But now we’re having a hard time deciding between the Honeywell WiFi Smart Thermostat and the Nest Thermostat.   We’ve heard pros and cons about both, but none have made our decision any easier.

Honeywell-smart-thermostat-iphone-app{via}

nest_thermostat_iphone_app {via}

Has anyone tried these?  Would you recommend one or the other?  Any new pros or cons you can offer?

Painting for Guests

Remember when we picked out paint colors?  We liked most of them, but there were a few that just had to go!  We decided we loved the Fresh Cut in the guest room, but decided to skip it in the dining room.  The first guest room was painted last week, and I think it looks pretty darn good! (Keep in mind that the pictures don’t necessarily make it look exactly the same as in real life.)

IMG_4153

IMG_4152

IMG_4155

With the white trim and fireplace, the pale green really just pops! Here are a few rooms that are my inspiration for a serene, luxurious guest room:

19a3ccfd02dfaa7aacdcce42d9f36d89 {via} 7f7d2d7119d3d4dccf4da1acc58f163b {via} b4d8c9dc92f94a07b7ec3a701a840aad {via}

I’d love to do this chenille coverlet on a bed in there.  So simple, and easy to change out pillows with the seasons.  Plus, anything will go with ivory!  (I’ve already put it on my birthday/Christmas wish list!)

7bb9f844e8cc808cf1500436e7c1d9fe{via}

The next guest room is a different story.  We tried out (what we thought was) a very pale coral color, but it ended up being way to salmon-y!  It was pretty, but it was a little much for a bedroom.  Plus Charles hated it! So this weekend, Charles primed a few spots in the room and painted over it with Del Mar Shores, which is a pale yellow.  Here’s a look!

IMG_4156

IMG_4157

IMG_41601

IMG_41591

I’ve never been a big yellow fan, but this is a really pretty color.  It’s bright and cheery, and will look great with the green in the adjoining guest room (they share a pass-through closet).  Here are a few of my favorite ideas for this room:

f4e453de7a6e15fd8f38ffe7e43855e9 {via} abbac19265f6ff1bcc9133b74c0acd55{via}06a2aa691198ee754fe77c0af12e51b6 {via}06a2aa691198ee754fe77c0af12e51b6 {via}

Got You Covered

Warning: this post contains a heated rant.  I make no apologies.

Does anyone else hate home insurance as much as I do?  Yes, it’s wonderful when there’s a flood that ruins all your things, or T-rex takes a bite out of your roof, but in general, IT’S A RACKET!!  Here’s the story…

When we first bought the house and knew it had to be insured, we searched high and low for a carrier that would cover an uninhabited historic renovation.  After about 3 tries, we found a builder’s risk policy that would cover us for a few months, and we paid out the you know what for it.  But of course, that didn’t cover jack squat, and when we were robbed of the copper in our heating and cooling units, there was no help to be found.  So we ended up having to pay an exorbitant amount of money to have the entire heating and cooling system replaced.  And that left us asking the question…what are we paying insurance for?

home-insurance-cartoon {via}

Earlier this month, the time came for us to either renew the policy or find another one that was better suited.  Same problem…no one wants to cover us.  We did end up signing for one policy, but there’s been some issues and now instead of covering us for a year, they will only cover us until January.  Basically, the addendum in the policy states that they will not cover houses that have “aluminum knob and tube wiring.”  Since our knob and tube is copper, we thought, Great! This works!  Turns out they should have added the word OR between aluminum and knob…they won’t cover any type of knob and tube.  So we went back to the original policy we had, and they said that they don’t cover knob and tube either, and they were unaware that we had this the first time (even though no one ever asked).  So here we are.

It looks like we have three options at this point:

1. Replace all of the knob and tube wiring in the house.  This doesn’t work because our electrician is basically finished updating the electrical in the house, so we would end up paying double for our electrical work.

2. Claim that we live in the house and get a homeowners policy (which will cover knob and tube).  This doesn’t work because it’s insurance fraud, and I’d really prefer not to go to jail.  Orange is NOT my color.

3. Go uninsured.  This doesn’t work for obvious reasons.

9c264f50ff1c1f4e0f7e9e74163e9ef6 {via}

So what should we do?  Any ideas?  Does anyone know of carriers that will cover us?  The way I figure it, there are thousands of houses all the time that are being renovated and not replacing wiring, so who ensures them?  There’s got to be a way.