All posts by Sarah @ 702 Park Project

Closet Organization with Sharpie

This shop is part of a social shopper marketing insight campaign with Pollinate Media Group® and Sharpie, but all my opinions are my own. #pmedia #EverydaySharpie http://my-disclosur.es/OBsstV

For the past few months, we have loved our renovated closet and the organization system we put in. There’s only one problem…the striped bins are up too high for us to know what’s in them! With summer coming to an end and fall on the horizon, I thought it was the perfect time to take our organized closet to the next level.

IMG_5675 IMG_5676

Last week I swung by our local Walgreens and picked up a few Sharpie products, including the Stainless Steel Pen.  The pen comes in a variety of colors, but I decided to stick with the classic black and add in color with some homemade labels.

IMG_5867

I picked up some scrapbook squares and decorative tape at our local craft store and created some pretty simple but cute labels.

IMG_5874 IMG_5872 IMG_5870

For the bins on my side, I made labels for Winter Scarves, Summer Scarves, Swim, and Sweats (how’s that alliteration for ya?!)  For Charles, I made labels for White Tees, Gray Tees, Red Tees, and Blue Tees.

Then I just clipped the labels to the bins with the cutest little clothes pins.

IMG_5878 IMG_5879 IMG_5885 IMG_5886 IMG_5889 IMG_5890 IMG_5891 IMG_5892

I loved using the Sharpie Stainless Steel pen for this project.  It writes incredibly smooth, and was the perfect choice for this project. Plus, the pen is super comfortable to write with!

Next project?  I’m tackling our makeshift kitchen pantry bins!

IMG_5894

This Week’s Links

Happy Sunday!! Today I’m catching up after a very sweet wedding weekend for my brother and new sister.  I’ll be sharing a few tidbits on that later!

Come back tomorrow to see my latest Sharpie project!  Have a super week, lovelies!

——————

I recently discovered Kristi Murphy when her DIY Ikea skirt was featured here. Check her out — her DIYs are fantastic, plus she’s got some great tips on parties, blogging, etc.

Lucy and Ricky’s Beverly Hills estate is for sale. Would you take it?

702ParkProject - Lucy & Ricky

Planning your kitchen layout? Be sure to consult this guide first!

The best TV apartments.

I fell deep into this interesting read on how traveling the world can be affordable.

Speaking of affordable travel, check out these top 10 luxury islands that are surprisingly affordable.

702ParkProject - luxury island1

Surely by now you’ve heard about the Saved By The Bell movie. Here are the best fashion lessons we learned from the show.

How to choose the right chandelier for your space.

Harlow’s big break. Typical dog behavior. (PS- If you don’t read The Daily Tay, you’re missing out!)

Emily Henderson trolled the Raleigh/Durham Craigslist for some pretty fabulous finds.

Finally! Someone else makes as much fun of Anthropologie as I do! Can we just stop with the Anthro obsession already?!  “There’s this gross fantasy they’ve created of an art student who can afford to spend thousands of dollars on a paint-splattered flea market find.”

702ParkProject - Anthro2

And in case you missed it…

  1. Laboring Away – A DIY Blog Hop
  2. The Exterior Gets Some Love, Part 2
  3. Interview With The Designer – Little Black Door
  4. Quotable Friday

Interview With The Designer: Little Black Door Designs

Today I have the very talented Elizabeth Baumgartner from Little Black Door Designs sharing the inside scoop on her design work.  Besides being brilliant when it comes to interiors, Elizabeth is so witty, and her emails always brighten my day!  I know you’ll enjoy her interview–be sure to check out her site as well!

Little Black Door

When and why did you become a designer?

I started designing full time about 3 years ago. Previous to that I was doing it part time while working a job I hated, but design has always been in my blood. From as early as I can remember I was picking books that had beautiful pictures of interiors (regardless of the story line) or drawing pictures of furniture. I rearranged my room more times than I can count and I’m the only girl I know who was thrilled to get an oil for her 15th birthday. At some point you can’t ignore your gut any longer. The company I was working for went out of business and I thought it was the perfect time to follow my dream. If you can’t follow your passion, what’s the point in dreaming at all, right?

LBD7

What are the perks and drawbacks of virtual designing?

I would say the biggest drawback is not being able to stand in the space.  With my local clients, I take photos of the room we are doing from every angle and I reference them a lot throughout the process, but I’m always able to put them in context.  I know what is just beyond the frame.  With virtual designing, you don’t have that crutch.

Edesign2

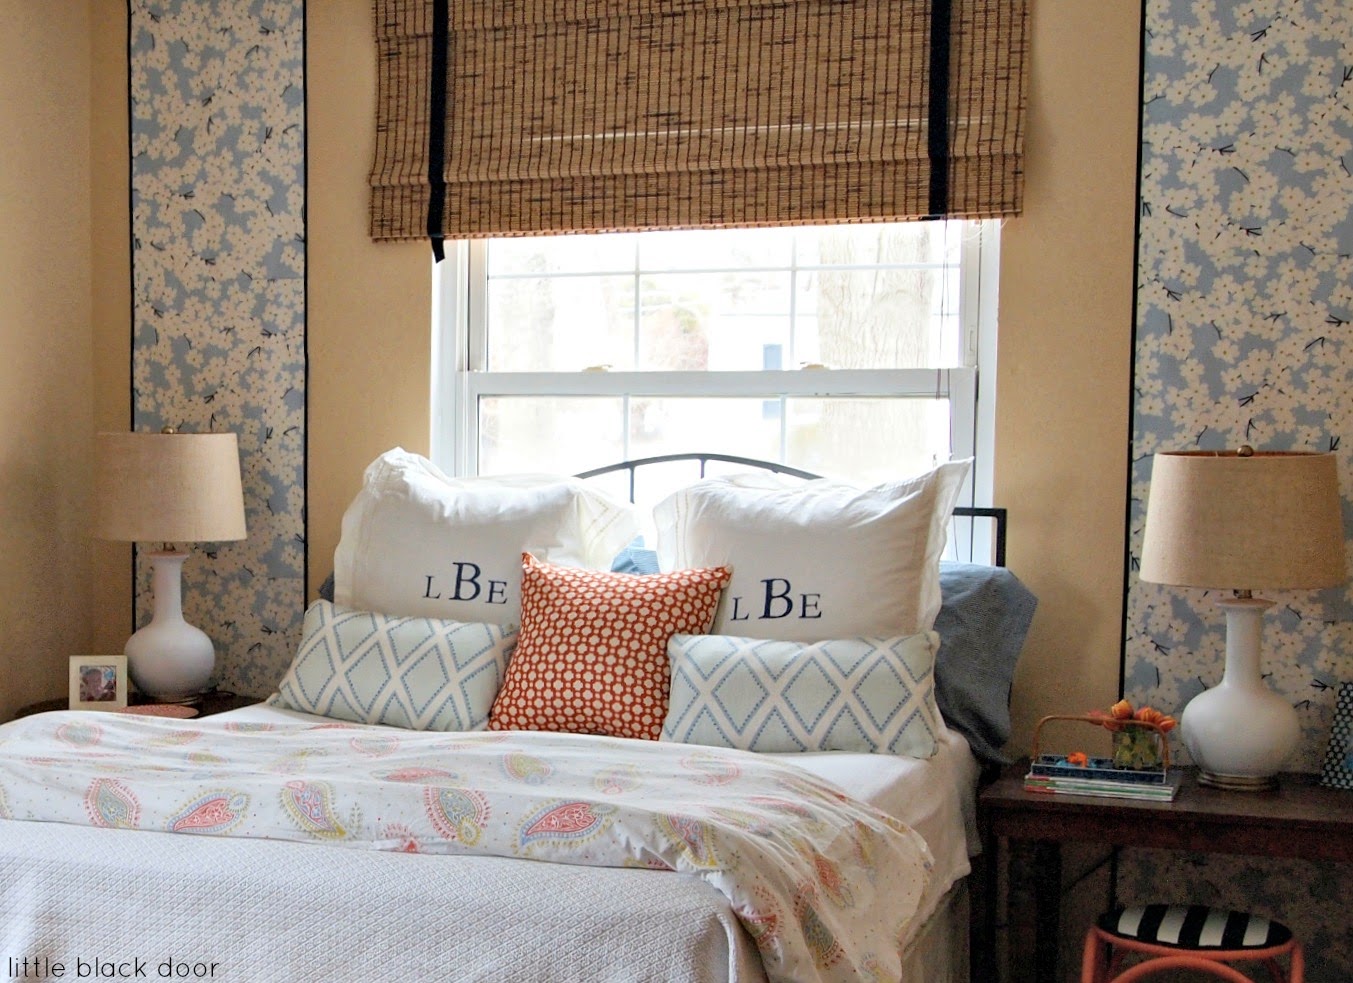
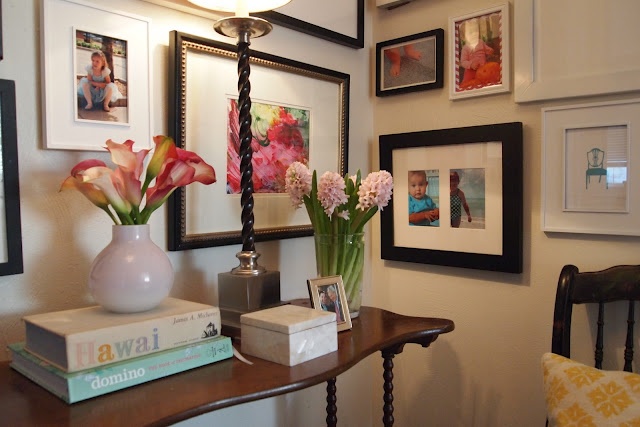
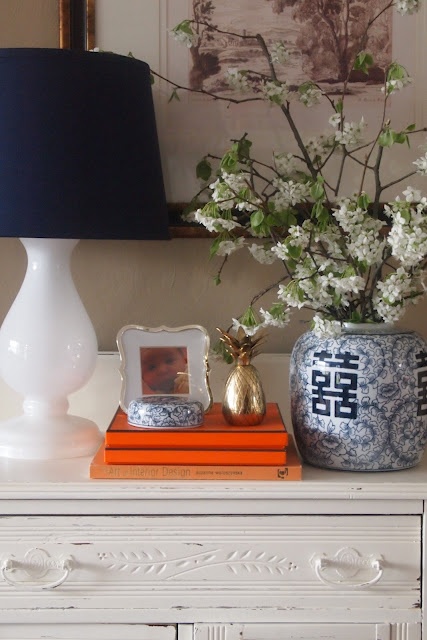
How would you characterize your style?

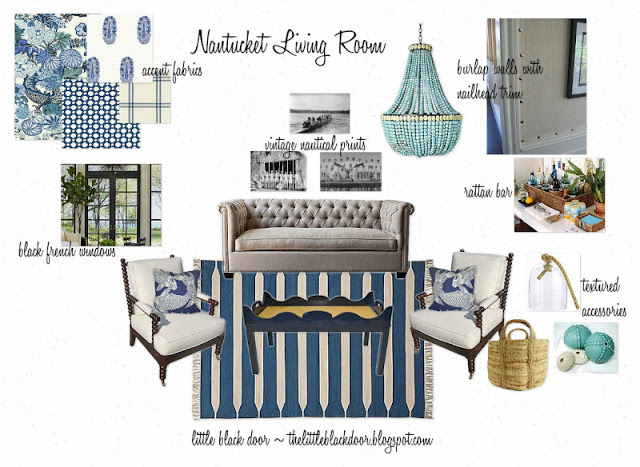
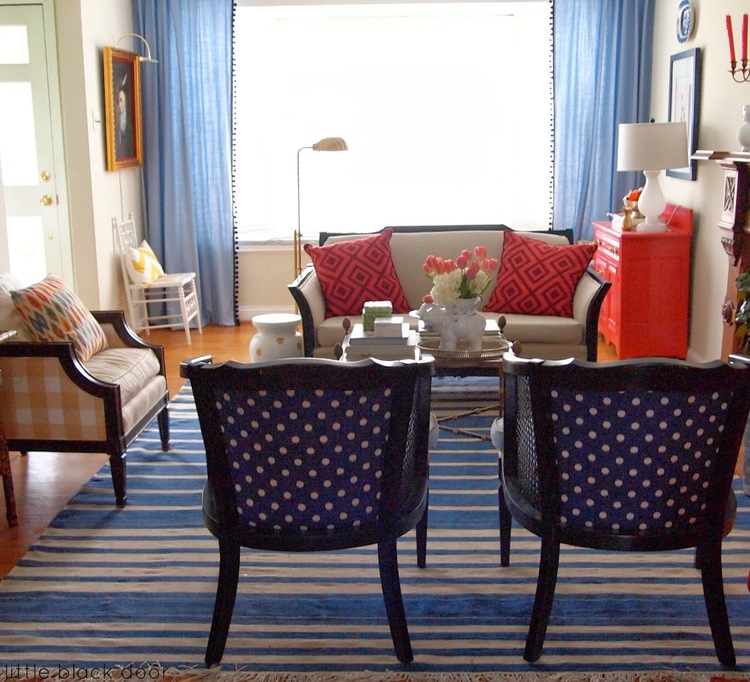
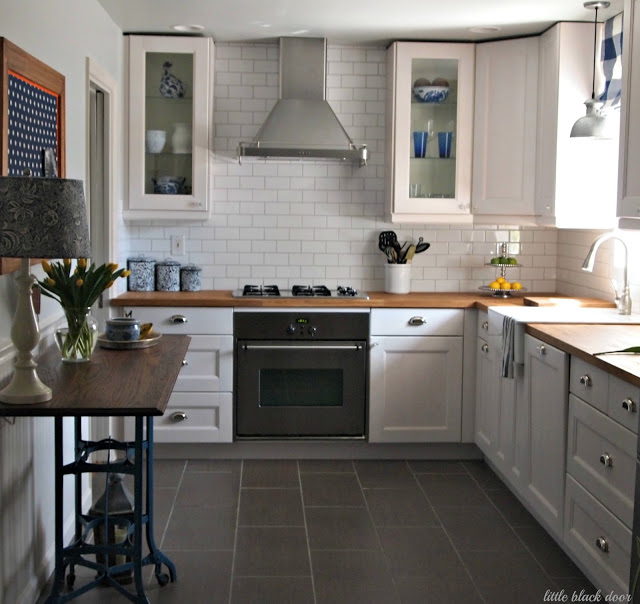
That’s the million dollar question! I always have trouble with this answer.  Whether working for a client or for myself, my goal is always the same: creating a space that looks unique but feels familiar.  I always gravitate towards classic elements mixed with some quirk and color.

LBD5

Does your personal home fit your design style?

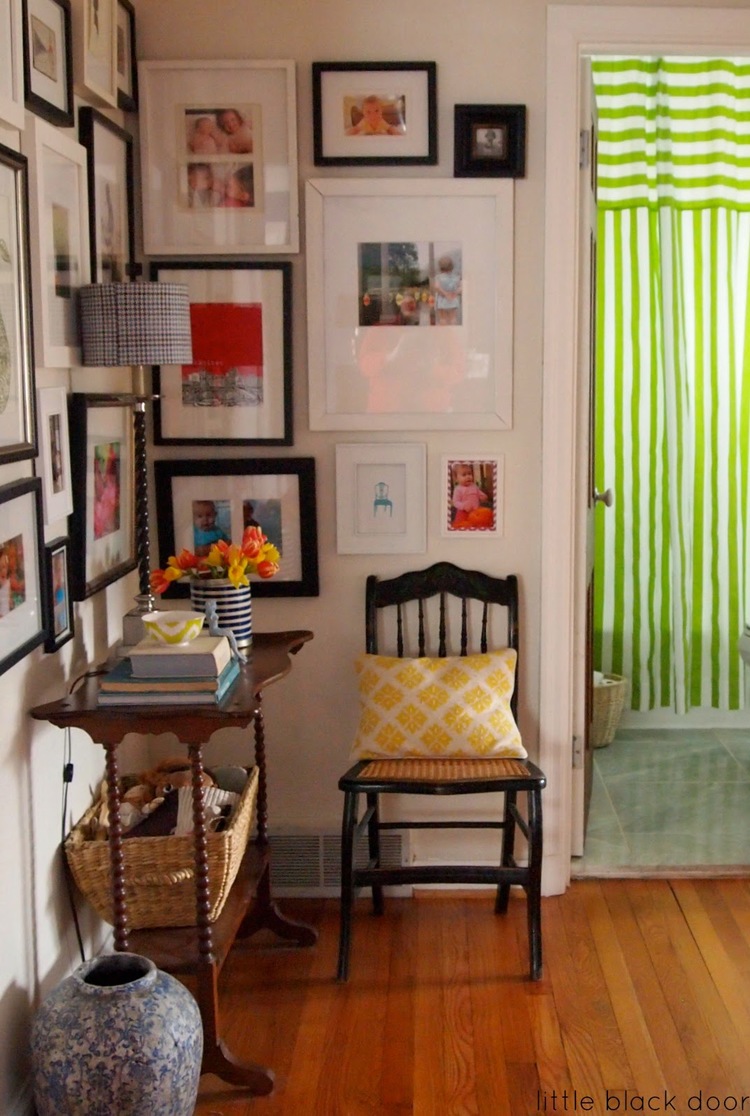
My personal home is probably the best example of my style and how it changes.  My home doesn’t look the same for long, because there is always a great thrifting find or new fabric that has to fit its way into the fold.  But I think design should always be changing and evolving.  That’s where the fun comes in!

LBD6

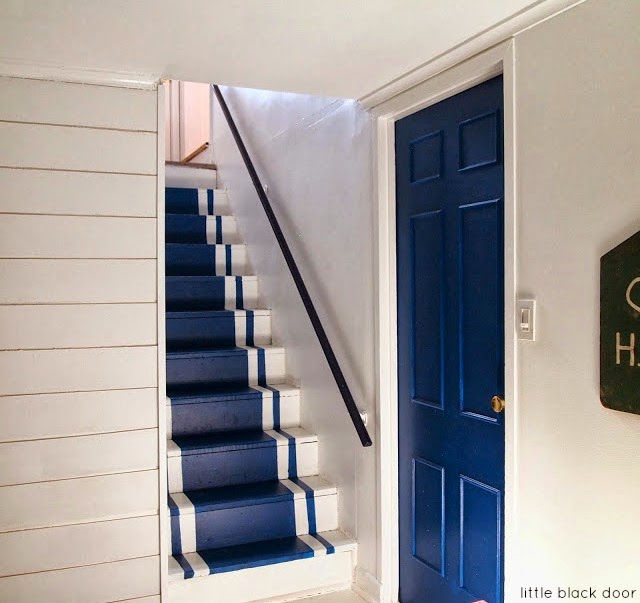
How has living in St. Louis influenced the way you decorate?

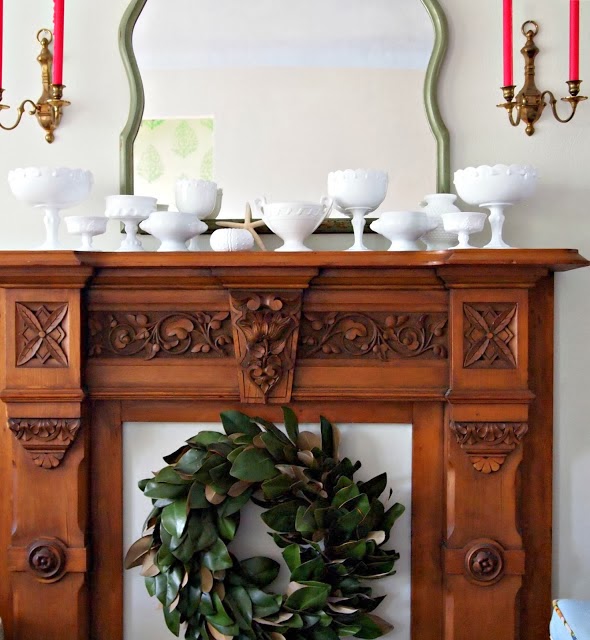
St. Louis is made up on a lot of little towns full of great old houses and I love nothing more than driving around to feast on all the eye candy.  My friends like to tease me that there isn’t a street in St. Louis that I haven’t been down to hunt for houses, and they are probably right.  I think my love of grand old homes certainly is influenced by living in St. Louis.

LBD10

What was the focus of your first paid design project?

It was a bedroom makeover and I think the budget was all of $800.  All of my years of shopping antique and consignment stores came in handy and luckily we were able to score a few deals. I was so green I didn’t even think to take before pictures!

LBD9

Where do you find your inspiration?

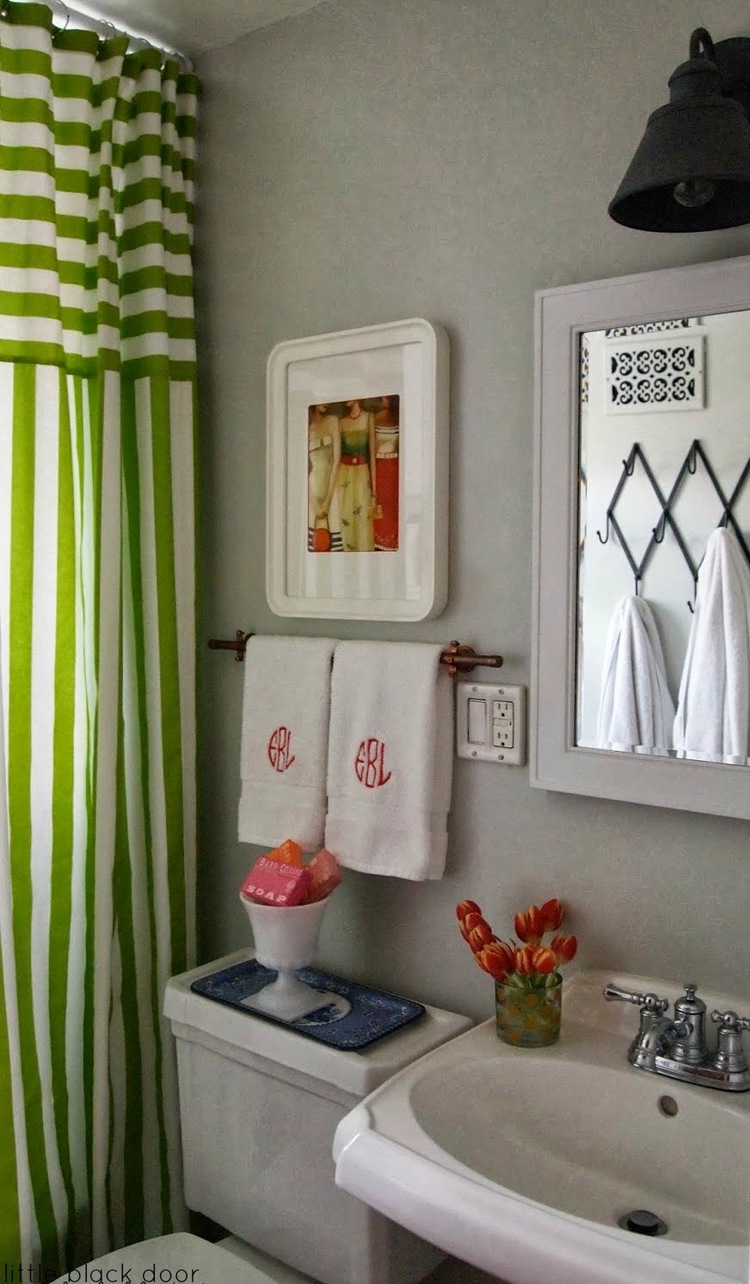
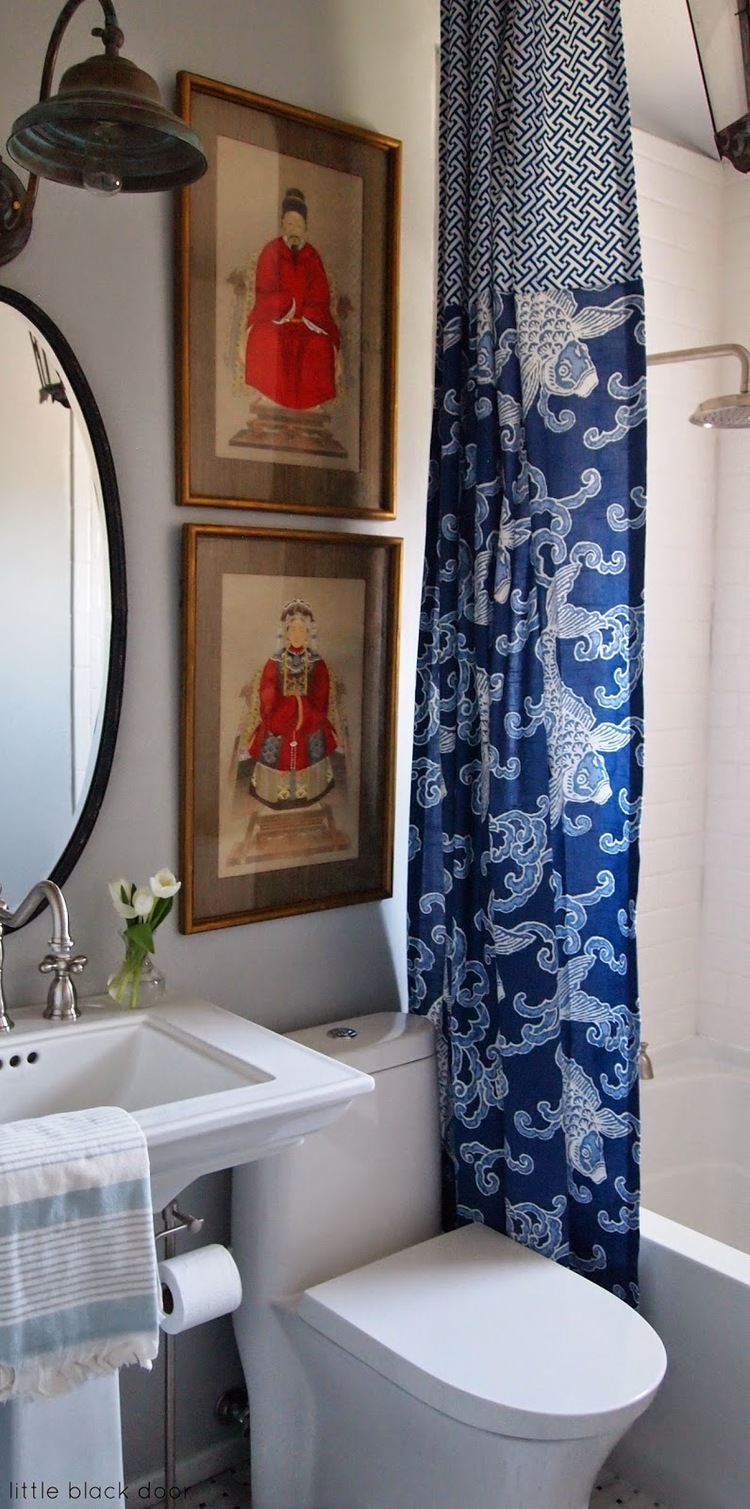
Of course I love my magazines, books and Instagram feed. But often, the best inspiration comes from things that aren’t necessarily design related…on the surface. I was recently inspired by the bathroom at a local museum. That’s right, the bathroom. The colors they used, and the smart workaround of an odd layout – I was exhilarated. Weird, I know. Inspiration is all around!

LBD12

What is the best advice you’ve ever received?

Don’t be afraid to put on your bossy pants. An old boss told me that in my project manager days and it is true no matter what your job. You need to be able to stand up for yourself and your work.

OLYMPUS DIGITAL CAMERA

Who has been your greatest professional influence?

My all time favorite boss (see above) is my biggest influence without a doubt. She started her own small business at a young age and had a very long and successful career. I learned so much from her about everything from sales, to billing, networking and managing expectations. I’m lucky enough to still be in contact with her and she still gives me great inspiration and encouragement to this day.

LBD2

What is your favorite design era?

This answer changes with the wind I tell you, I am never pinned down to one for long. But as of right this minute, I’m very into Chippendale everything, so Mid Georgian I guess.

LBD1

What’s at the top of your bucket list?

Travel, travel and more travel! I always come back full of ideas after a trip and I can’t think of anything better for the soul than a bit of time in a strange place.

LBD8

What do you have coming up next?

I have a big reveal coming up in mid fall that I’m excited about. I’m not allowed to share much yet, but trust me, when I can I’ll be shouting it from the rooftops!

LBD4

Blog • Design Services • Facebook • Twitter • Pinterest • Instagram

All photos via Little Black Door.

The Exterior Gets Some Love, Part 2

Last week I showed you the transformation of the front of our house.  Today, I’m sharing the back, minus the porches (I’ll show those next week).

Let’s start with a before shot.

IMG_2790

Pretty gross, huh? Take a look at it now.

IMG_5419 IMG_5418

The house was painted and the porches were stabilized, plus we trimmed the trees and added a flower bed using bricks (similar to the front of the house).  The porches still need to be painted and we need to rehang our black shutters, but it already looks a gazillion times better.

We also ripped out most of the overgrowth in our backyard and realized that we had at least 10 feet of yard on every side that was being covered up.  We even discovered a brick wall that runs along the back of the yard!

Here’s the before.

IMG_2986

And the after.

IMG_5417

And because I know how much y’all love before and after pictures…

702ParkProject - Back B&A1 702ParkProject - Back B&A2

Come back next week to see what we’ve done to the porches and sides of the house! In the meantime, you can follow me on Instagram, Twitter, and Facebook to keep up! :)

Laboring Away – DIY Blog Hop

Happy Labor Day, friends!! Like most everyone else I know, I’m enjoying a much-needed day off, but wondering where in the hell this summer went! Wasn’t it just May?!

Anyway, I’m so thrilled to be a part of the Laboring Away DIY Blog Hop!  These ladies are so incredibly talented and I’m honored to be in a group with them.

Laboring Away

I’ve found that a lot of furniture in our home is dark…whether wood or fabric.  Most of the time it’s nice to have these hearty pieces, but sometimes it can darken the mood a bit.  So to keep things fresh and summery year round, I decided to make over this sad little dresser I picked up at the Habitat for Humanity ReStore.

IMG_49991 IMG_5000

Because the front of the drawers were a really cheap material with a thin wood veneer, I didn’t feel bad about covering those guys up.  All I needed for this quick and easy makeover was a roll of wallpaper, spray on adhesive, and scissors.

I chose a plain white wallpaper to give the piece a sleek and sophisticated look, but any wallpaper would do.  I found an old roll that had been opened at the local hardware store and ended up getting the whole roll for $5.

IMG_5738 IMG_5739 IMG_5740

The step are pretty easy.  First, you measure out the correct size for the piece of wallpaper you need.  We did this by laying the wallpaper on top of the face of the drawer and creasing it around the edges.

With a steady hand, cut the wallpaper, then spray the adhesive onto the drawer front and stick on the wallpaper. Easy, right?

The last step is rubbing a dark furniture polish into the top and sides of the dresser to give the entire piece a uniform look.

IMG_5742 IMG_5743 IMG_5744 IMG_5851 IMG_5852 IMG_5853

This entire project, including the dresser, cost less than $50 and took about an hour.

702ParkProject - Dresser B&A2

Be sure to check out these lovely ladies and see what projects they have in store for Labor Day!

Lemon Grove BlogTwitterFacebookInstagram

Eat.Sleep.DecorateTwitterFacebookInstagram

Brittany FrenchTwitterFacebookInstagram