In May 2015, I revealed our new and improved two-story back porch in my first One Room Challenge. As part of that, I converted an old window from the church I grew up in into an outdoor coffee table. Here’s another look at how I did it!

In May 2015, I revealed our new and improved two-story back porch in my first One Room Challenge. As part of that, I converted an old window from the church I grew up in into an outdoor coffee table. Here’s another look at how I did it!
I had so much fun rounding up some favorite mid century modern listings on Craigslist that I decided to do another!
Summer is almost over (hooray for fall!!), so now is the perfect time to stock up on beachy and outdoor furniture at lower prices. To me, this trend is made up of rattan, bamboo, and cane accents. Here are some of my favorites from the Raleigh area. (Click on photo for link.)

For whatever reason, I’ve been having a real mid century modern moment lately. There’s just something about those funky lines that is really doing it for me. Unfortunately, the style of our house doesn’t really lend itself to this style of furniture, so I’ve just been doing some Craigslist window shopping.
I’ve found a few great places around the Raleigh area that have a good selection of MCM furniture. The first is in Garner and has a fun assortment of mid century office furniture. (Click on photo for link.)

Did you catch the porch makeover reveal last week as part of the One Room Challenge? I had so much fun pulling everything together, but was definitely trying to stick to a tight budget. I couldn’t find a coffee table I loved for the upstairs porch in my price range, so I decided to make my own!
This window isn’t just any old window. It’s one from the church where I grew up, and where Charles and I were married. So to be able to use it as an integral part of our porch wax extra special.
As for the DIY, this one was about as easy as it gets. Let’s get started!
1. Paint the table legs. I picked up 4 legs for less than $20 at Lowe’s. Two coats of spray paint and I called it good.


2. Scrape any loose paint off the window. To maintain the rustic I didn’t want to scrape off too much. Just enough to get the loose pieces off.


3. Screw in corner brackets, two per leg.


Voila!! Wasn’t that easy?


What projects are you working on lately?
The mid century post on Monday got me thinking about mid century furniture, which got me thinking about one of my favorite DIY projects.
Last Labor Day, a few of us joined together to share a few summer projects. I shared a quick and easy dresser makeover. Take a look!
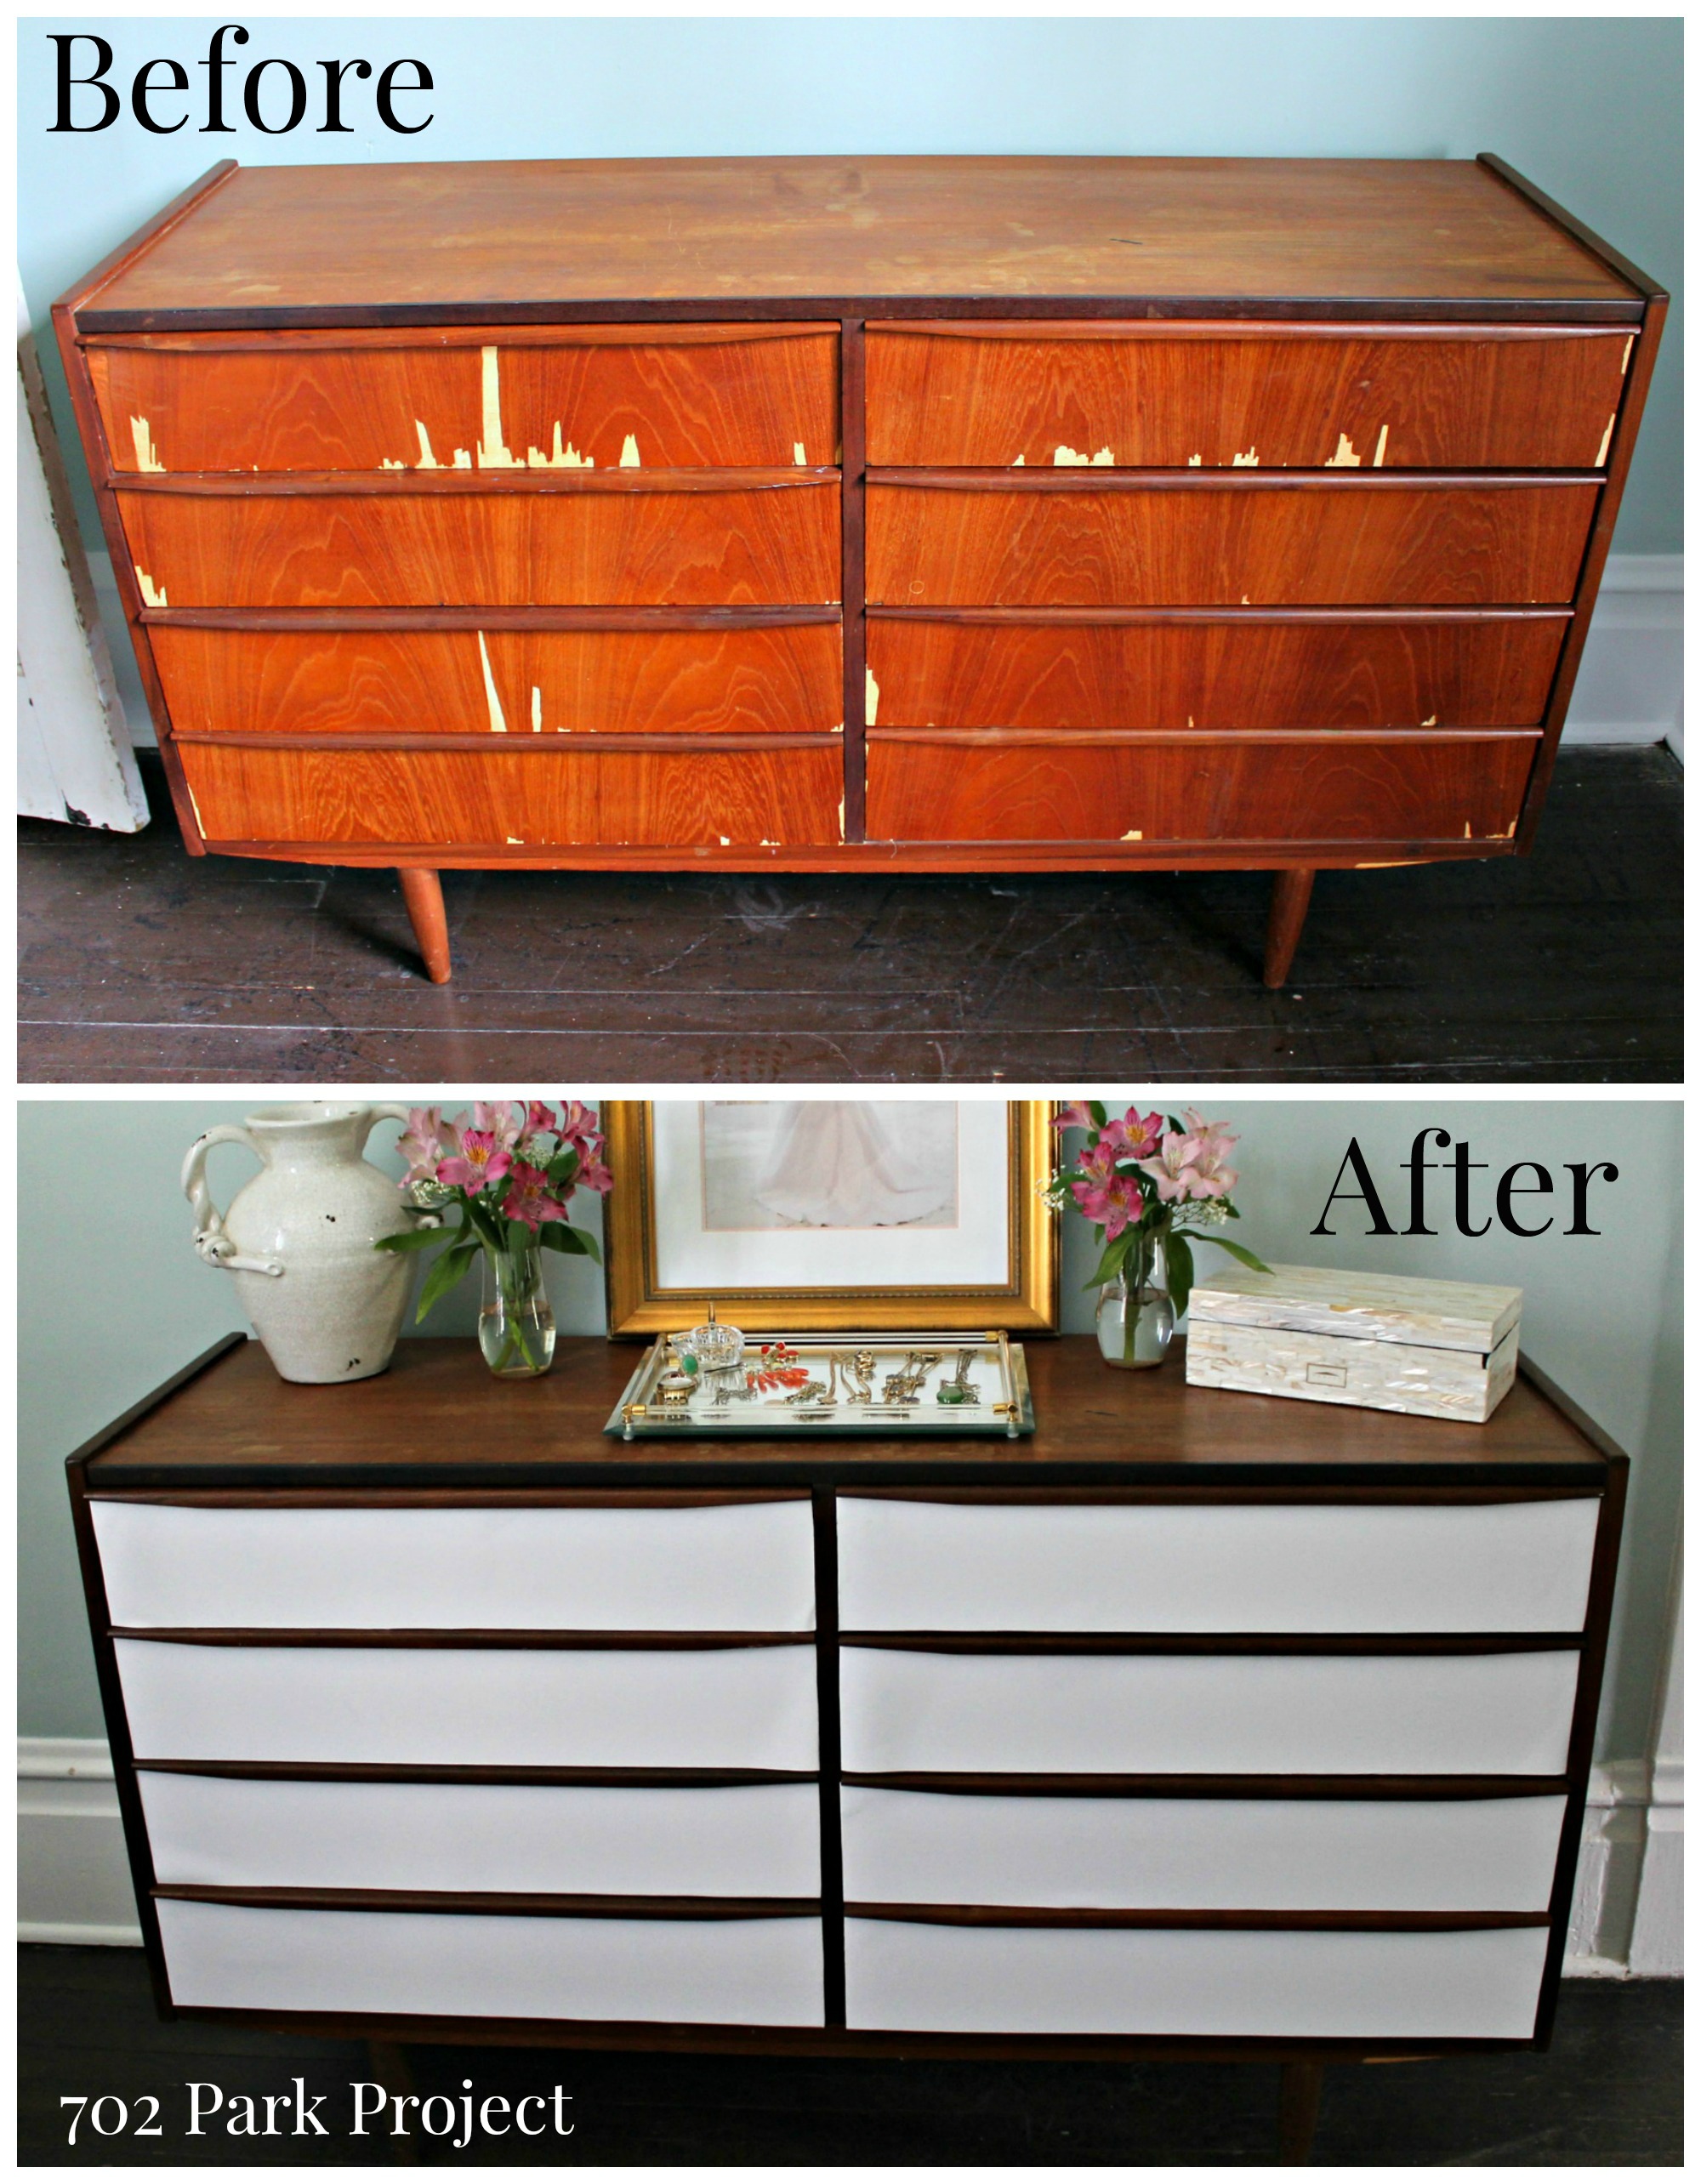
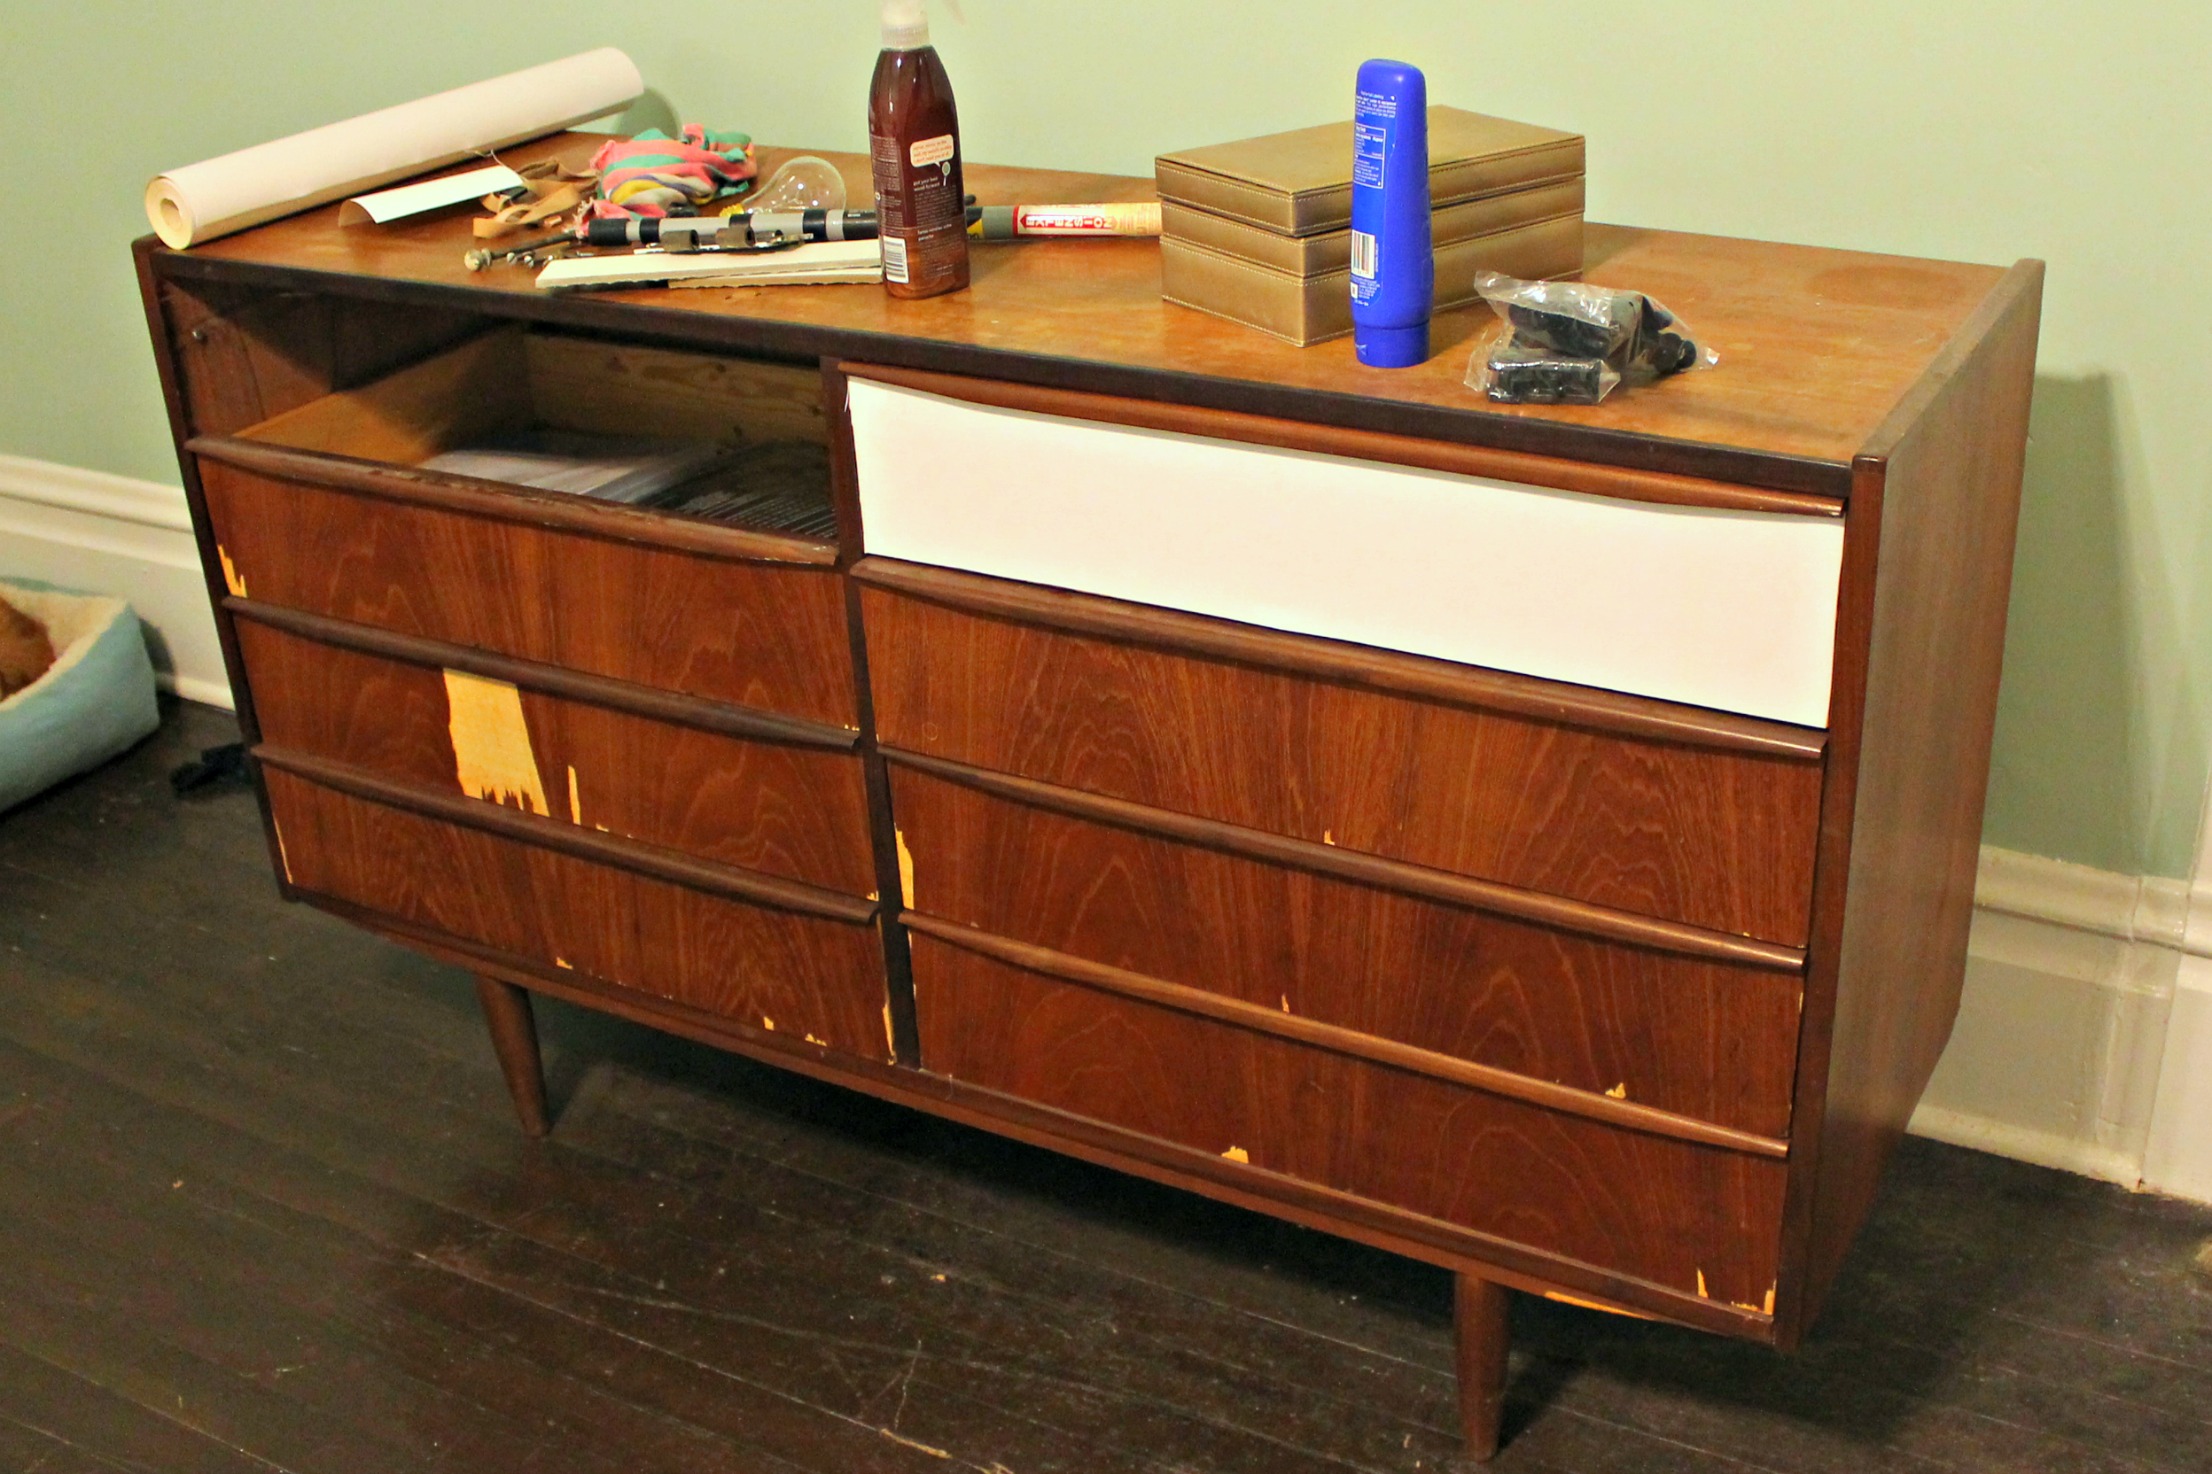
I’ve found that a lot of furniture in our home is dark…whether wood or fabric. Most of the time it’s nice to have these hearty pieces, but sometimes it can darken the mood a bit. So to keep things fresh and summery year round, I decided to make over this sad little dresser I picked up at the Habitat for Humanity ReStore.
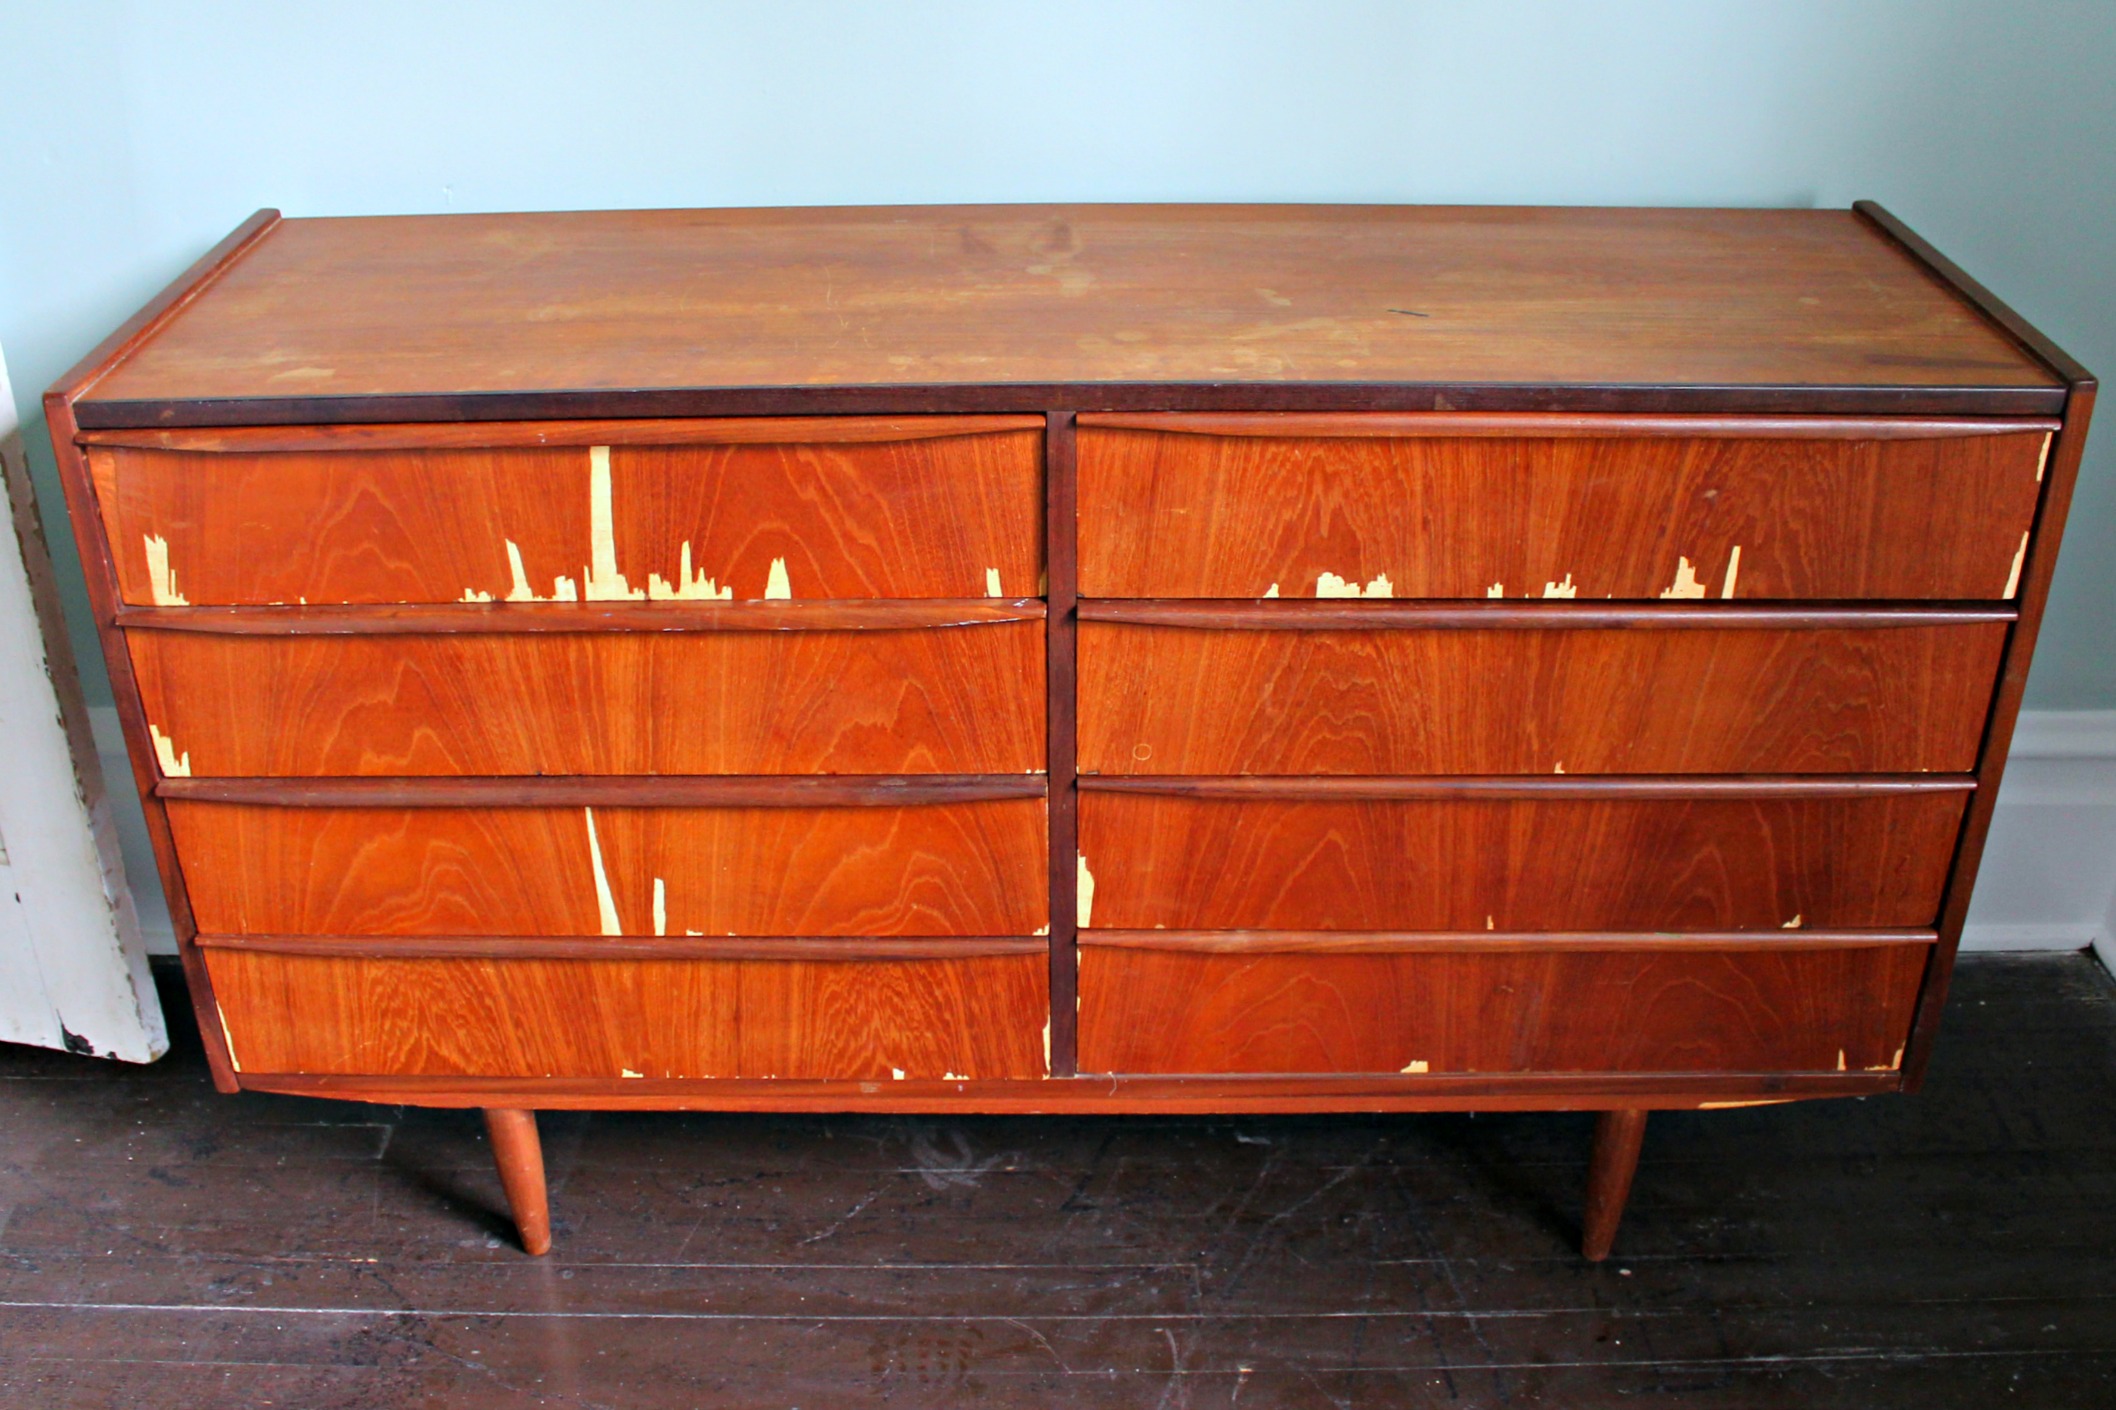
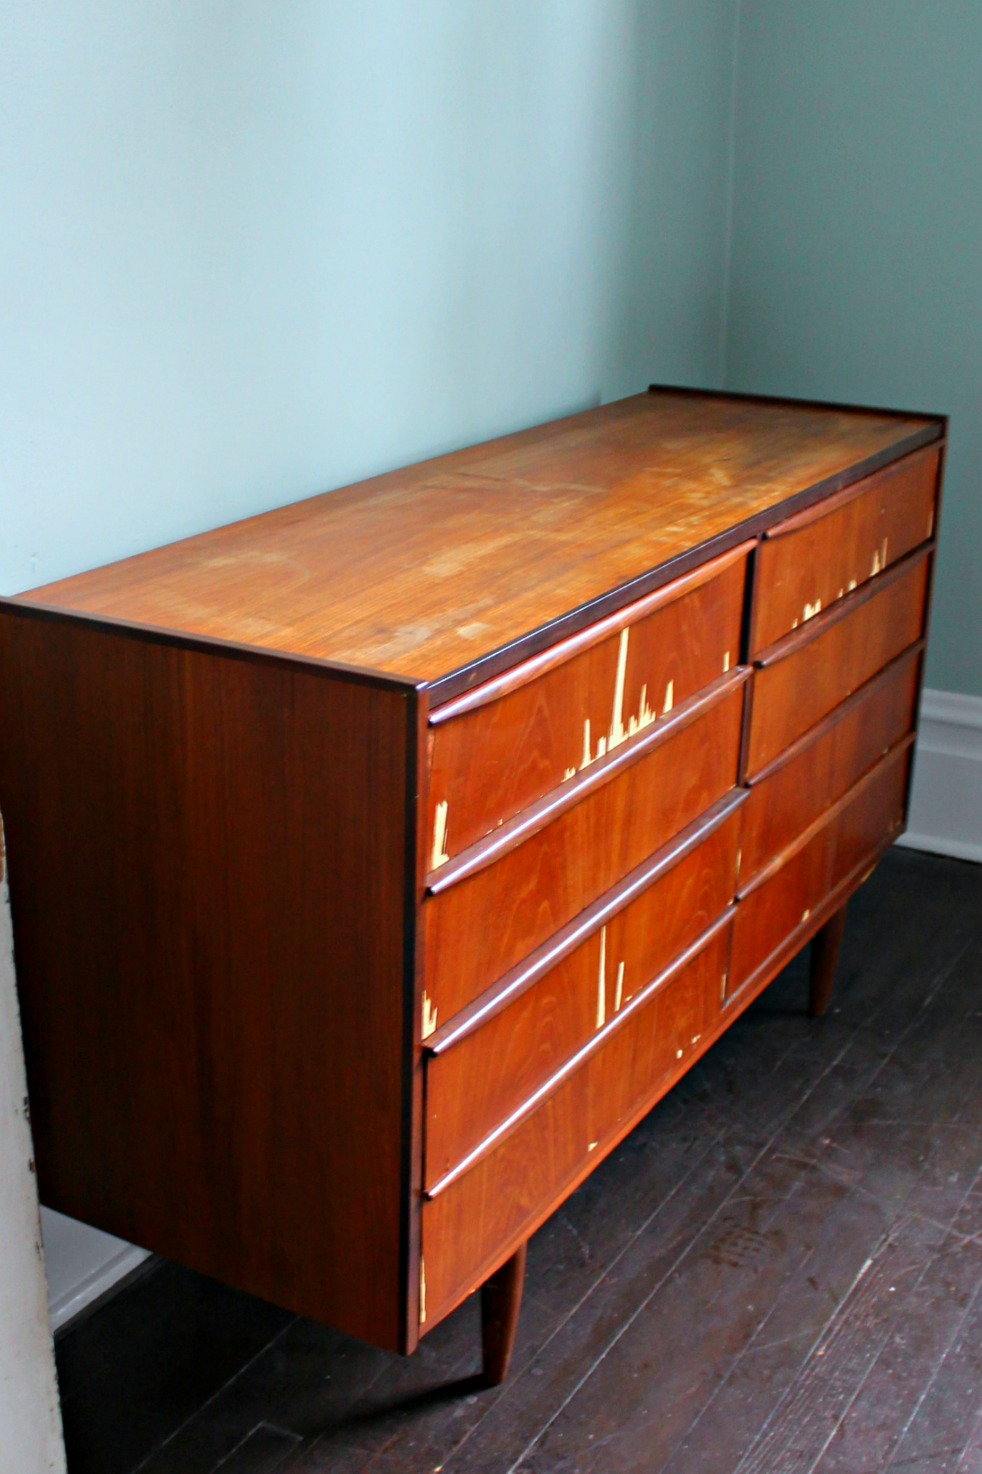
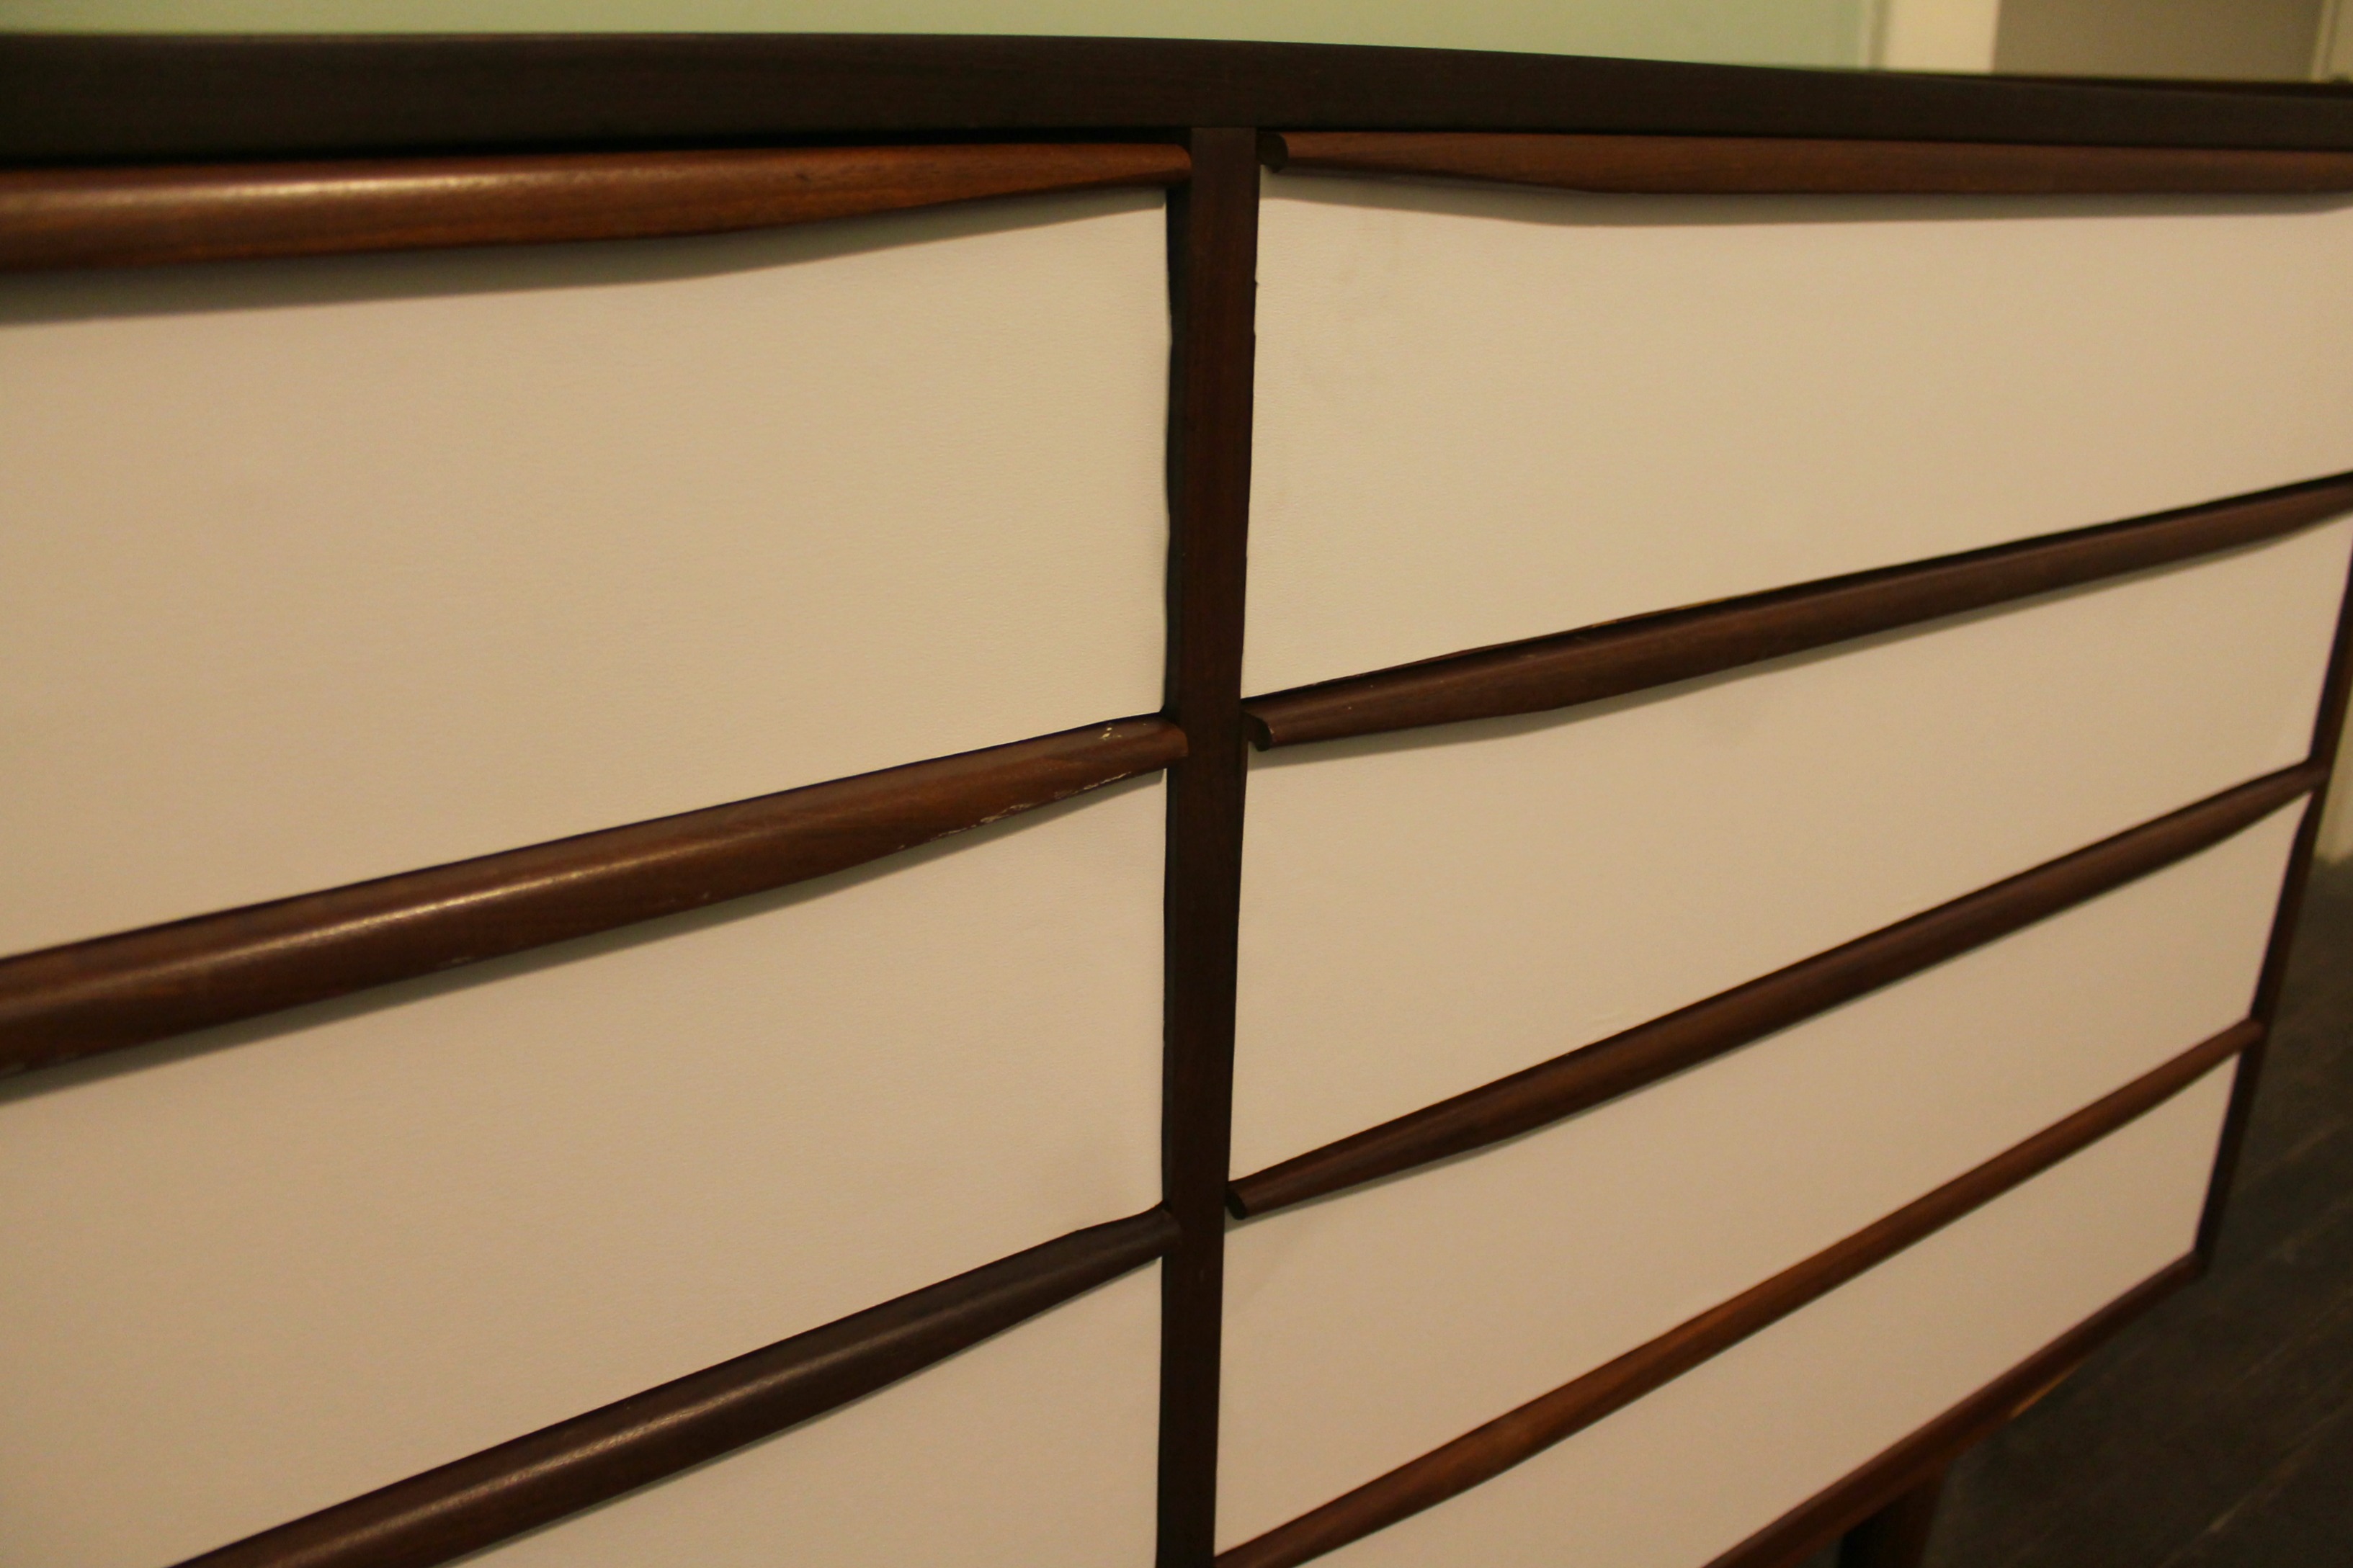
Because the front of the drawers were a really cheap material with a thin wood veneer, I didn’t feel bad about covering those guys up. All I needed for this quick and easy makeover was a roll of wallpaper, spray on adhesive, and scissors.
I chose a plain white wallpaper to give the piece a sleek and sophisticated look, but any wallpaper would do. I found an old roll that had been opened at the local hardware store and ended up getting the whole roll for $5.
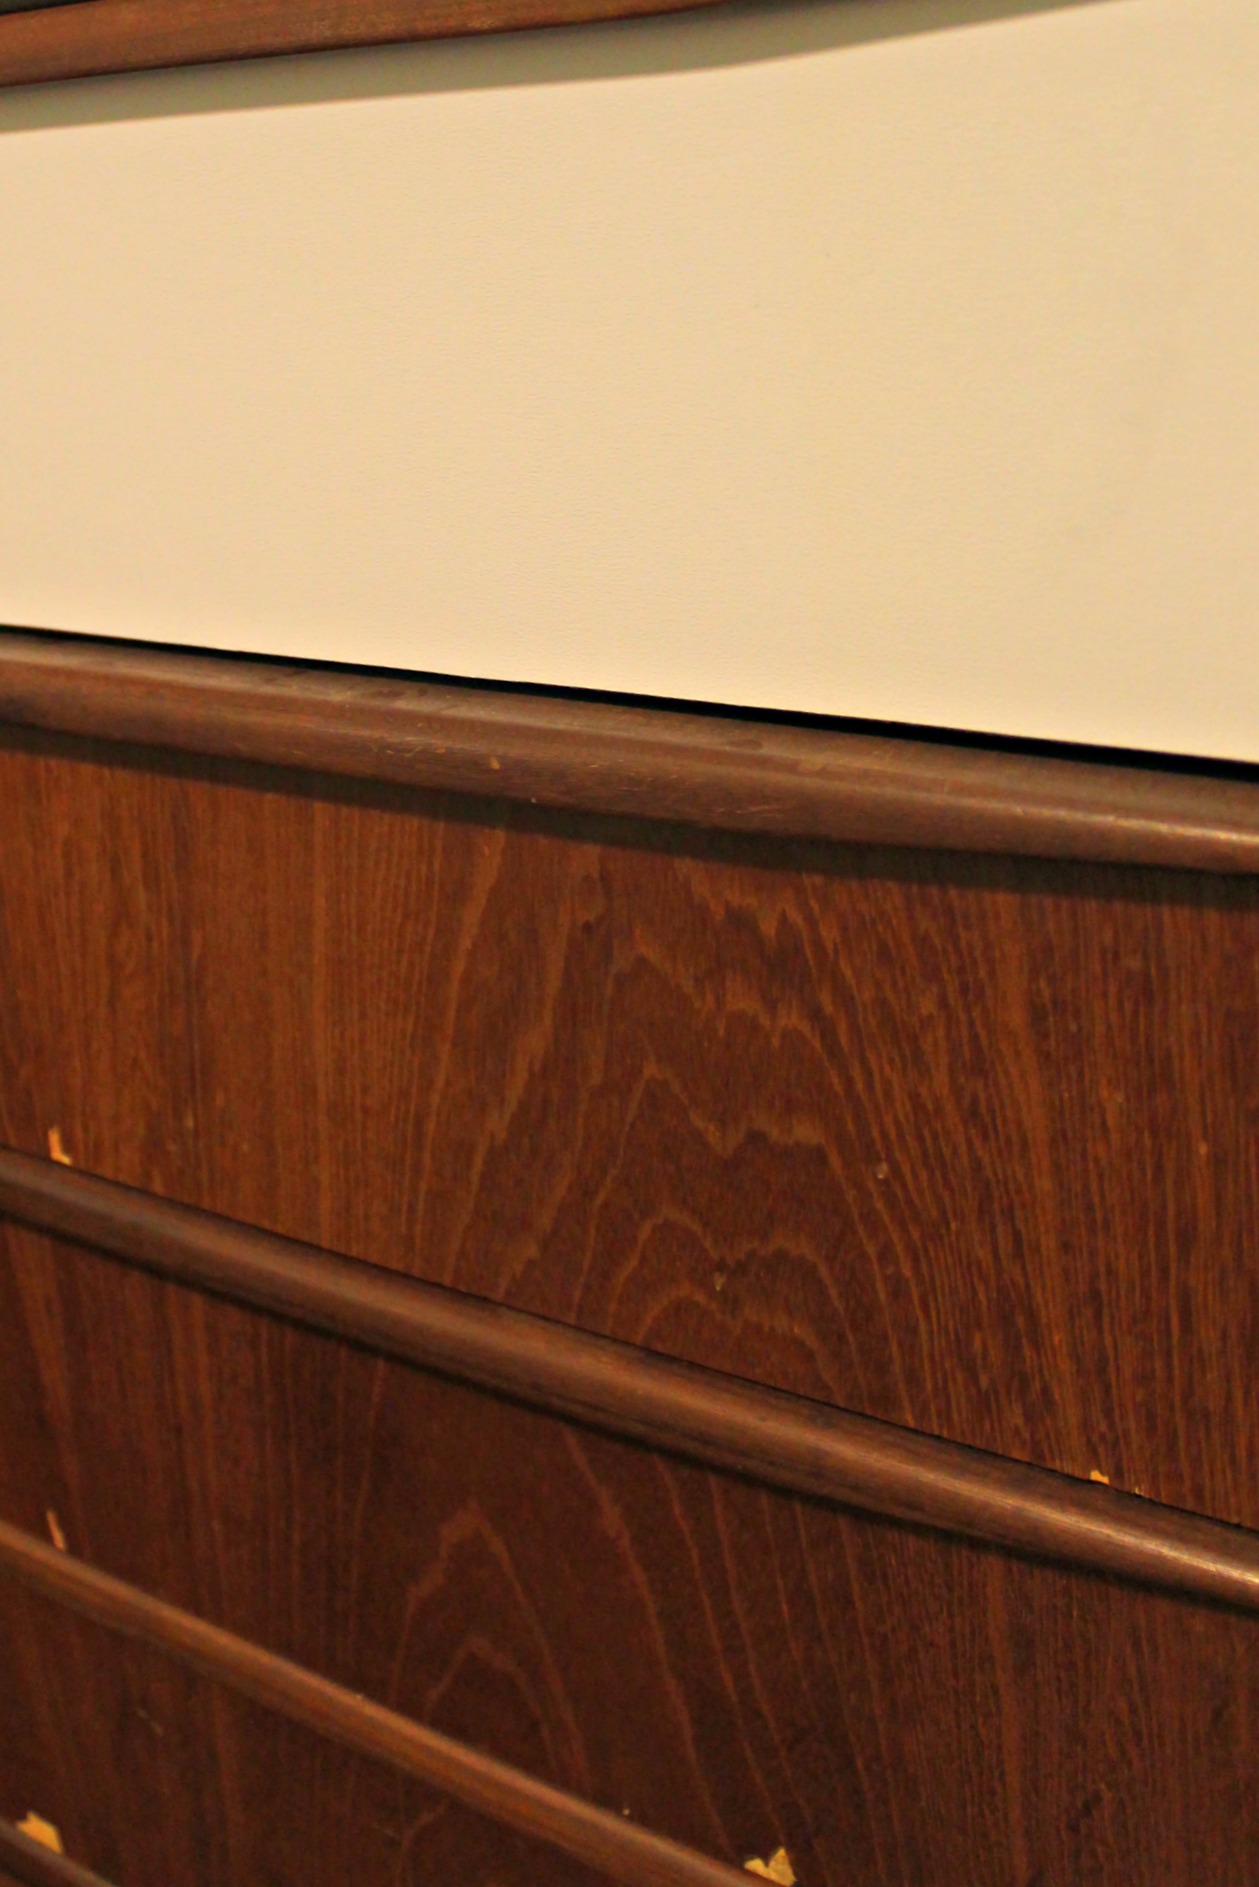
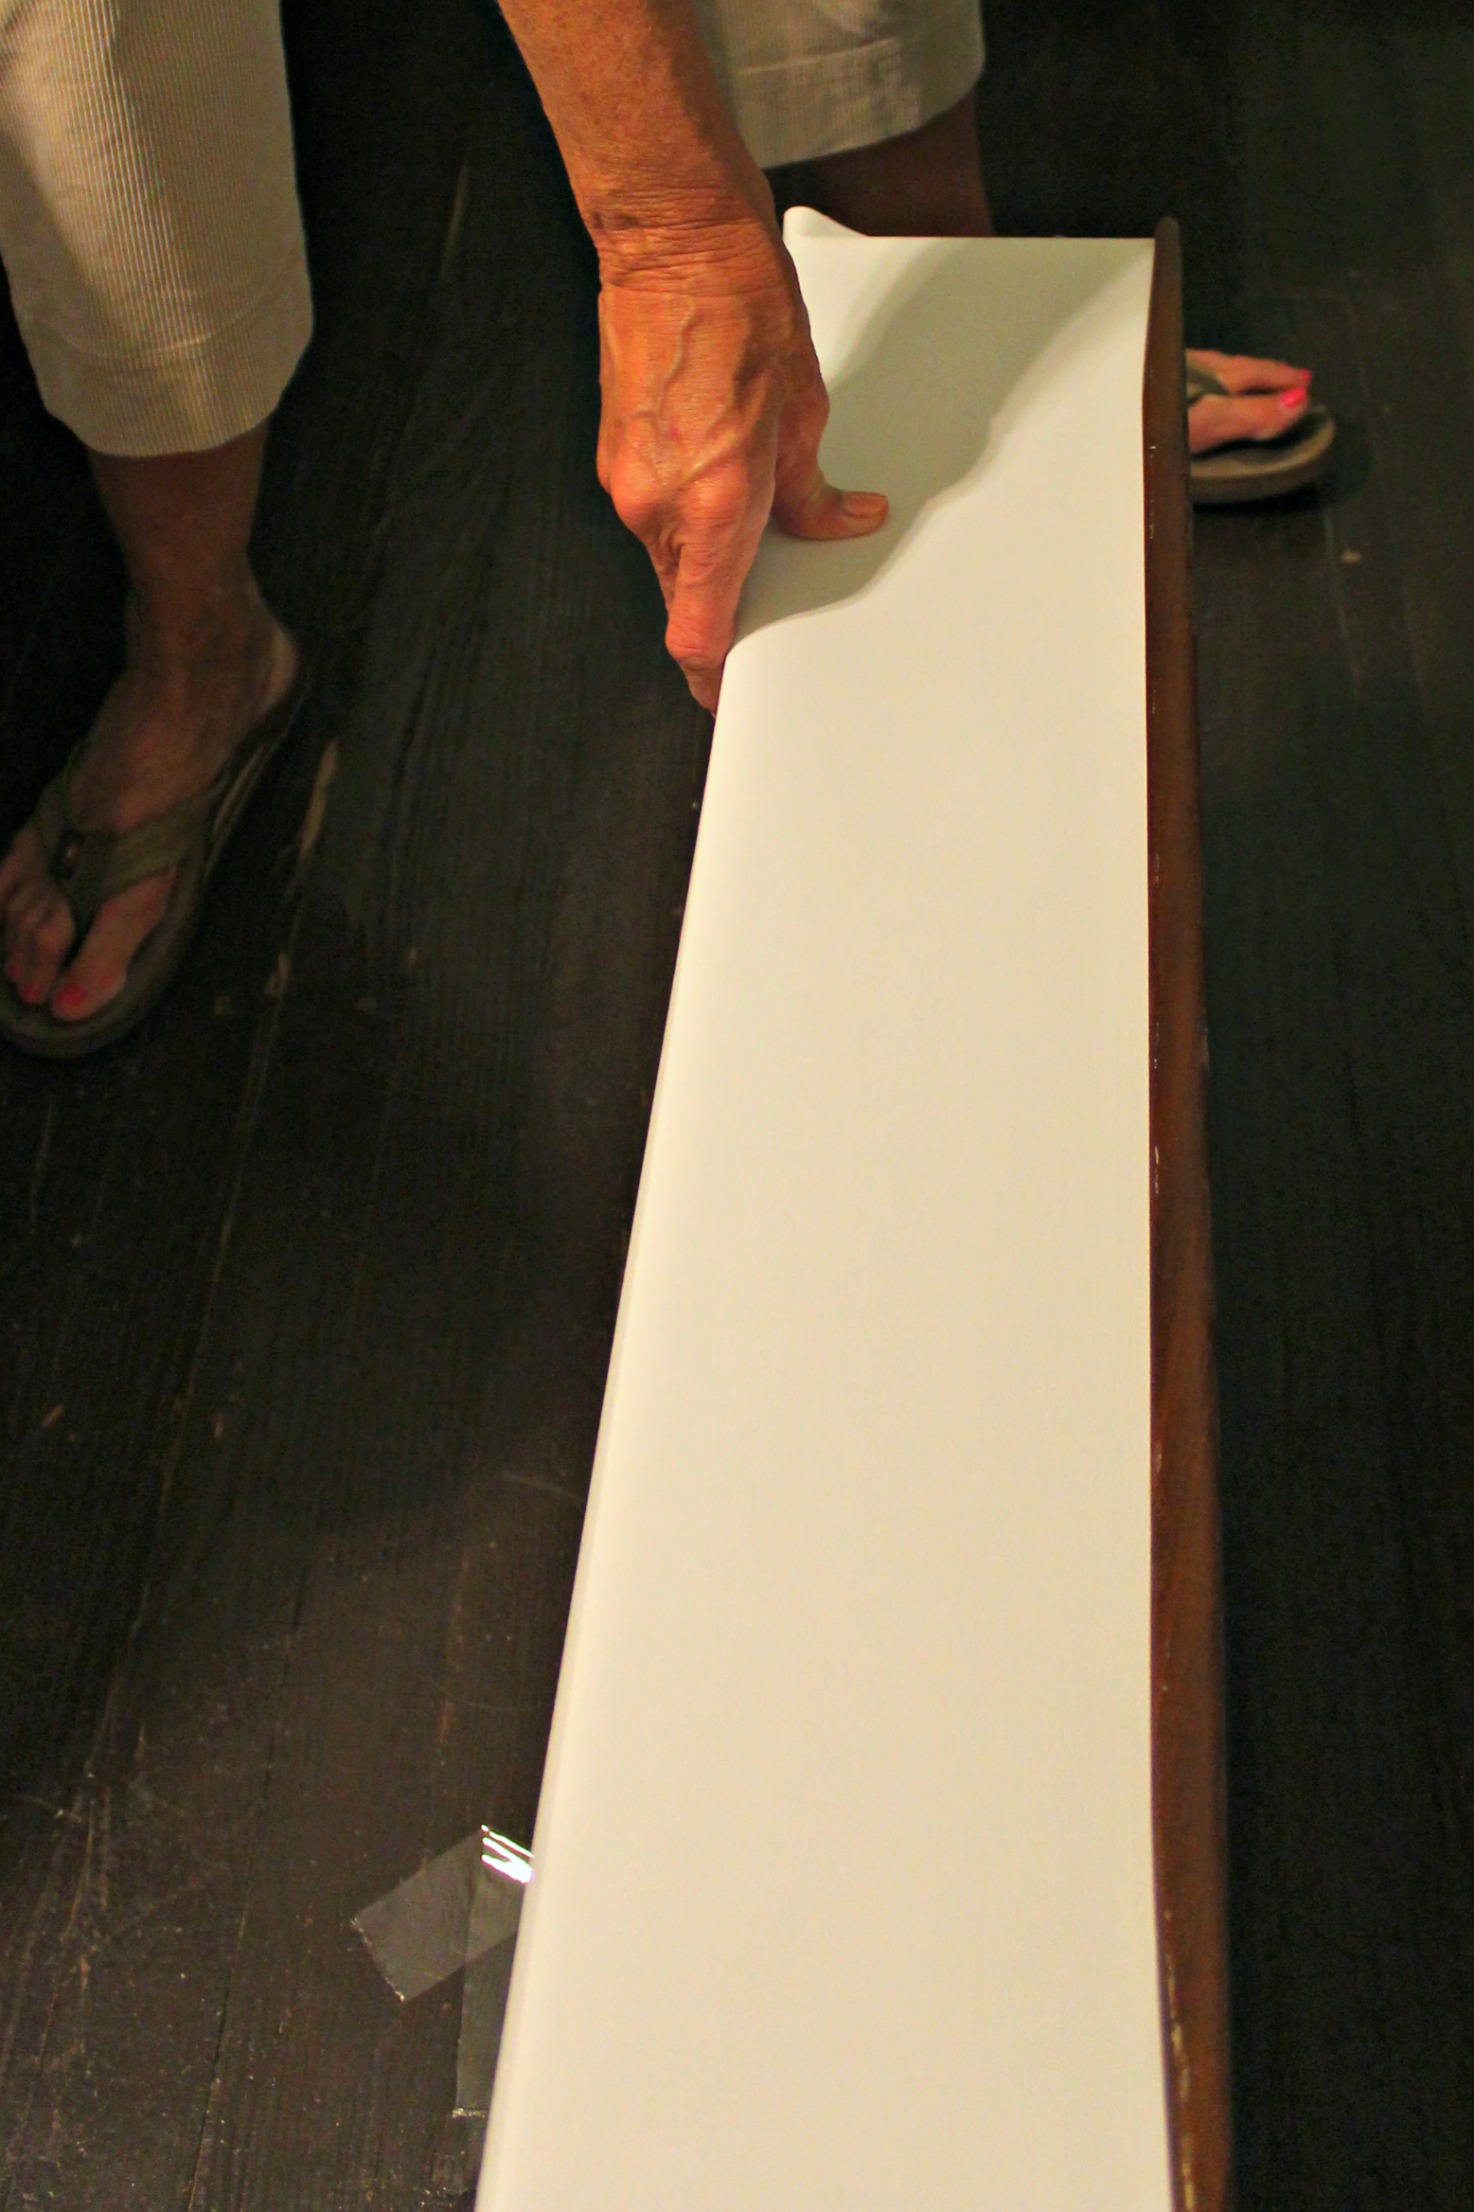
The step are pretty easy. First, you measure out the correct size for the piece of wallpaper you need. We did this by laying the wallpaper on top of the face of the drawer and creasing it around the edges.
With a steady hand, cut the wallpaper, then spray the adhesive onto the drawer front and stick on the wallpaper. Easy, right?
The last step is rubbing a dark furniture polish into the top and sides of the dresser to give the entire piece a uniform look.
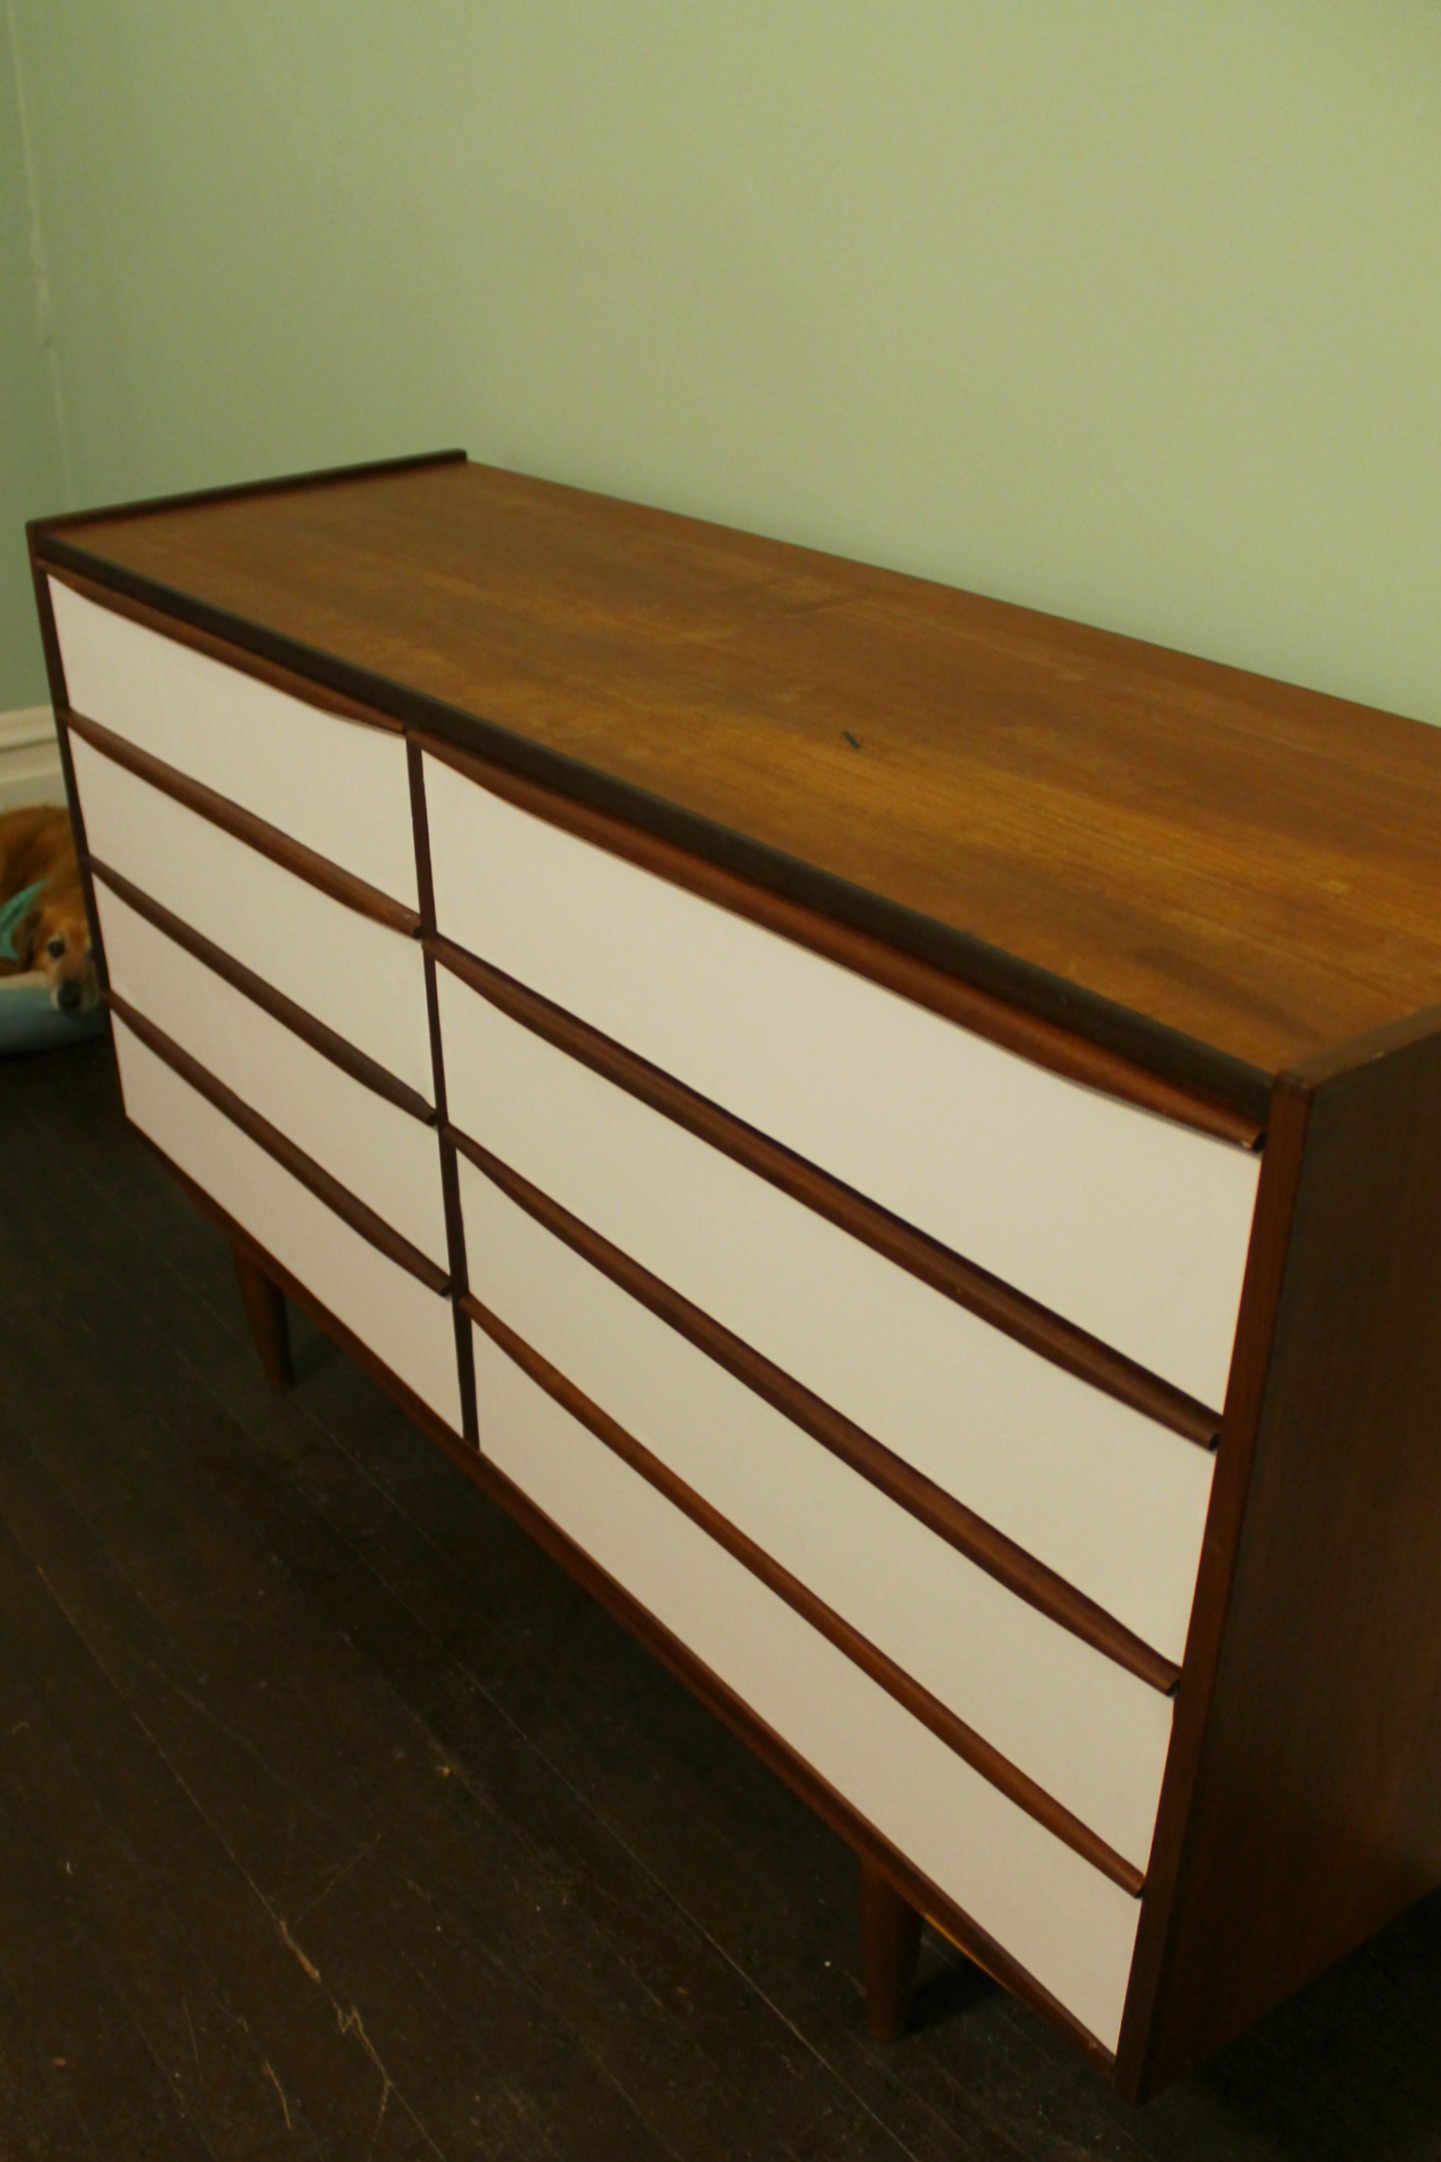

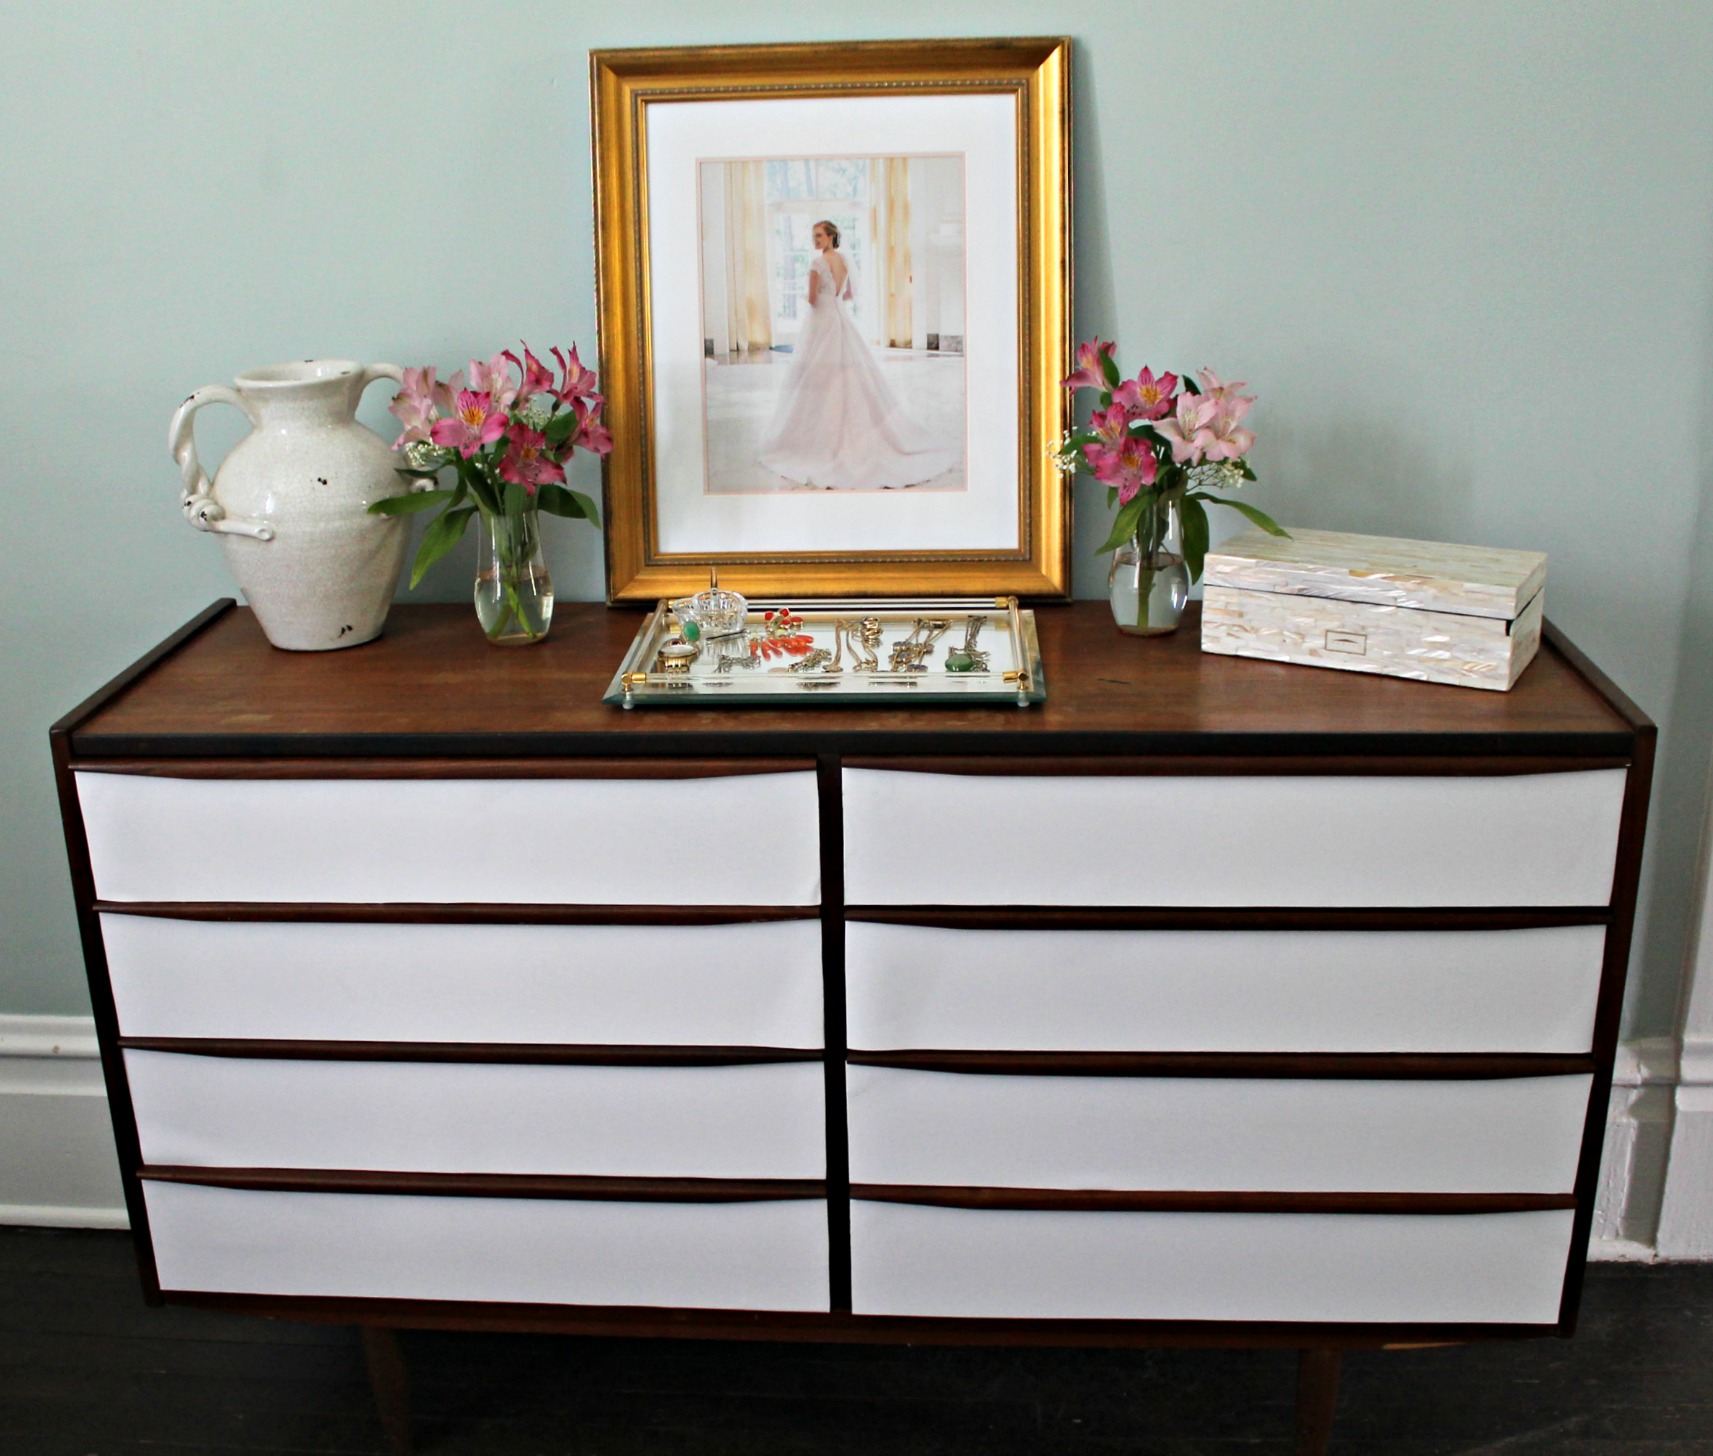
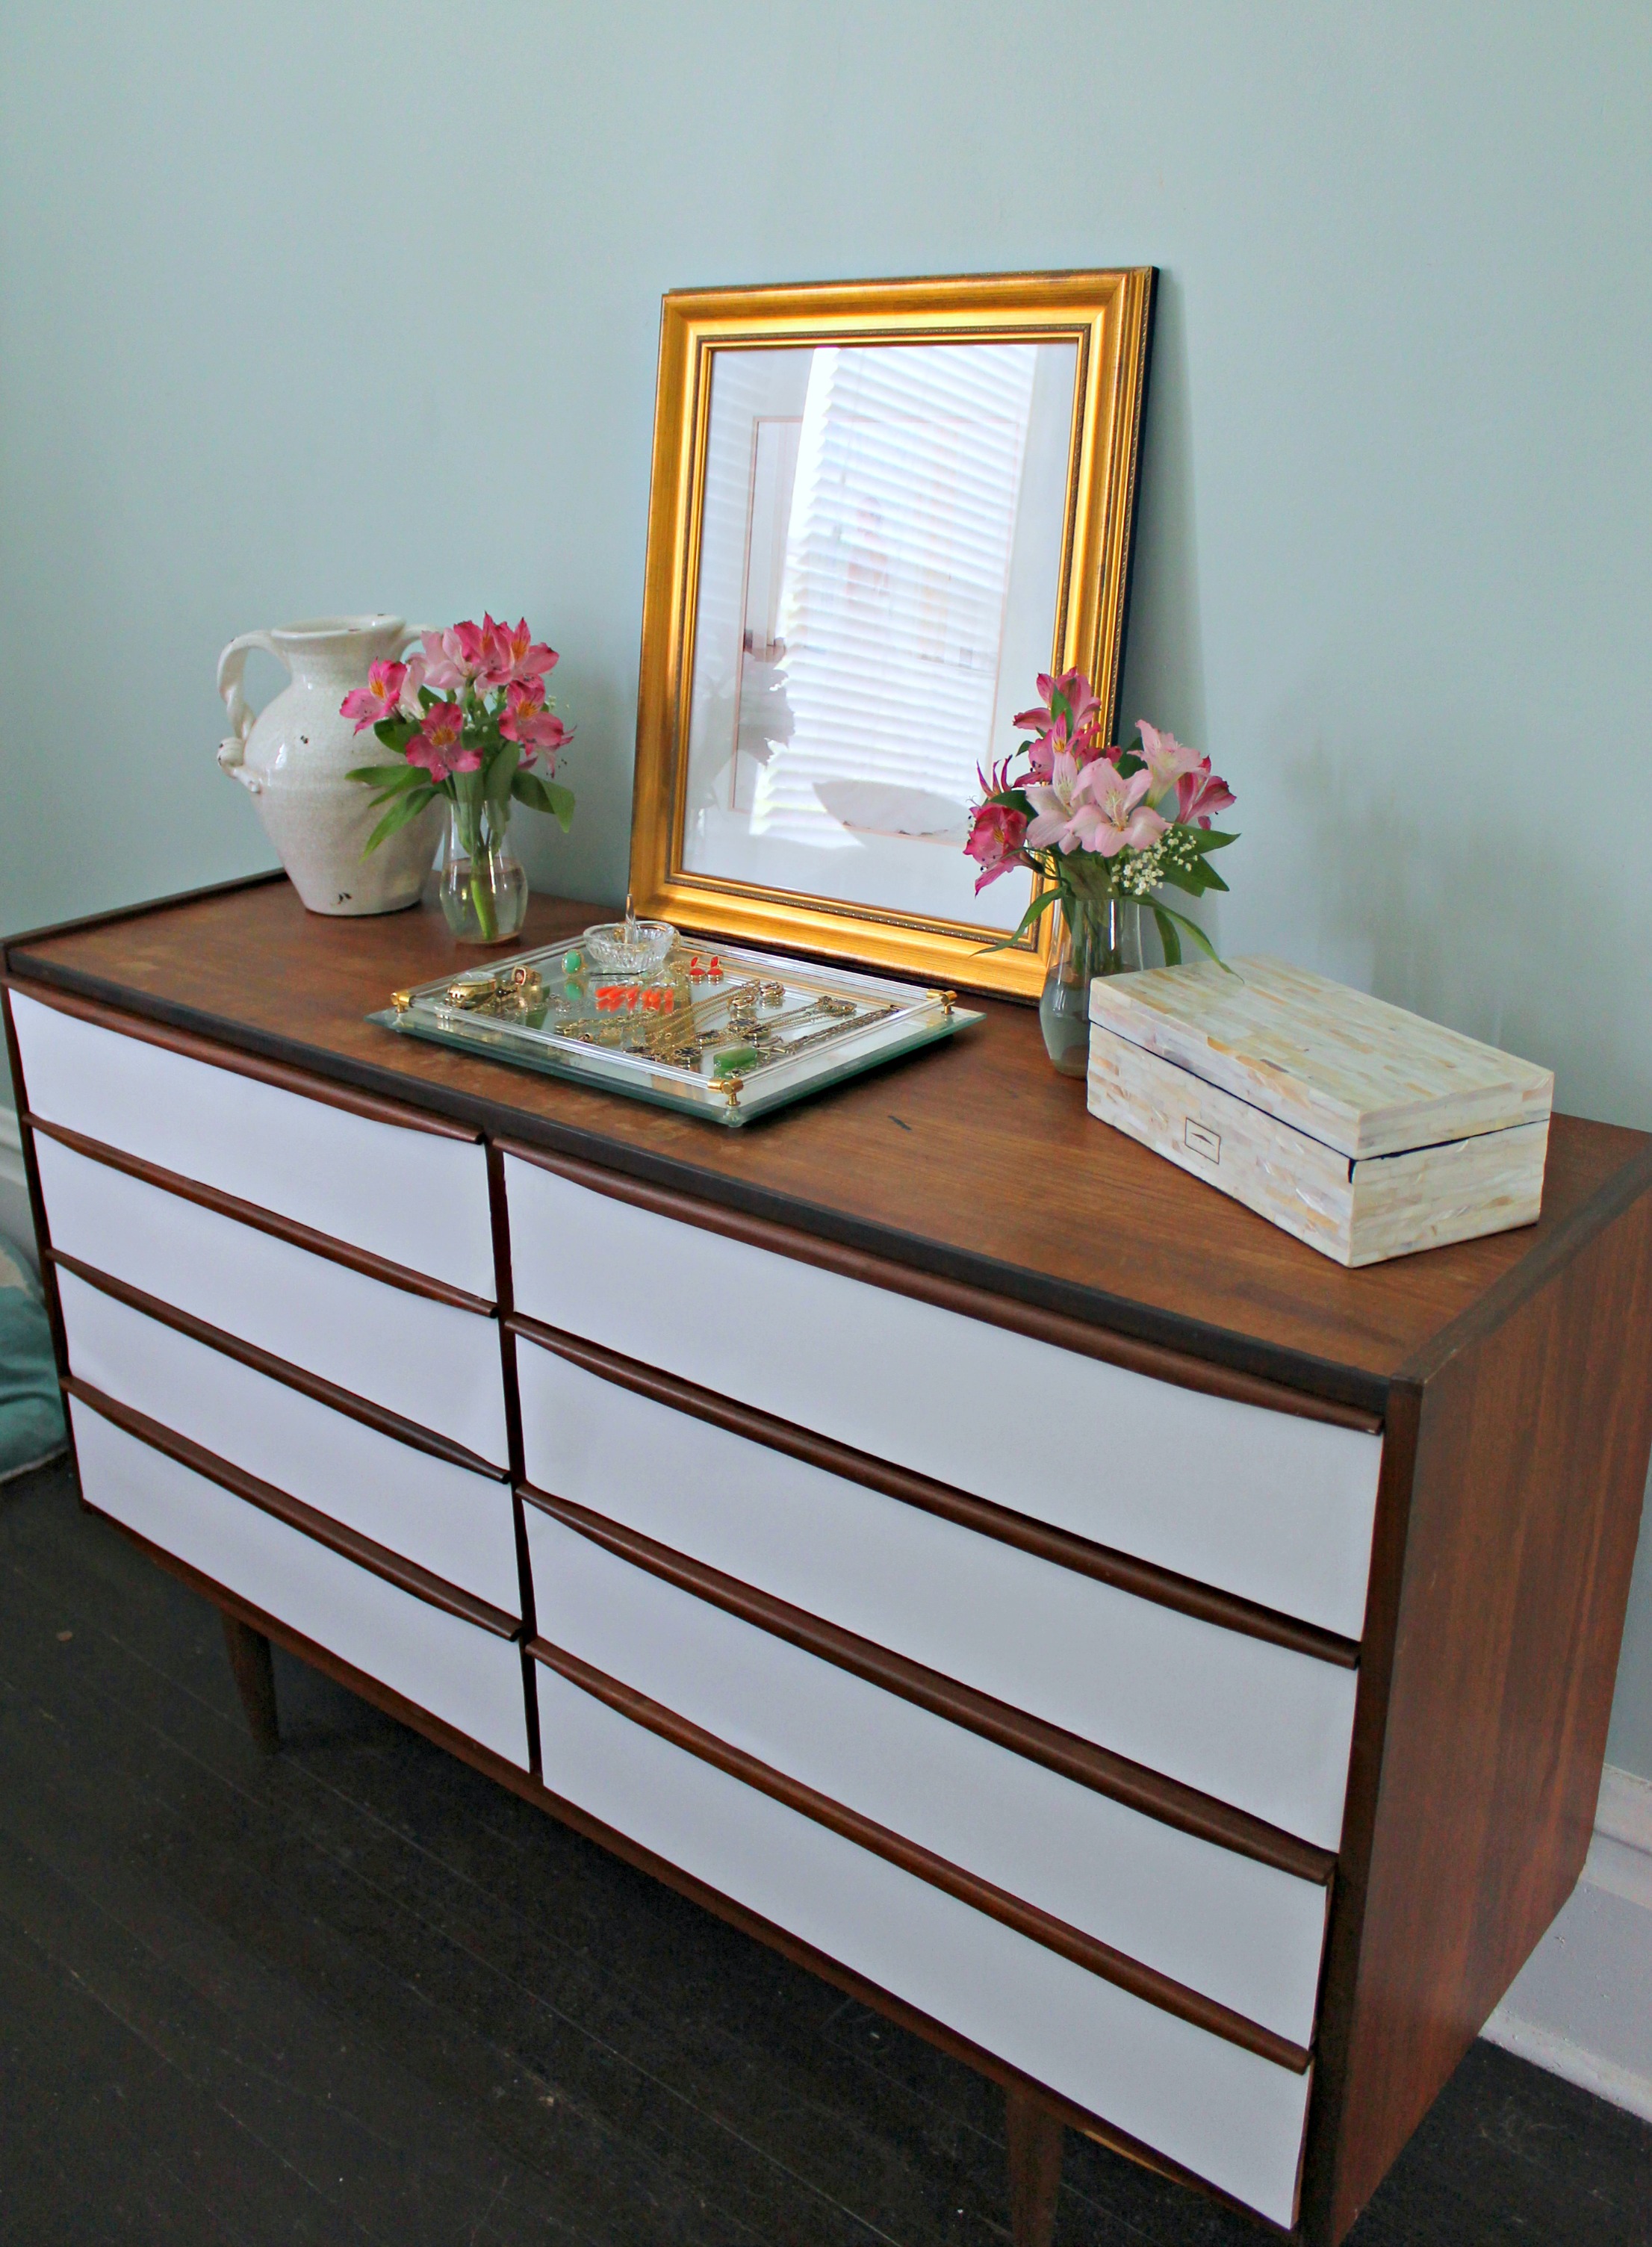
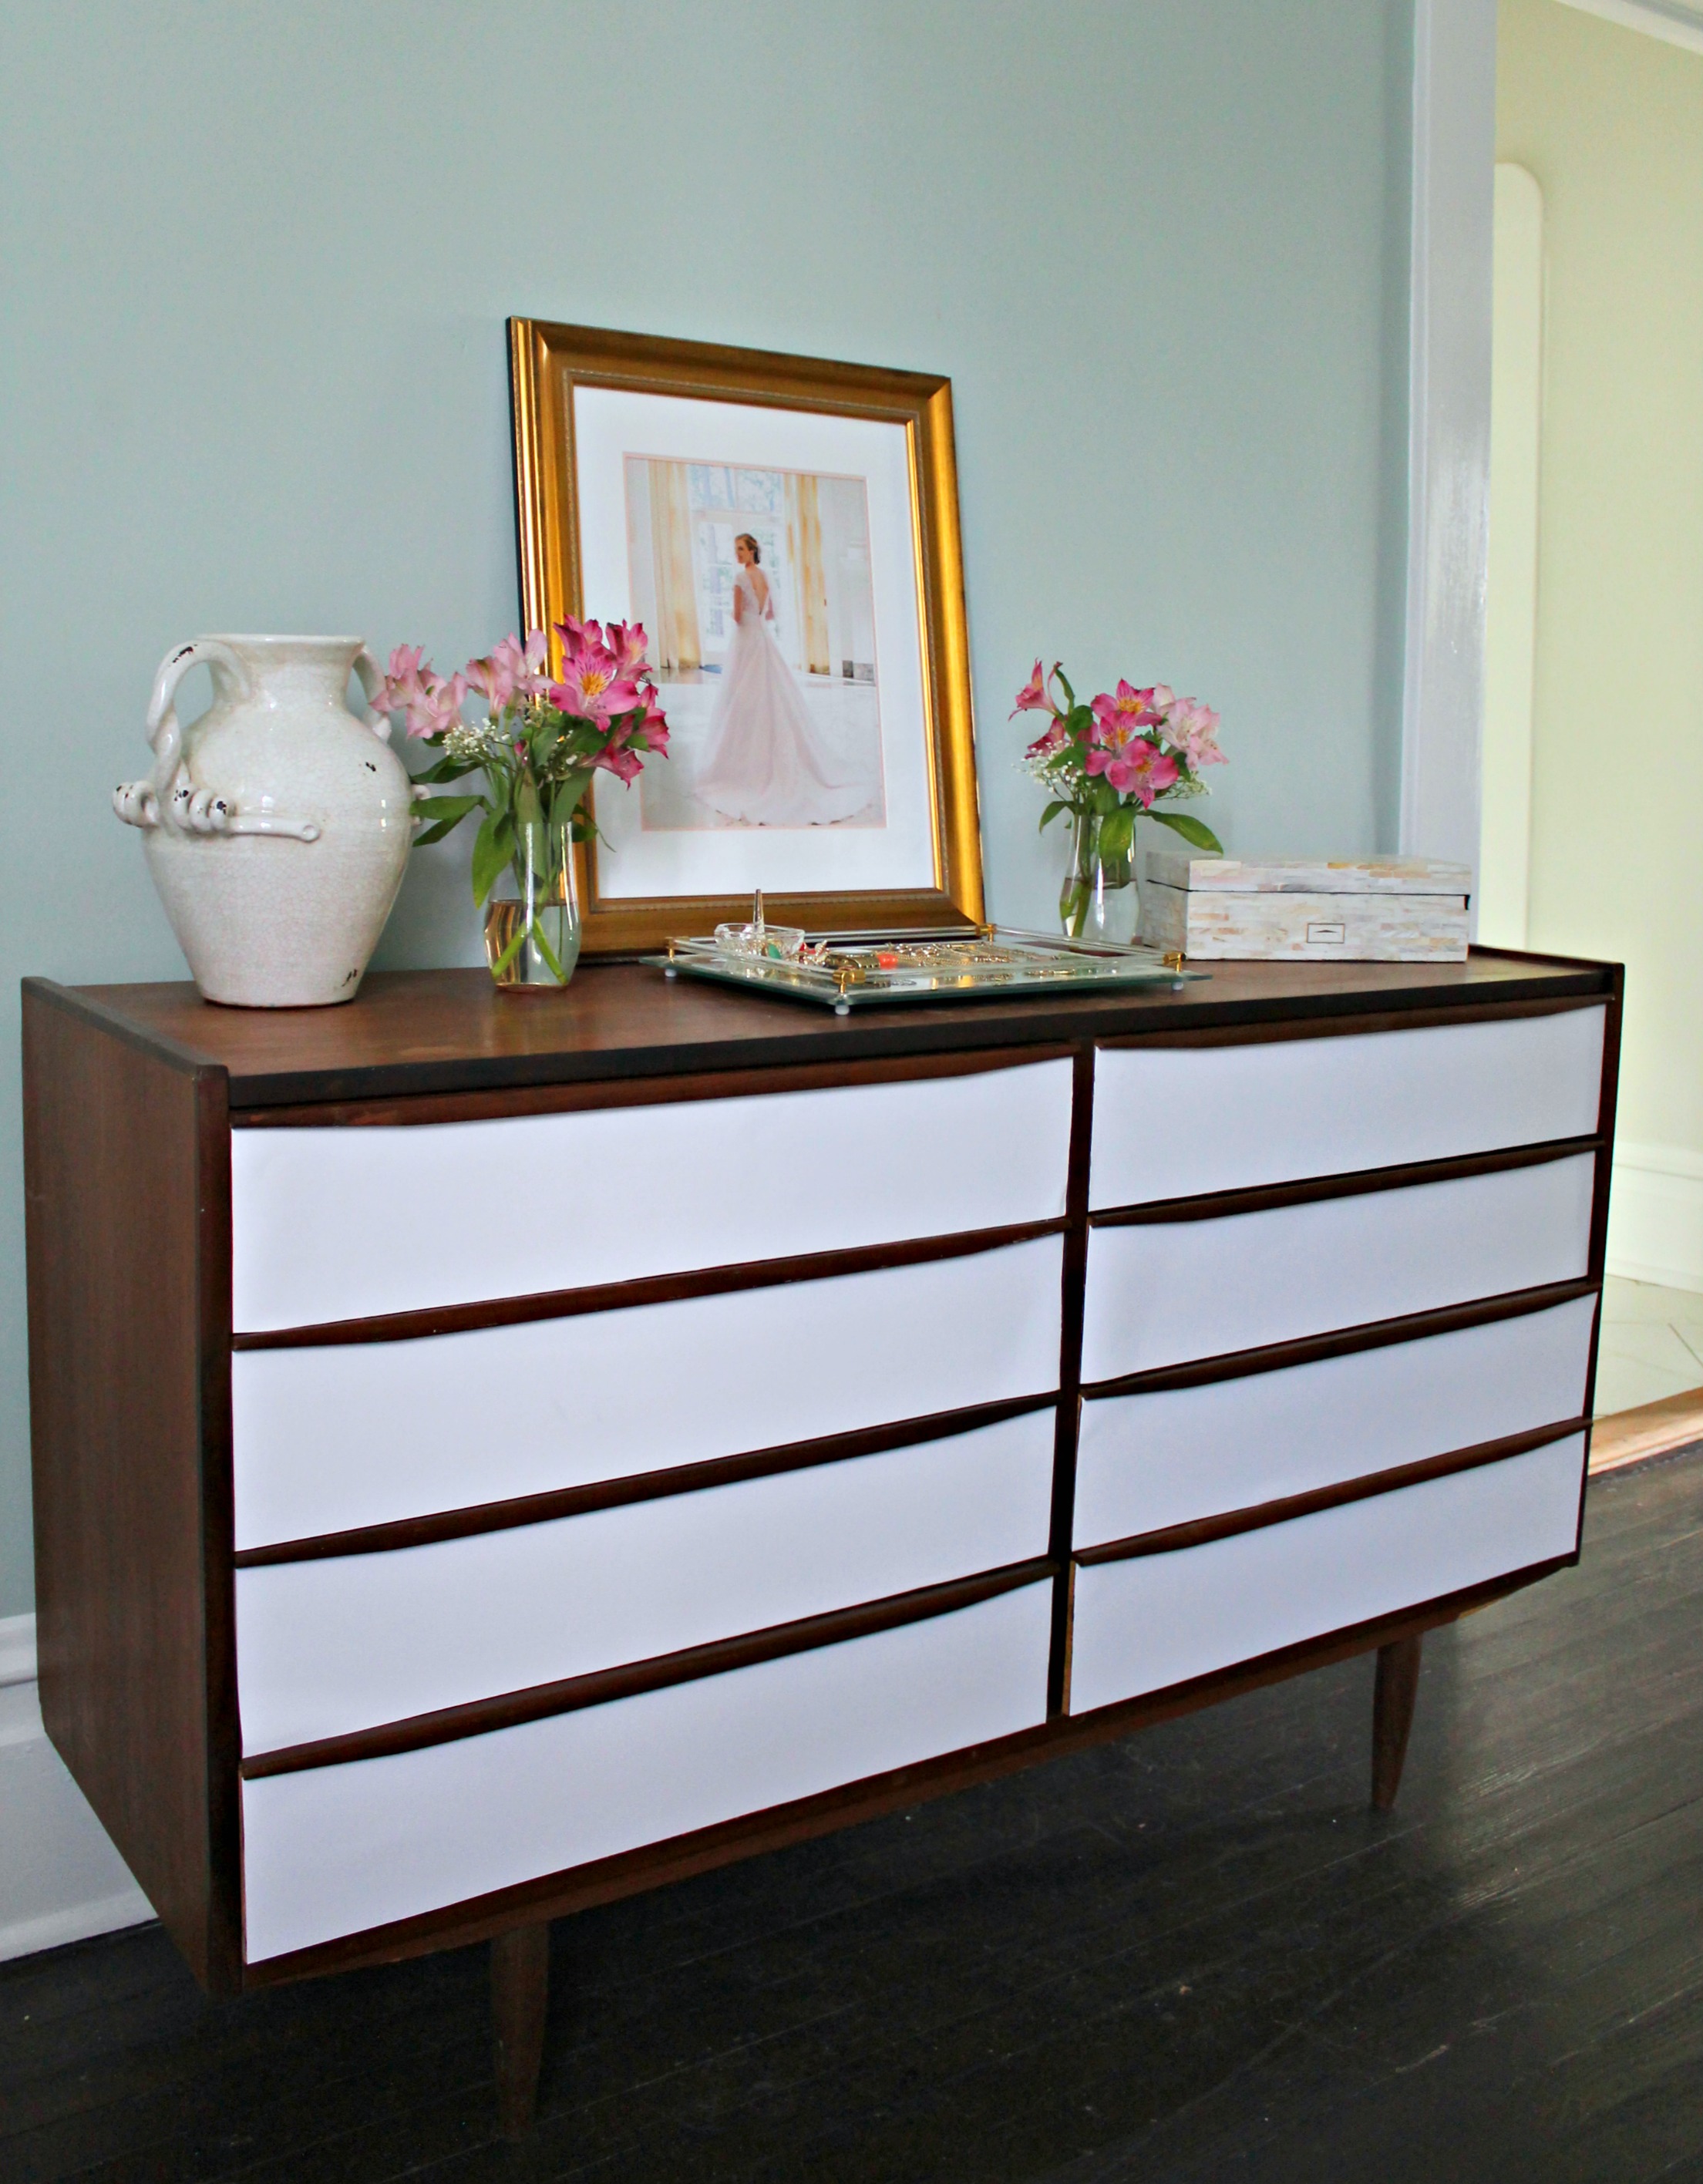
This entire project, including the dresser, cost less than $50 and took about an hour.
Come back tomorrow for the final reveal of the One Room Challenge porch makeover! I’m so excited to share!!
PS- Make sure you enter daily for your chance to win a $125 credit to Christenberry Collection!
I was so happy when we finally got the other guest bedroom looking a little better, but the bedside table definitely left something to be desired.

I got the two accent tables at Target a while back when they were on clearance, so I only paid $7 for each one. I’m glad I got two, because just one would have been comically small next to the tall bed. Anyway, I decided to spice them up just a bit with a fun DIY.

I’ve been wanting to try out this DIY ever since I saw Jen and Courtney give it a go. But I wasn’t quite ready to commit to the expensive contact paper they used, so I went with this one instead. I figured for $11 it didn’t matter if I messed up.
I really don’t need to give you a step-by-step tutorial. It’s just that easy. Unroll the paper, measure the surface, cut along the grid lines on the back of the paper, then stick. See, easy. Just make sure to go over the front edge so it looks uniform.

Because I knew I would be stacking the tables, I decided to try out two different methods to see which I liked best. On table #1 I extended the paper over the metal side bars on top. On table #2 I just went to the edge of the wood surface.

And here’s a close up. I much prefer table #2. It’s almost impossible to get a clean look if you go with the table #1 method.

Table #1 went on top of table #2 and that was it. The easiest DIY ever! Because these are in a guest room and won’t get much use at all, I just stuck them together with a few 3M tabs. If I was to move this table to a room where it gets more use, I would screw the tables together with a few decorative screws.


I still have well over half the roll of contact paper left. So in total, this little project cost less than $20. I’m so excited to use the rest of the roll on a few different pieces around the house. And how cute are these little boxes? I feel an office DIY coming on!
Have you ever used contact paper to decorate? How did you like it?
Don’t forget to enter for your chance to win a $75 gift card to Cruel Mountain Designs!
Sharing with these lovely blogs:
23 / 24 / 25 / 26